Construction of
HeliCycle Helicopter
Builders Group #2-18
Tail Number N3722T
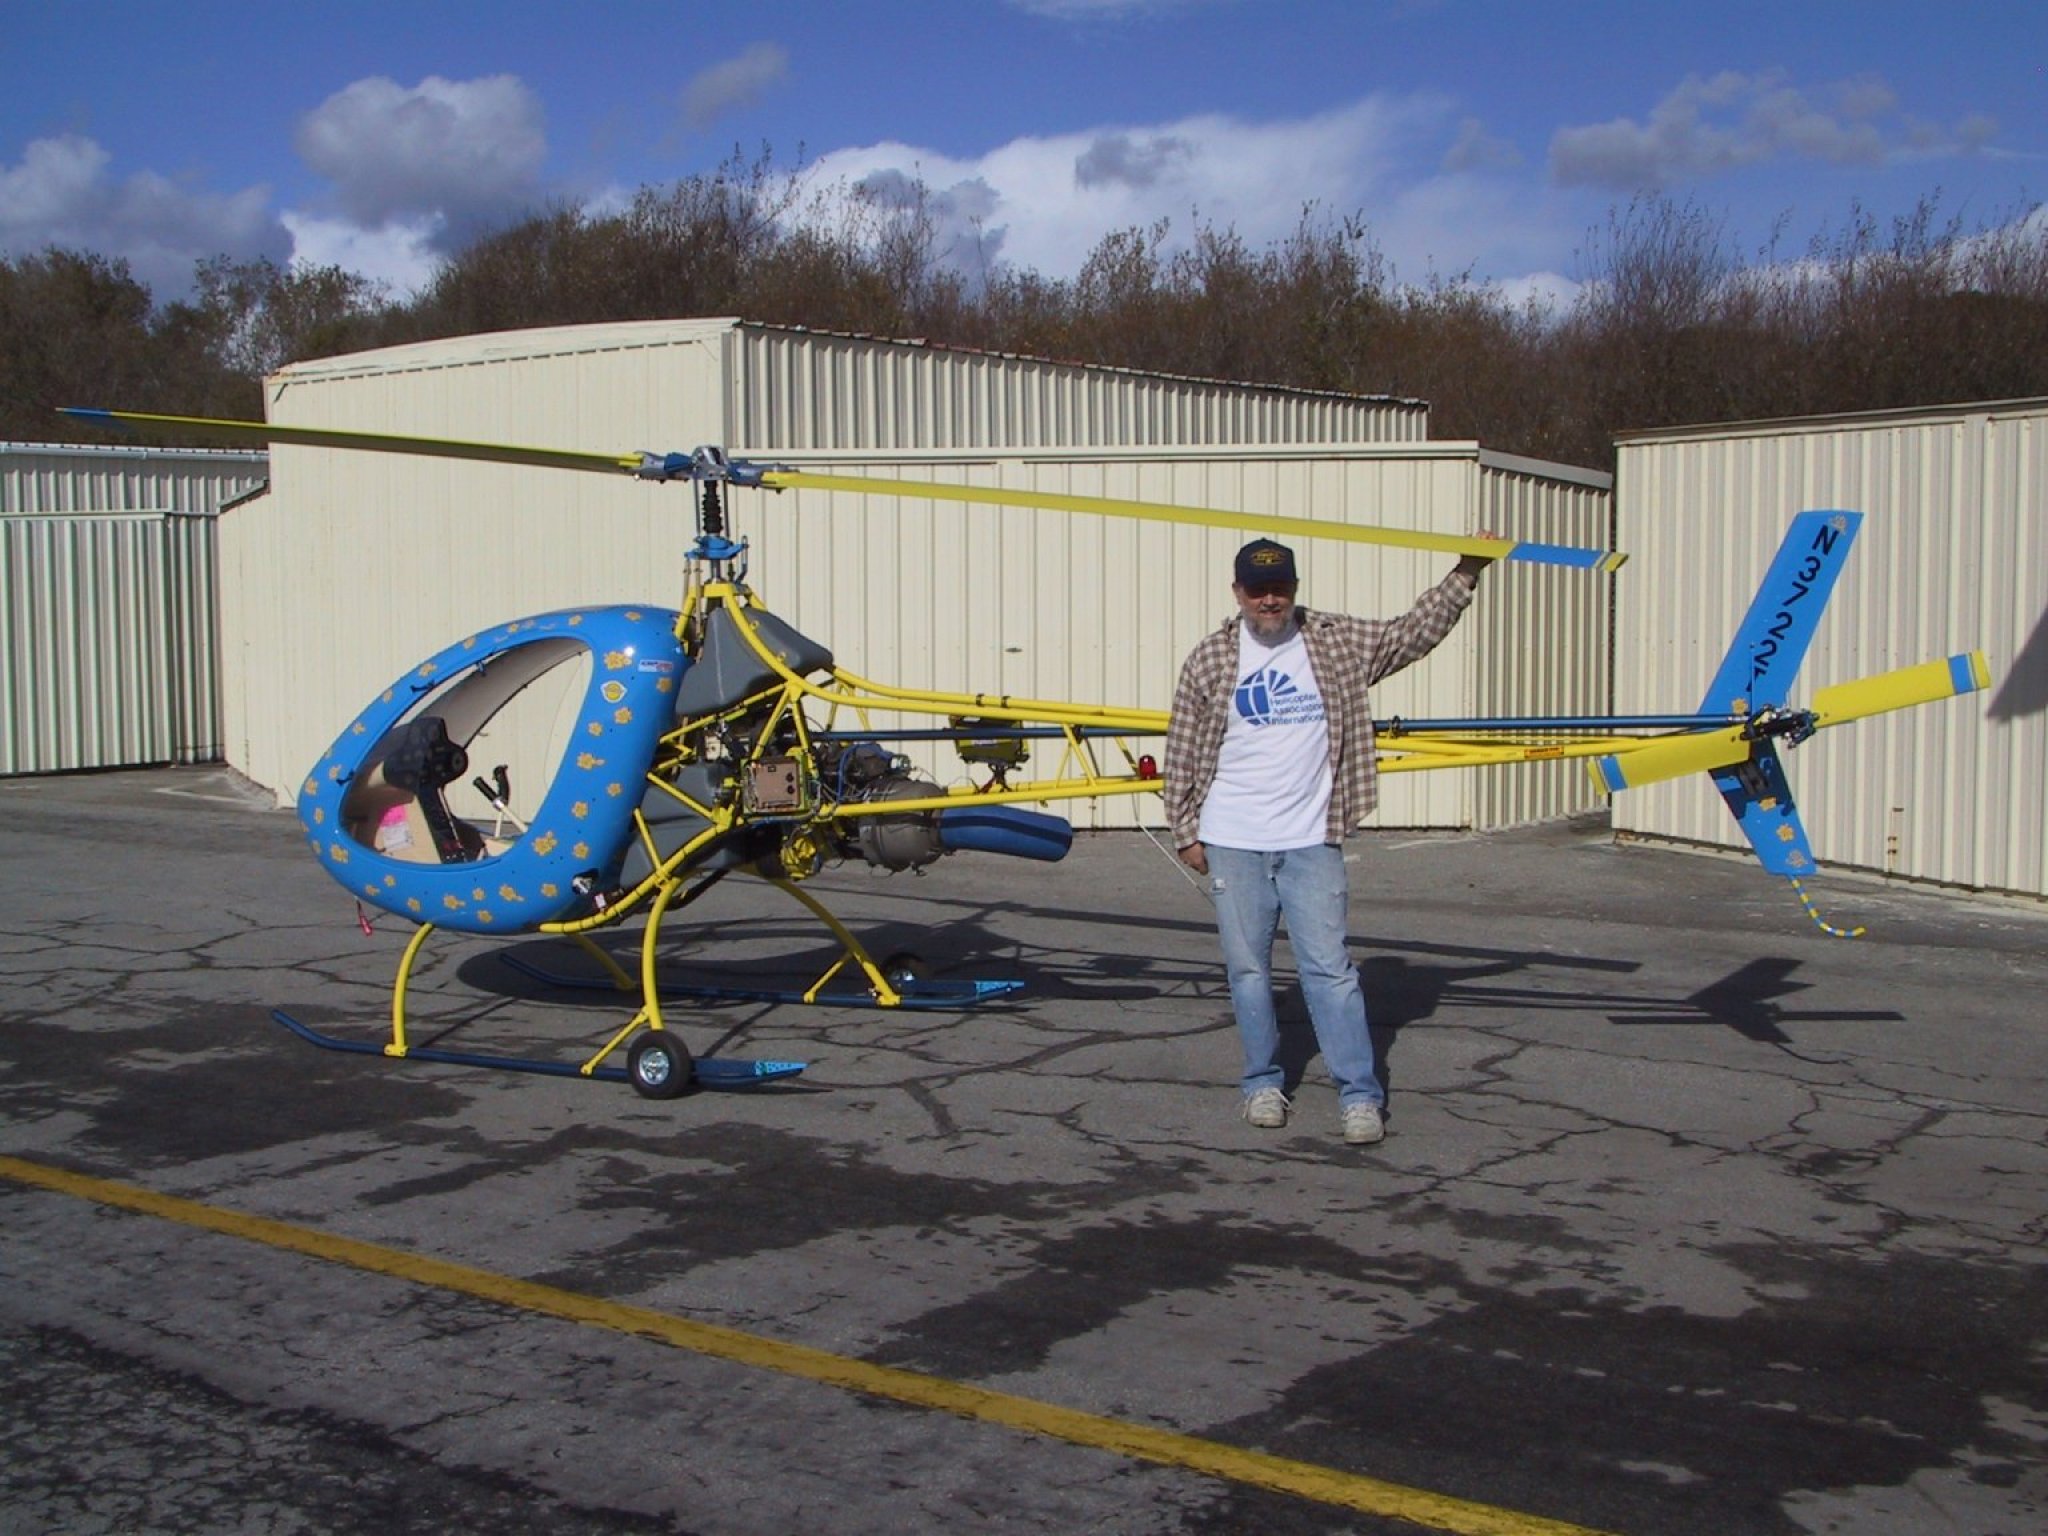
"TWO - TO - TANGO"
Build started,
18th of August 2001
Build
finished, 27th of November 2003
FAA
Inspected, 9th of December 2003
First
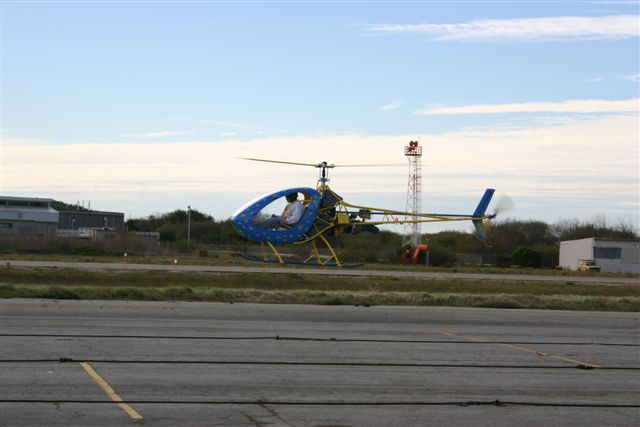
Flight, 17th of December 2003 at 10:39
40
Hours flown off on 09/11/04
By
Thomas [Tom...] Sled
If you've NOT been here recently, you must HIT your REFRESH button
This Page is a "work in
progress", last updated on 9/11/06 at 12:21 READ Personal
note at end....
tsled@earthlink.net
note "NEW" E-address above
Introduction
My HeliCycle Helicopter, N3722T is a 31 year dream that is finally happening thanks to the understanding and love of my wonderful wife, Miss Fran.
I wish to thank Mr. B.J. Schramm of EAGLE R&D, who is the designer of this fantastic Helicopter. His superb design of this strong, yet light weight, easy to build, quality kit, and his accessibility and patience in giving answers to my many phone questions, is making this project not only fun but also a great learning experience.
And finally a note of thanks to all the other HeliCycle builders that have gathered together to help and support each other on the Internet. It is a good group of builders with wide and varying backgrounds that through E-mail inquires, web sites, and even some phone calls, have helped me with this project. Again, THANK YOU GENTs!
Dedication
There is no experience like flying, it provides a rush and exhilaration almost beyond compare, especially in rotor craft. Helicopters and gyroplanes are incredibly versatile but VERY unforgiving beasts. In the past few years two instructors and a good friend have perished in rotorcraft flying accidents: Mr. Jim DiGaetano, Mr. Tommy Zimmerman, and Mr. Troy Taylor. To their memory I dedicate this build. UDATE... Mr. BJ Schramm has passed away in a helicopter incident on 4/27/04 the reason yet to be detrimind by the NTSB. Our prayers are with you Mr. BJ, fly smooooth, and fly high.
Pre-ramble
Back, way back in 1968, I was attending University of San Diego and partying a bit too much, for which my grades suffered. I bought a helicopter ride for fun in Mission Bay one weekend and became hooked. It was in a Bell 47, and to me was like a magic-carpet-ride. You may find this hard to believe, but I actually quit College and went down and joined the Army, (remember this was at the height of the Vietnam War !) telling them my choice of occupation would be helicopter pilot. Well it is a looooong story, but I was sent to Fort Ord, CA, where I went through 2 months of Basic Training, then 4 months of Advanced Infantry Weapons Training. Along the way I took and passed all the test to get into flight school but never heard anything. Then the day I was being processed to ship out to go to Vietnam as a "ground-pounding" Armorer (45-Bravo), I got orders that I was accepted to flight school.
I went to primary flight school at Fort Wolters, TX for five months, then to Fort Rucker, AL for four months. I graduated from helicopter flight school, class of #69-13 [second row, 8th person, center, above the flag] and became what the Army calls a 153-Alpha. Guess where I was sent? Vietnam, Chu Lai to be exact, where after only a few fast weeks I caught a grenade on the ground (there is actually a book being written on the incident by the cousin of one of my class mates, pilot (Mr. Nicholas Venditti) who was killed sitting next to me, that will be out soon), and I spent about a year and a half in and out of hospitals in Vietnam, Japan, and California.
People often times ask me what it was like being a Helicopter pilot in Vietnam. I have a few stories but I am not that good of a writer but another pilot, Mr. John Galkiewicz, who spent ten times the amount of time I did across the pond has written several down to earth stories of what it was like there. He was kind enough to let me place a link here to his stories, very good reading.
Through out this you will "hear" me refer to people as "Mister" And their first name. The reason for this is out of respect. While in Army Helicopter Flight school I also became a Warrant Officer. Well all the regular Commissioned Officers demanded we call them "Sir", because they said we were just ‘awarded’ an officer ship, even though they only went through 6 months of Officers Candidate School and we went through 9 months of the same type of hell (eating "square" meals, 5 or 6 inspections a day...) while also going through flight school. As Warrant Officers we were referred to as "Mister" and our first names. Although we were really there just to get those wings, after what all we had to go through, we deserved more respect. So when I use the term "Mister" today, it is out of respect for that person, but if I call some one "Sir", well you can guess what I think of them, anyway I digress.
Well I went back to College for a while, and then started working for a living in electronics. Because of my leg and arm injuries, I had lost my dream of flying for a living, but had not lost my love of flying, I had no money to support my "habit". I had around 300 hours in helicopters but it was all military time and they are too expensive to rent in private life. After a few years I joined a local flight club at Fullerton Airport and started fixed wing lessons. I got a total of about 25 hours in the old Cessna 150, but then I got a job with ITT and a lot of traveling, so no more time for flying. About two years later I got settled in Las Vegas for a bit so I started taking lessons again, this time in a Piper low wing. I got another 20 some hours, then a job with FMC and more traveling, this time including international. Then came marriage to GREAT lady, Miss Fran, and as love would have it, along came our two children, Mr. Josh and Miss Sarah.
Well much time has passed, our son, Mr. Josh graduated from University of California, Berkeley and is now employed writing code (making a lot more money than I do). our daughter, Miss Sarah, also graduated from University of California, Berkeley, with High Honors, received a full fellowship and is presently in the Doctorate program studying Americanist Politics at M.I.T. My wonderful wife, Miss Fran, is a Medical Transcriptionist, well known and respected in the local area and has decided to further her education and is attending College taking all kinds of classes in her "spare" time. As for me, I decided to get back into the air.
After not finding a "good" helicopter kit that wasn't too expensive, I decided to build a Bandit GyroPlane. N4357S was inspected by the FAA in December of 1998. [see the story of my Bandit build here...] I got into a hangar at Oceano AirPort which I share with Mr. Abe Viero and his Robinson R-22 in the other half. I flew the Bandit for a few years up and down the California Central coast, Dunes and Santa Maria river. I even took her for an event or two at El Mirage. But a GyroPlane just can not do the same things a helicopter can, so I kept looking for a good Helicopter kit, and along came the Helicycle.
The Helicycle is a single place design by Mr. B.J. Schramm, you might remember him as he also designed the Scorpion and the Rotoway helicopters. The Helicycle has way too many features to go into here, and a lot of them you will notice as you see this build come together. But here is the link to the Helicycle web site ( http://www.helicycle.com/ ) please visit them as the site holds much information, pictures, web site links, and even short videos from some of the other builders.
THE KIT
Once you view the videos and decide that you want to build a HeliCycle (and you will) the first thing you do is call EAGLE R&D @ 208.461-2567 and have Blake send you a contract which basically says what he will deliver and when, with a few pages of legalese that says you will go through with the whole thing, you will pay on time, and that you won't make design changes during the build. You sign it and send it in with a down payment to reserve one of the 40 or so slots in the next build. Then B.J. signs the contract and returns it to you. The Build is designed to span a year, and the shipment of parts for the build is broken down into four phases with each having options available.
Phase #1:
Group 1. Airframe, airframe brackets and landing gear with
skids.
Group 2. Cabin, windscreens, floor pan, seat back,
instrument pod, empennage tail feathers.
Group 3. Cyclic, collective, throttle and Directional
controls, push/pull tubes and cables, fuel
system.
Phase #2:
Group 4. Main transmission, main shaft and support system,
main drive pulley and overrun clutch.
Group 5. Tail rotor, tail rotor gear box, and tail rotor
drive shaft system.
Phase #3:
Group 6. Swash plate assy, main rotor hub with blade grips,
pitch and drag links.
Group 7. Main rotor blades and retention system
Group 8. Instrument panel, instruments, sensors, circuit
breakers, wiring system components.
Phase #4:
Group 9. Turbine engine, associated Turbine systems.
The packaging and crating of the components in the kit are very well done. Blake and his crew pack, check, then double check before crating it all up. On two occasions I had been missing parts, I called Eagle R&D (I usually call around 7:00 in the morning and Blake always answers the phone himself) informed them of the missing parts to which they asked me to please double check, which I did and they right away sent me new parts (no other questions asked). On another occasion I cut a small piece of steel in the wrong place and they were kind enough to send me a new piece. By the bye, on the two occasions above I later found that the parts were included in the original kit but I had placed one in the wrong pile and the other I had miss-counted (I returned the parts to B.J.).
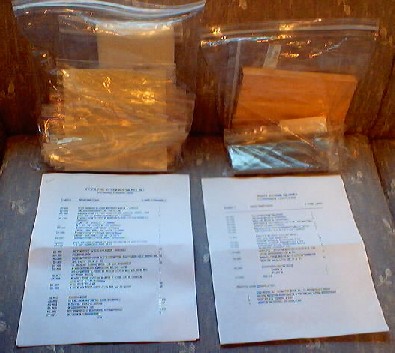
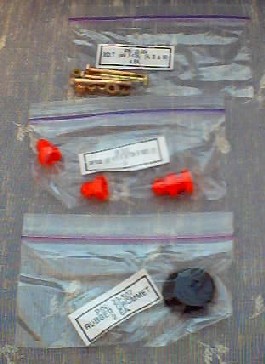
The quality of the components and materials is "top of the line". All the hardware is aviation quality, properly sized and rated by the design. All the Aluminum is 6061T6 or better, the sheets sent for making brackets have protective coatings on one face, and you always get a bit more than you need. All parts and materials are numbered. A group or sub group of parts comes in gallon size zip-loc bags, within them are smaller bags holding the individual parts with their part numbers on small strips of paper. A group parts list with all the part numbers and a description of the parts is included in each of the gallon bags.
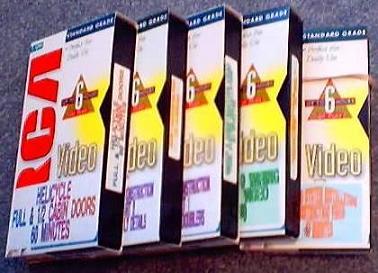
Each group also comes with one or more videos. In the video's case is a tools-required-sheet which is also the first thing gone over on the video. The production quality of the videos is fair to medium, it is an area which could use a little improvement. Because most VCRs don't have counters on them, and if you switch videos you loose track of what is where on a video. For build #3 and now #4 Eagle R&D has finally changed to DVDs which help in finding something fast.
Drawings are included for the many little brackets that need to be made, they included the material and part numbers. This is an area where I think the kit is lacking. I would like to see a Top Assembly drawing with part numbers as it would be nice to have a MAIN drawing to refer to as you are working on things rather than having to find the details somewhere on a video again.
Tools are discussed at the start of
each group, a lot are standard but each group has a few special
ones. There are a few that I highly recommend you get, they
are not expensive, they are available at many places the ones I
show here are from Harbor freight which tends to sell very
inexpensive tools and medium grade tools, in fact if you watch
the catalogs you can buy them on super sale like I did at prices
even lower than shown here. BJ recommends an 8" disk
sander to shape different brackets, instead I got, on sale, 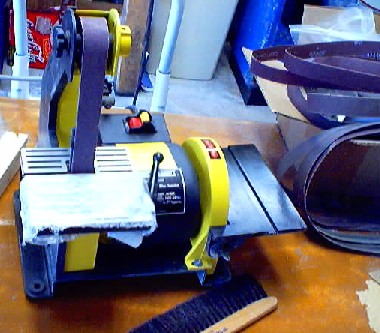 a one inch belt sander that has a 5" disk on
its side. I think I have only used the 5" disk once,
but the 1" belt... Wow ! I found it was easy to shape
Aluminum into complex shapes, de-bur steel, shape the wood, and
even de-bur the plexiglass. I got a bunch of 1" belts
of different grits (I use 120, 240, 320) on Ebay really
cheap.
a one inch belt sander that has a 5" disk on
its side. I think I have only used the 5" disk once,
but the 1" belt... Wow ! I found it was easy to shape
Aluminum into complex shapes, de-bur steel, shape the wood, and
even de-bur the plexiglass. I got a bunch of 1" belts
of different grits (I use 120, 240, 320) on Ebay really
cheap.
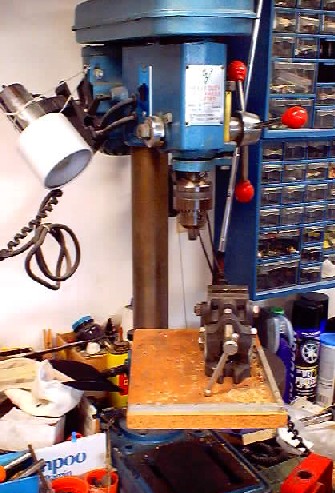 A must is a good bench
top drill press, again available anywhere.
A must is a good bench
top drill press, again available anywhere.
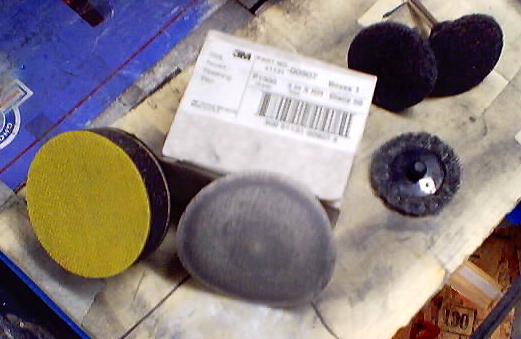
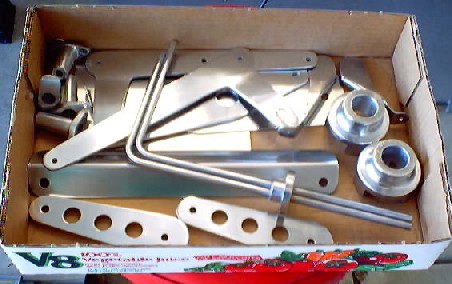
I found some 3M Scotch Brite 3" disks
in fine and ultra fine. Using them on the drill press I can
buff the Aluminum parts to a mirror finish. Then with a
simple application of Flitz polish, the parts look more like
chrome! (See the Aluminum parts in the "V-8" box
below).
To get tools or aircraft parts you need catalogs, at the very end of this documents a list of about 30 FREE ones that are good reading material. One thing to note, the same tool or part, even the exact same brand, can be different prices from catalog to catalog, sometimes even cost double!
Disclaimer:
This web site and the
infomation contained within it are for entertainment purposes
only. The opinions expressed on construction techniques are MY
opinions ONLY and should not be confused with proper construction
techniques. There is undoubtedly more than one way to build a
Helicopter and some methods that I use may or may not work in any
given circumstance. If there is any question please call the kit
manufacturer, EAGLE
R&D @ 208.461-2567. I love to
be helpful but I am not responsible for the use or misuse of any
information contained on this web site. OK, now raise your rigth
hand and say out loud... "Yes Mr. Tom, I understand".
MY BUILD
I made my decision to
build, signed the contract and sent my down payment in February
of 2,001. I was assigned as builder 18 of the second group
(2-18). The delivery of my Phase #1 arrived 17 August 2,001
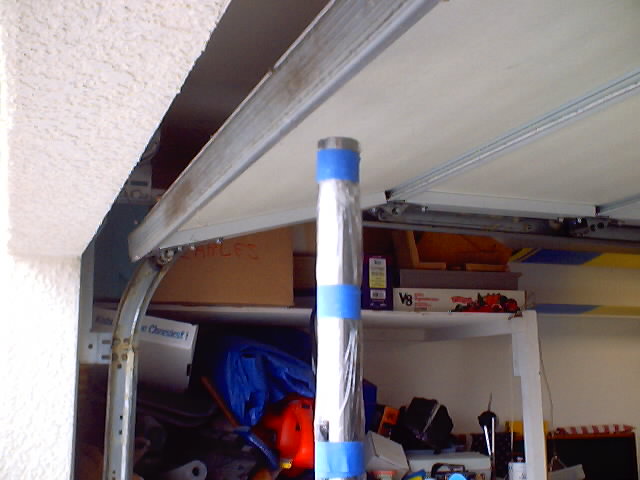
as you can see here.

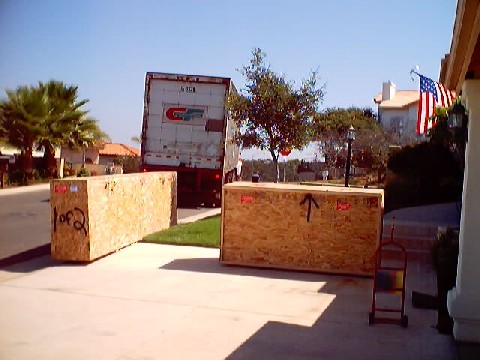
They had stacked the small crate on top of the long one. So I climbed up into the truck and the driver and I were sliding it down toward the end of the truck when it hung up for a second. Well I thought he had stopped pushing so I kind of stepped to the very back edge of the truck behind the crates when all of a sudden he shoved it about a foot. Well I had no where to go but out the back of the truck down 5' to the street. I was thinking the crate was following me so I hit the street and rolled (about 20 feet because my street is down hill) the crate did not fall out, thank God. But I landed with the full force of my weight on my left palm so it became real sore, swollen, turned black and blue, and throbbed. Not to mention I smacked up my shoulder, knee and ankle rolling.
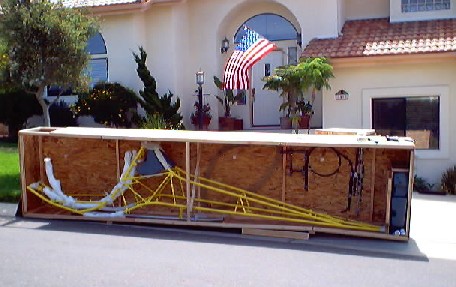
We used the "Angell" method of the broom sticks and had no problems after that. But then I got a sun burn on my neck un-screwing the hundreds of screws. A few hints to those who have not got the crates yet: On the loooooooong crate un-screw the side that does NOT have the wires sticking thru, like in the picture above on the right, and you can pull all the parts out while undoing the least amount of screws. On the small crate, the two fiberglass body half's have 4 wood screws holding them to the walls in the bottom, so be careful, don't pull on the parts until you remove these screws. But I got it all un loaded and it looks GREAT!!! You need at least a 19' by 6' area to work on her. Now ifin you have a 20' garage and you plan on using half, make sure it is the far side from your side door, other wise you will be ducking under or squeezing around the tail for a year.
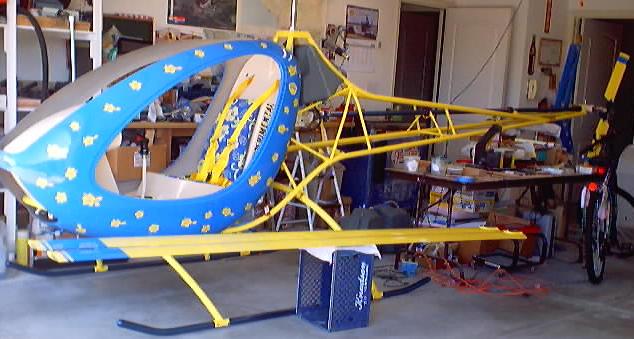
How much room do I need to build a Helicycle?
I found with the body off you need 17' 8", and with the body on you need 18' 6" room for the main frame to not touch anything. If your going to put it in your garage for a year or so, I suggest you place it NOT near your small walk in door or you will have to be walking around or ducking under the tail for a long, long time like I and my wife had too because that was the side all my tools and tool benches were on. And I needed 82" of height on my garage door to "just" slide her out flat on the skids as you will see later here.
I bought some heavy duty casters and built an "H" frame out of wood 2x4's and mounted the caster. I grooved the wood to hold the skids more secure. It makes moving her around the garage, even sideways, real easy.
Eagle R&D keeps very tight tolerances, especially on any holes, so you do the final reaming on them so you have exact fits.
As you see this build evolve, you will see the HeliCycle put together, then a part, then together, then apart. On the tapes BJ tells you to put something together, then take it apart, then put it together again.... you will also hear BJ say over and over, "on final assembly...", The problem is you kind of have to wait till you have everything before you get to the "final assembly" point.
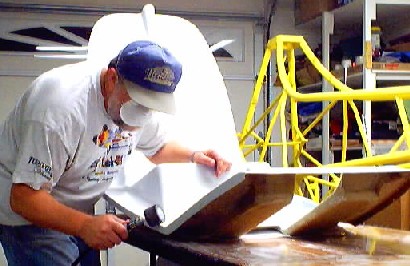
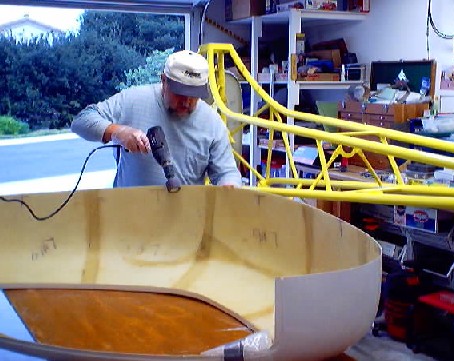
Mounting the Pod:
 .....
.....  .....
.....
 ....
....
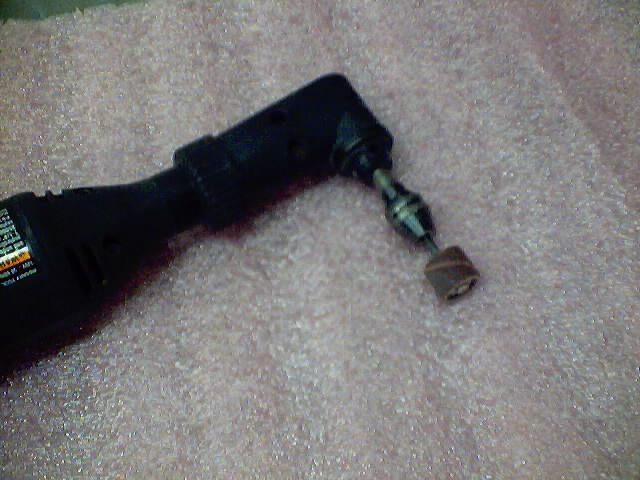
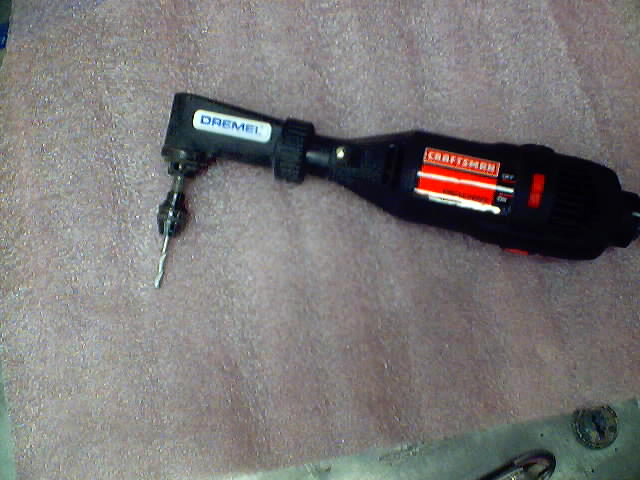
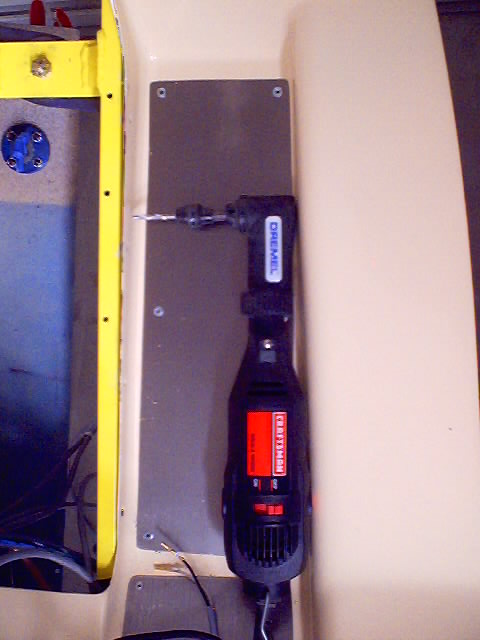
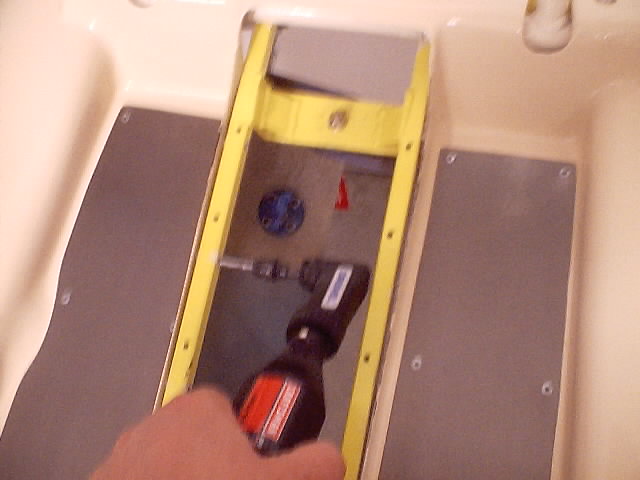
One of the procedures on the construction videos that really bugged me was mounting of the Pod. Eagle R&D sends a long drill bit and goes into extensive instructions on how to drill the Pod to frame mounting holes at an angle, and how you can elongate these holes to get a good fit. Well I watched that tape over and over and decided there had to be a better way. I had just bought a small Dremel tool from Sears (wish I would have got the variable speed model and suggest you do) [see the photos above] and got a sanding drum for it which makes shaping the fiberglass body very, very, very easy. Anyway, I found a 90' attachment for the Dremel on Ebay and got it. As you can see in the pictures above you are able to drill these holes straight with out any problem. On the video BJ talks about aligning the Pod by elongating the holes, this is the method he suggests to center it. Well about two years ago a friend of mine was rebuilding an Air Command Autogyro and asked if I would help him with his instrument pod. The pod was almost identical to this one. It was listing to one side, and vibrated like a son-of-a- .... Well the simple fix I came up with and what I have done for my pod here is a 4" x 1" x 5.15" block of wood. I covered it with white paper so it can be seen better). The wood is standard pine shelving cut to "just" fit when the pod is all screwed down tight (mine measured 5.15" in width but yours may vary). It is right behind the fiberglass stiffing bars as can be seen. It is at a bit of an angle too. What you do is mark with chalk or something, exactly where the block lightly wedges in. Then drill 4 holes in the pod on each side that will enter the center of the wood sides. Now install screws thru the pod into the wood on ONE SIDE ONLY! Then, as B.J says a million times, "at final assembly" you just push the pod slightly past center into alignment and put screws into the other side and Wa La, she will stay centered there and by bridging the sides together, the vibrations will be dampened.
For some ungodly reason it does not work for you, take the wood out and you can still elongate the hell out of the mounting holes like B.J says to do.
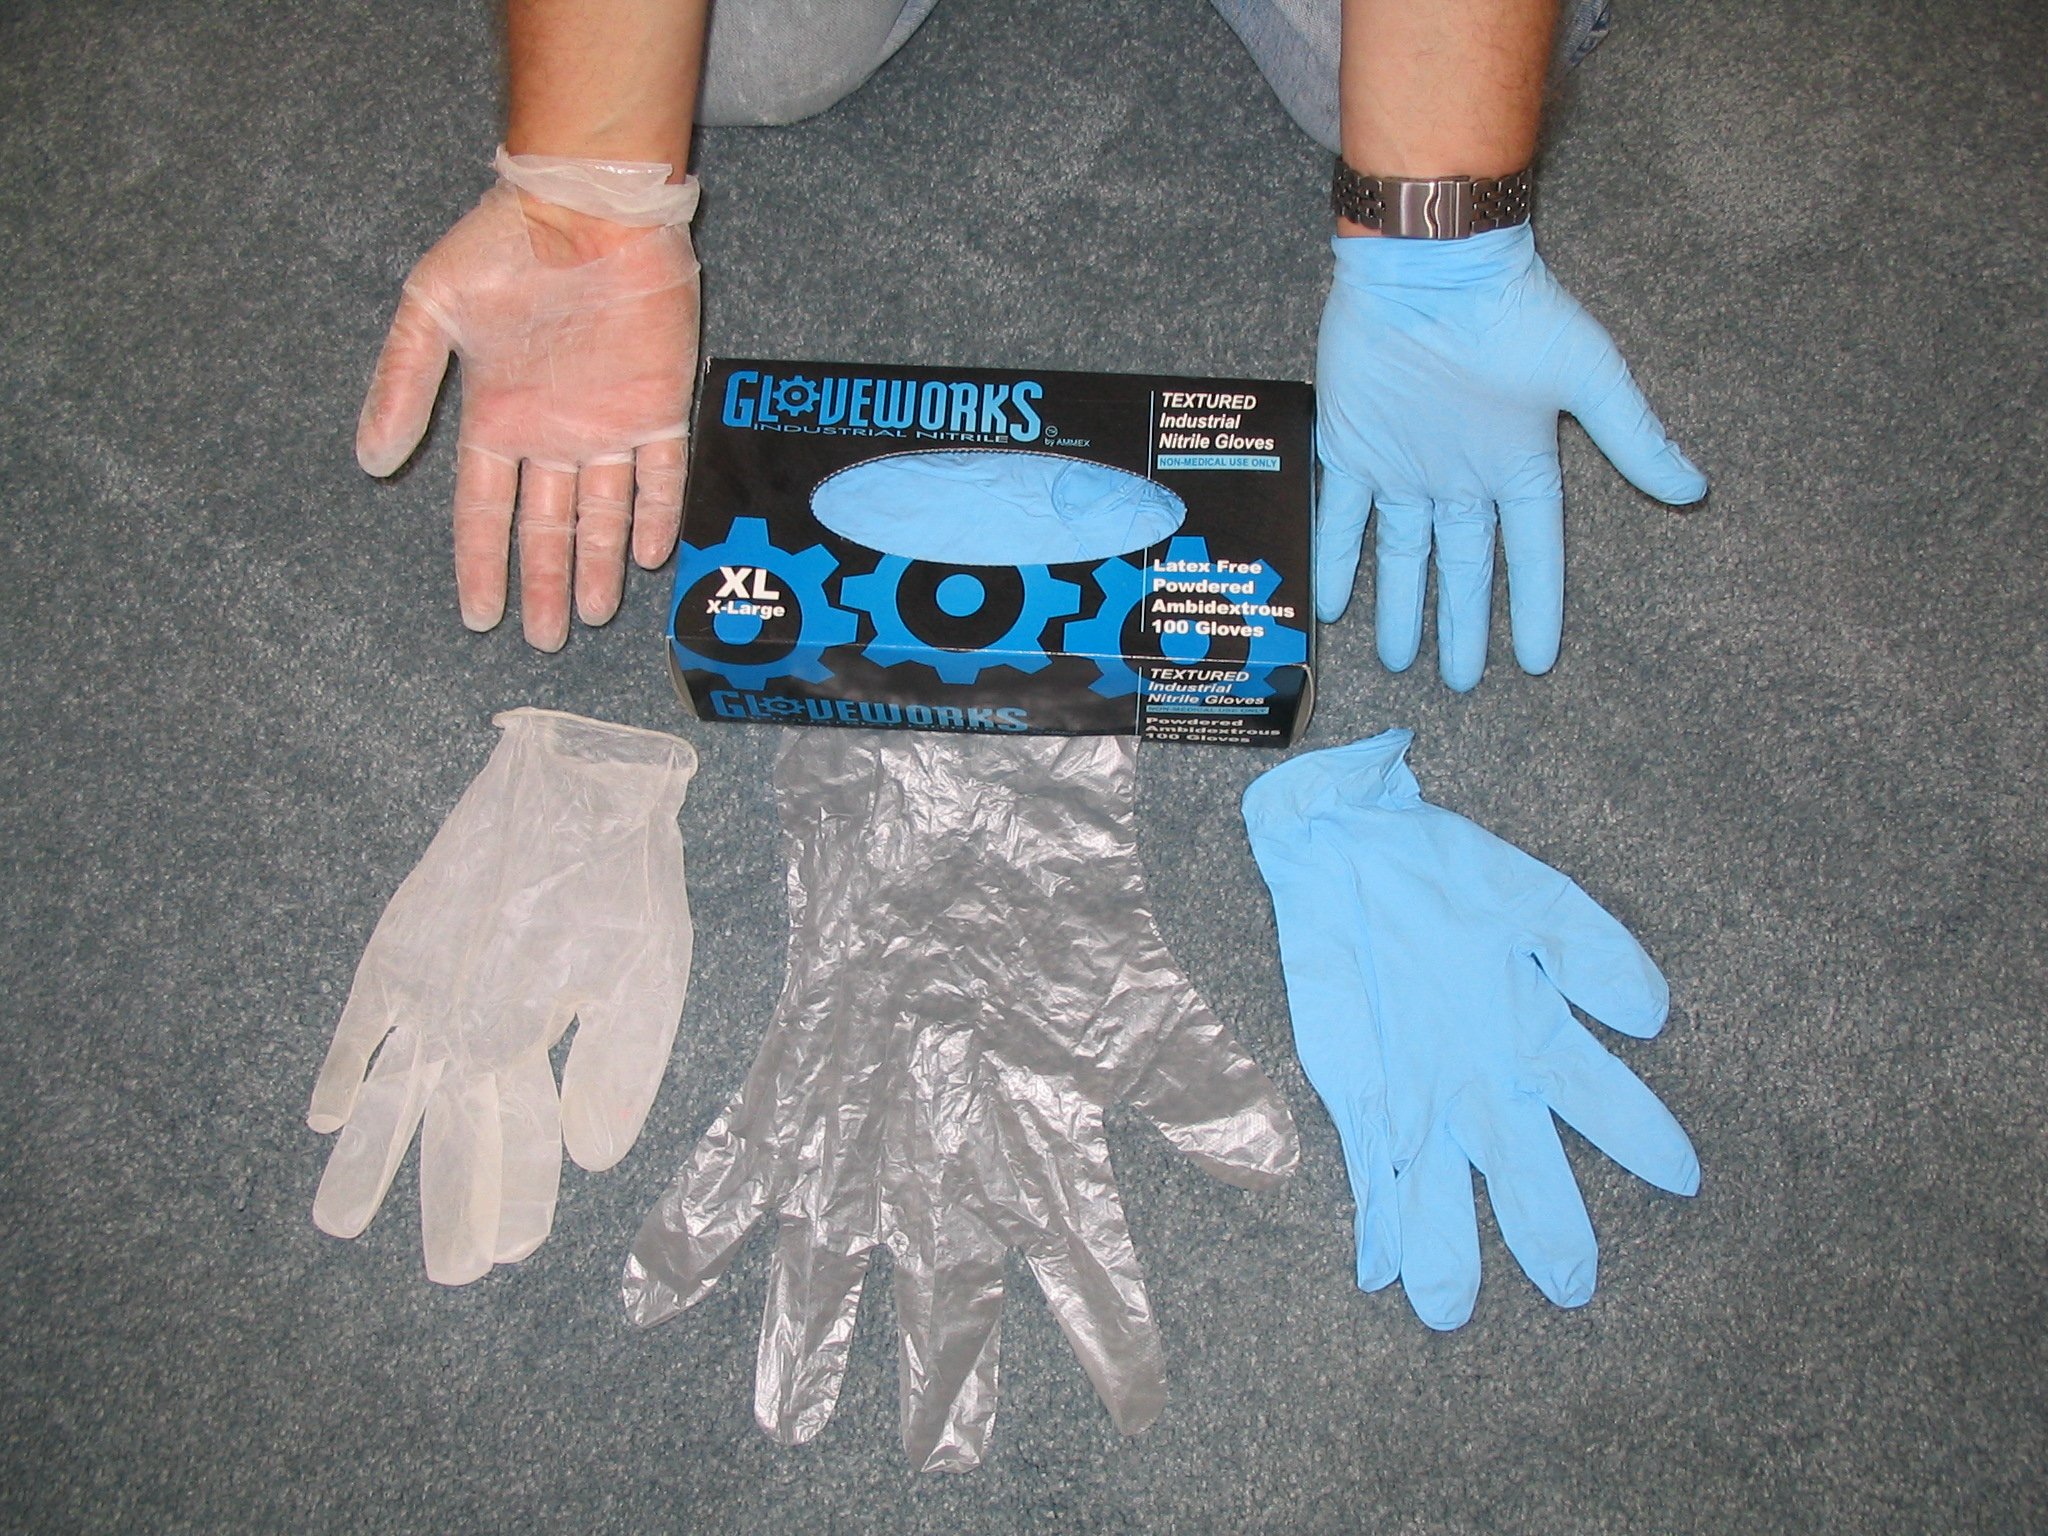
Remember what your dad said, if your going to do it, wear protection:
Some prefer Latex for sensitivity of feel at the tips, myself I like the textured Nitrile because they are so comfortable I can wear them all day and I like the light blue color. There are also the clear food server type gloves, yes gloves... what did you think I was talking about? When ever I even see fiberglass I start itching, and you are going to have a lot of sanding to do on the body and seatpan. Some of the chemicals like acetone will attack Latex and the gloves will fall apart in a few minutes. I got a box of the clear food server type for when I need to move stuff around or mix a batch of Epoxy and only need to wear the gloves for a few minutes. When you buy the glovers pay attention to the size, last box I bought of the Nitrile shown here I for got to look and got X-Large. I really think the blue Nitriles are the best.
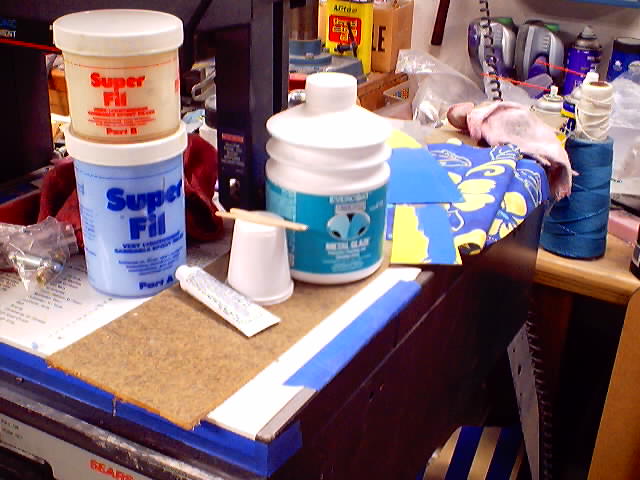
BJ in the videos says to use Bondo to fix imperfections on the fiberglass. Bondo is heavy and is of a different composition then fiberglass which causes it to shrink and expand at a different rate then fiberglass. A better product to use, sold by AirCraft Spruce is SuperFil. It is a two part Epoxy mixed 2:1, very light weight, hardens up in just a few hours then can be sanded, painted, whatever, just like fiberglass. I also suggest you stop by either a craft store or a food store and get some very small cups and wooden popscycle sticks to mix up batches of SuperFil and 2-part Epoxy. The SuperFil can also be used when doing your blades but for that I found an even better product to use at an autobody paint and supply store called EverCoat. It is a two part Polyester glazing putty. You mix it up and it spreads on like a cold cream filling in all voids even very tiny ones. It hardens up in an hour or so and can then be sanded smooth and painted.
One thing that BJ does over and over again in the videos that you should NOT do, is mix two part Epoxy, and other two-part compounds on cardboard. What happens is the esters of the catalyst are volatile and get absorbed into the cardboard so you do not get a correct mix of chemicals. Save plastic lids from food containers and some of the containers that food comes in. Just make sure that they are clean and totally free of any and all oils. Or you can mix them on wax paper or tin foil, or get small plastic cups like a Dentist uses. New Popsicle sticks or coffee stirrers from work are great for mixing and spreading.
Protective Coverings:
You have to make a bunch of small parts out of aluminum, they are not too detailed and are not too hard. You get more then enough of the material and the drawings are for the most part straight forward. My AirPort, Oceano is about 2,000' from the Pacific Ocean so I am going to have all my Aluminum anodized a dark blue for protection, and damn good looks.
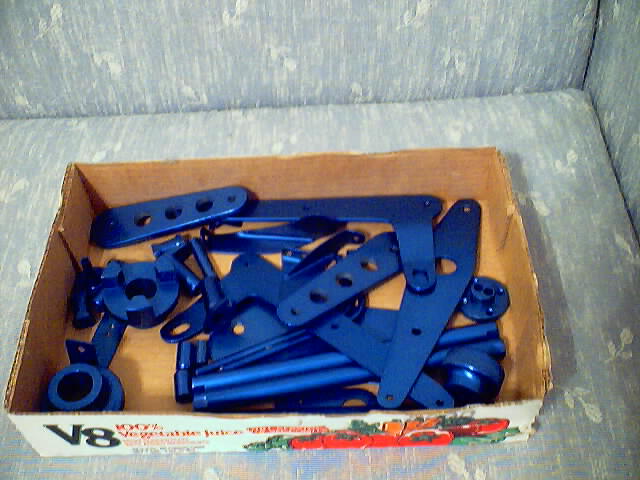
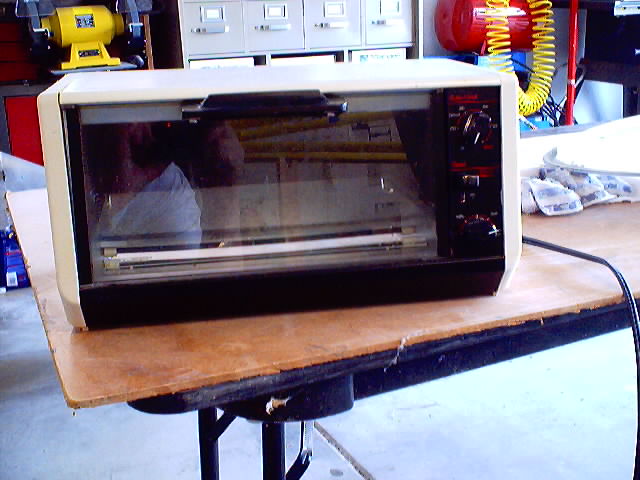
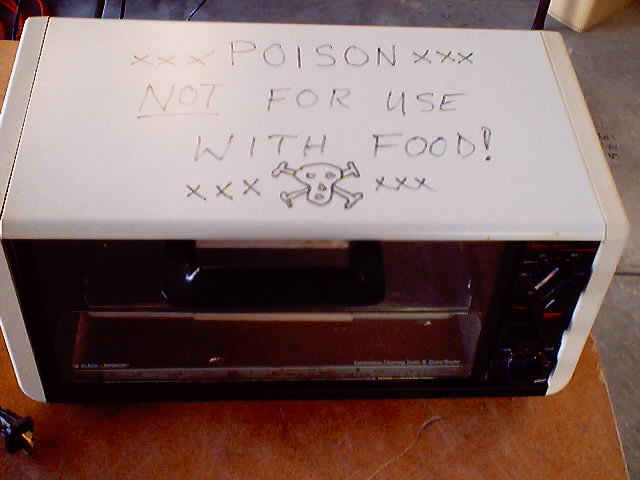
As I mentioned above, I am right on the Pacific Ocean, so I have been doing some research into anodizing and other protective coatings. What I have decided to do is get all the Aluminum parts anodized, and any that do "contact" movement I am going to use Gun-Kote over the anodizing. On the others I am using EverBright. On some of the steel parts like the blade links I am using blue Gun Kote to sort of match the blue anodized Aluminum parts. Some of these coatings, like Gun-Kote, need to be baked on, but you can get an old or even a new toaster oven of under $20.00, I got this one at a garage sale for $5.oo. Just make sure you mark it "POISON" so it is not used for food ever again. Here are some interesting protective coatings with different qualities.
. ....
....
EverBright: http://www.everbrite.net/ is like a hard shell varnish, it goes on a bit thick, it is best to use a 2 inch square of lint free cloth to wipe it on. You should use blue Nitril gloves. It leaves a nice finish over anodizing. Gun Kote: http://www.rb-treasures.com/product2.html comes in clear and in a few colors, it leaves a very hard shell coating but must be baked on. EverShield:http://www.aircraftfinishing.com/evershield.htm is also a clear coating but a bit duller than EverBright. It is a two part, some what complicated to use coating, advertized has a ceramic coating that can take 1,000' heat. You too might find other uses for these interesting coatings. Great FREE catalog on finishing supplies at Caswell Plating: www.caswellplating.com. A GREAT page on home anodizing is at http://www.focuser.com/atm/anodize/anodize.html. If you just want to polish up your Aluminum parts Flitz is the polish to use. It is a cream you just put on and rub in lightly, then before it drys you wipe it off with paper napkins. Why paper napkins you ask, because they absorb the cleaning oils better than cloth and you can get a mirror shine from regular Aluminum.
Plexiglas, care and feeding:
The HeliCycle comes with a large section of plexiglas, a plexiglas foot window, and two plexiglas doors. A friend I haven't seen in a long time stopped in and was looking at all my HeliCycle pieces. He was looking at the big Plexiglas piece which has been sitting around in a corner gathering a butt load of dust since I drilled it out about a year ago. He asked what I was planning on using to keep the dirt and bugs off. I said Windex I guess. He said if you do it will darken, and start to cloud up plus get brittle and be prone to crack after not too long. He said it happen to him on a plexiglas table he had, when he finally got around to talking to a plexiglas dealer who told him NEVER to use Windex or any GLASS cleaner because they all contain some amount of ammonia and/or alcohol, neither of which is good for plexiglas. So I got on line and contacted a plexiglas dealer and also a canopy manufacture, here is what they said:
"Windex has ammonia in it. That is one of the things to avoid using on clear plastic according to an owner of a plastics company that makes a lot of things for boats in Ft. Lauderdale, below is what the dealer had to say:
"When I first got into this business (and didn't know what I was doing) I'd clean the plastic with Windex before heating and forming it. I didn't know why the canopy plastic lost it's clearness, hence looked fogged up. I discussed it with the above mentioned expert. He explained that when I heat up the plastic it accelerates the process that usually happens over a long time of contact with ammonia.
I use what works. Novus works and is made for plastic.I use Novus #1 for cleaning canopies. It brightens and has some antistatic properties to it. Novus #2 is a compound which when rubbed with cotton cloth, will remove small scratches. I've used both of the above. It's good stuff.
They have a Novus #3 made for
larger scratches. I found that using Novus #2 gets the scratch
out just as fast. I don't buy the #3 any more."
Here is what another dealer said:
"Our web site has more info on our Novus Polish than does our catalog. The item you are interested in is a great plastic cleaner, it is water thin, takes the grime off a sheet of plastic, the static charge and puts a very light protective coating on the sheet. It is an excellent product.
We are always amazed at the variety of uses that our customers find for this stuff. Our favorite way to employ Novus polish is as a turntable dustcover cleaner and restorer. You should see the look on the faces of customers who've brought in an older 'table with a dustcover marred by fine scratches and dirt, and watch as clear, clean plastic is revealed with a simple treatment of Novus #2.
We've also had good luck using the Novus #1
on CDs and DVDs with skipping problems (usually related to small
dirt and dust particles attracted and held by static
charge)."
I found a good source for Novus and ordered some, here is the
URL: http://www.delviesplastics.com/waxes_cleaners_novus.htm
Seatbelt and Shoulder Harness
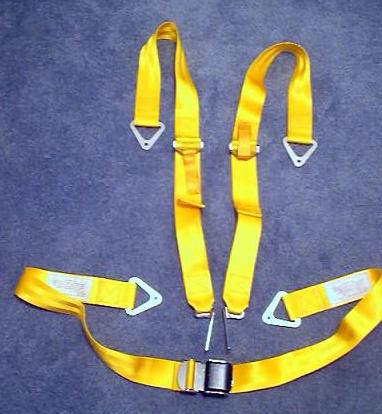 Seat belts and shoulder harness do
not come with the kit but the FAA will not even think of signing
your ship off unless you have a good set, so I decided to have
them custom made to fit "exactly". Here is the info on
the 2" lap belt and shoulder harness set. If you
did the string measurements ( What I did was tie some light
cord to the seat belt and shoulder harness mounting holes, then I
put the pads I plan on using in the seat and seat back.
Then I sat down and hooked up the cords like they would be the
belts and tied knots in them where they should all come
together. I cut them off the mounting holes and measured
them. I came up with 49" in the seat belt mount hole
to mount hole, and 37" in the each harness side mount hole
to where the center buckle would be. I then figured I might
get (more) fat, dumb, and happy flying my Turbine around so I
added a few extra inches and came up with, 5' 6" and 4'
1" which is what I requested from Davis. I suggest you do the same
and if your dimentions are equal or less than mine you are fine.
) and your over all Lap is 56" or less, and the shoulder is
41" or less this will work for you. There are three
numbers to order, and please note that the last three digits
are the color code and I listed some of the standard colors they
offer, at NO EXTRA COST below. The
order numbers I have listed are with the last
three at "182" which is for 'Bright Yellow', it is
a slight tint toward neon (it works for me): FDC-6400-129-4-182
is for the Lap belt, FDC-7275-75-7-182 is for the
Left shoulder harness, FDC-7275-75-8-182 is for
the Right shoulder harness. The Color Codes are
044 for Navy Blue, 080 for Black, 106 for
Beige, 179 for Olive Drab,
182 for Bright
Yellow. If you wish a different color or need more
information, talk with Mr. Art Soto at
626.289-3555. They will ask you to Fax your order
to them at 626.289-3587 so type up a sheet with your name,
address, phone number, the three part numbers (with your choice
of color) and make up some number as a P.O. number (Purchase
Order #), and mention "Ground shipping" as these weigh
about 3.5 Lbs. total all boxed up. They
don't take credit cards so they will ship them C.O.D. to
you. Mine fit perfect!!! I can even gain 20 Lbs.
or add a thick back pad for long flights. Plus the
belts have the FAA TSO-C22F tags stiched onto them. Should
cost less than $100.oo.
Seat belts and shoulder harness do
not come with the kit but the FAA will not even think of signing
your ship off unless you have a good set, so I decided to have
them custom made to fit "exactly". Here is the info on
the 2" lap belt and shoulder harness set. If you
did the string measurements ( What I did was tie some light
cord to the seat belt and shoulder harness mounting holes, then I
put the pads I plan on using in the seat and seat back.
Then I sat down and hooked up the cords like they would be the
belts and tied knots in them where they should all come
together. I cut them off the mounting holes and measured
them. I came up with 49" in the seat belt mount hole
to mount hole, and 37" in the each harness side mount hole
to where the center buckle would be. I then figured I might
get (more) fat, dumb, and happy flying my Turbine around so I
added a few extra inches and came up with, 5' 6" and 4'
1" which is what I requested from Davis. I suggest you do the same
and if your dimentions are equal or less than mine you are fine.
) and your over all Lap is 56" or less, and the shoulder is
41" or less this will work for you. There are three
numbers to order, and please note that the last three digits
are the color code and I listed some of the standard colors they
offer, at NO EXTRA COST below. The
order numbers I have listed are with the last
three at "182" which is for 'Bright Yellow', it is
a slight tint toward neon (it works for me): FDC-6400-129-4-182
is for the Lap belt, FDC-7275-75-7-182 is for the
Left shoulder harness, FDC-7275-75-8-182 is for
the Right shoulder harness. The Color Codes are
044 for Navy Blue, 080 for Black, 106 for
Beige, 179 for Olive Drab,
182 for Bright
Yellow. If you wish a different color or need more
information, talk with Mr. Art Soto at
626.289-3555. They will ask you to Fax your order
to them at 626.289-3587 so type up a sheet with your name,
address, phone number, the three part numbers (with your choice
of color) and make up some number as a P.O. number (Purchase
Order #), and mention "Ground shipping" as these weigh
about 3.5 Lbs. total all boxed up. They
don't take credit cards so they will ship them C.O.D. to
you. Mine fit perfect!!! I can even gain 20 Lbs.
or add a thick back pad for long flights. Plus the
belts have the FAA TSO-C22F tags stiched onto them. Should
cost less than $100.oo.
Instruments and Electronics
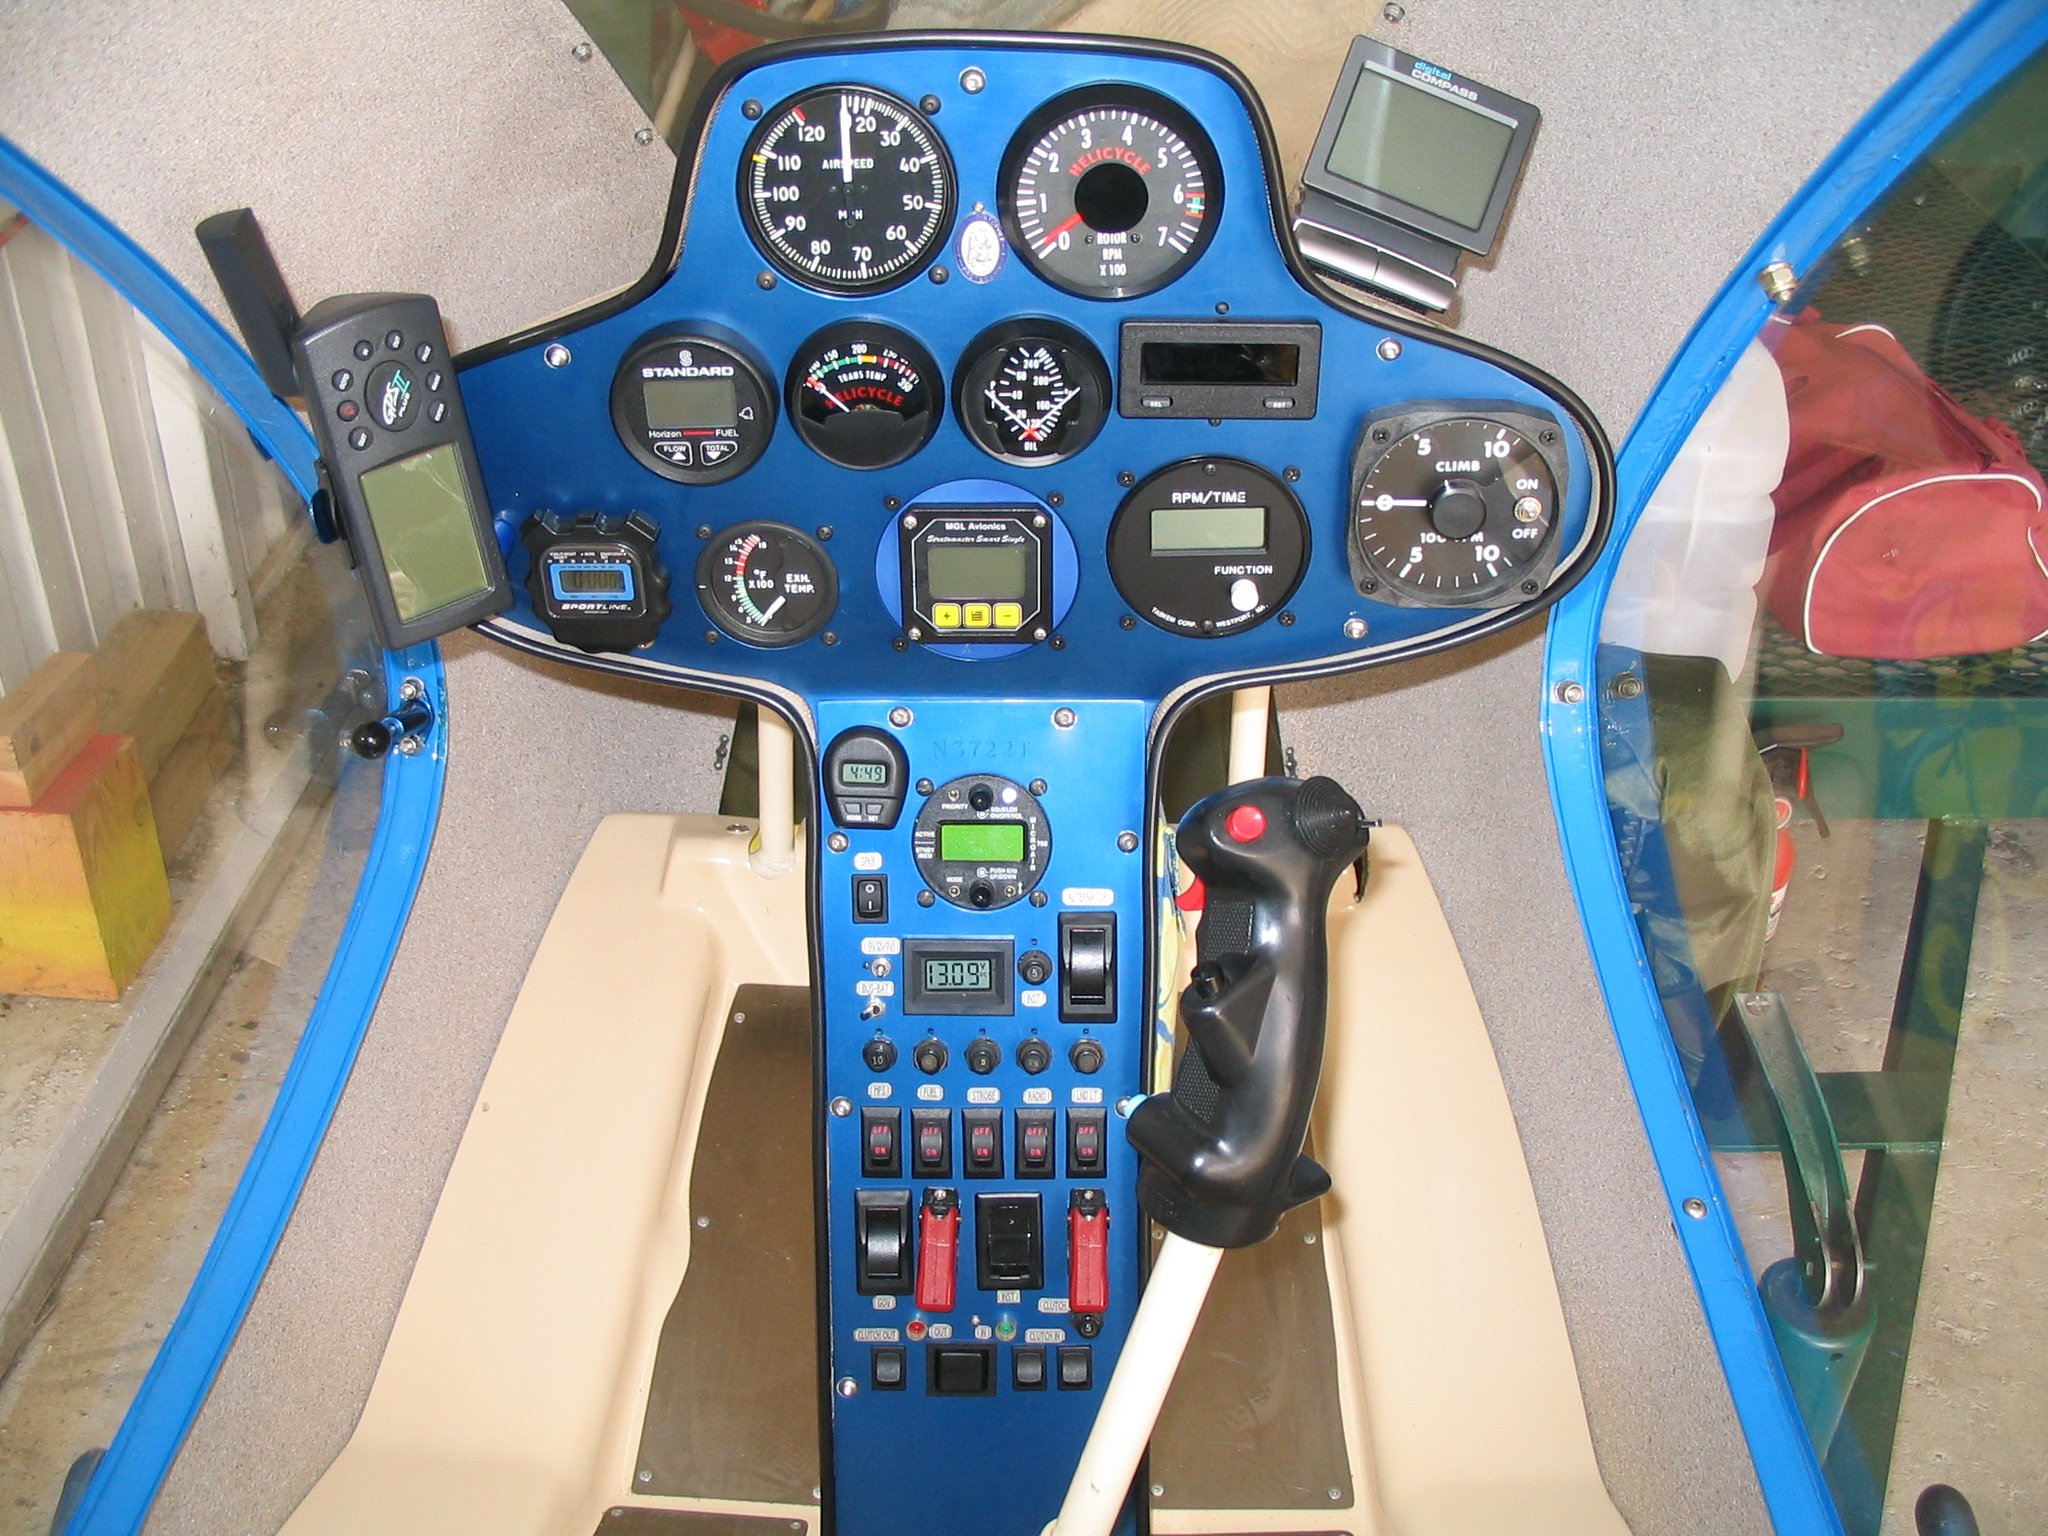
In the kit you get an Instrument pod, two sheets of aluminum, several gauges, circuit breakers, switches, and a schematic drawing. A few instruments don't come with the kit and it is up to each person as to what features, quality, and price they wish. For the "Air" instruments I found what I consider a really good AirSpeed Indicator (top left) for use in a helicopter at CPS OnLine for $129.95 which I ordered. Since helicopters spend most of the time low, close to the ground I decided to get a good Digital Altimeter that will tell me at a glance exactly how many feet I am, my mind does not have to figure out the two or three pointers used on a normal Altimeter. The one I chose is the "Smart Single ALT-1" by MGL Avionics at $206.oo. (In the center of the picture, with the yellow buttons). It even has a built in VSI but the numbers are very small. The only thing wrong with it is the funny 8 sided hole you have to cut in the panel. Because you are so close to the ground to begin with, it is nice to be able to confirm quickly whether you are going up or down so I got a Model 500 Ball Variometer at $275.26, which is an electric Instantaneous Vertical Speed Indicator normally used in gliders (on the far right). Has a back up I got a Digital Rotor Tach (with the white button) from Taskem. Fuel gauges in a helicopter are never accurate so I got a Standard Horizon FF41 Fuel Flow Manager (middle row, far left) ($189.95), that is used in boats. It displays the fuel flow rate for checking engine performance. It can be programed so with a push of the button it will display amount of fuel used very accurately. It can even be programed with the amount of fuel on board and it will warn you when the remaining fuel gets to what ever amount you program into it. AirCraft Spruce is now selling this gauge but they call it the Mizer and charge DOUBLE!
Eagle R&D supplies several gauges, some that came with my kit were intended for the Rotax engine so they are not used with the Turbine. The two gauges in the center are Transmission Oil temp and Engine Oil temp/Oil preasure, and at the top right is the Rotor Tach. The rectangle with 61,500 is the Red Lion Digital Tach for the Turbine. The bottom left is where the Exhaust Gas Temp gauge for the Turbine will go. These gauges will be coming with the Turbine. On the far left is a Garmin GPS II that I got for a really good deal on Ebay. Not shown here is a Hobbs SWN150 Engine Hour Meter that I mounted to the right side of the seat to leave more room in the panel.
I got me a wonderful radio it is a MicroAir 760 it is the size of a airspeed gauge! It is powerful for its size at 4 Watts. The display shows the frequency you are on and the next frequency. You can pre load up to 25 frequencies and have it auto scan for an active frequency or you can step through the frequencies by a switch. I hooked it up to the coolie hat switch on my cyclic so I can change the frequencies with the tap of my thumb. I got a simple "L" antenna off of E-bay for $12.oo. A good friend of mine at work, Mr. Bill Rea is our Compliancy Engineer and really into radios, he was kind enough to bring his test equipment out to the airport. We hooked it all up and tested the radio, she out puts slightly better than advertised at 4.2 Watts and the meters showed NO leakage! Thanks for the help Mr. Bill.
Eagle R&D supplies a cyclic control grip with two switches but I like the Infinity grip. After flying 7 different types of helicopters I got that grip because it has extra switches and the main thing it has the large palm rest shelf where you can rest your palm on it just like I had in the Huey's. Of course I wired the trigger for pull to talk, and the red button on top will be wired for the ident on the Transponder when I get it. I use the coolie hat to change frequencies on my radio, I use the top flip toggle switch to turn on two ultra miniature landing lights I have, one in front of the right and left longeron legs (so they don't disturb the air flow (BJ did not like the idea and made me take them off while he was here cause he wanted to run the ship flat out at sea level to do some testing, I now have them back on)) I have a special simple circuit of a certain flasher relay so they alternate on right off left, on left off right back and forth. It is for flying up and down the beach where a lot of other fast moving (not that my 110 MPH is not fast) fixed wings are also flying and I really want to be seen. Then I have headphone like jacks in the body next to each leg that are wired to some of the switches, so some time down the road I can mount fixed and movie cameras to the skids, plug them in and control them from the grip. When you order the grip get the spacer to fit our Dia of control tube, and I got an additional 3 feet of cables that way I did not have to splice and wires.
I am an Electronic Engineer so
I decided to do a bit more to my Instrument panel and electric
panel. When it comes to wiring my HeliCycle I am re-doing the
schematics to fit the Aircraft rocker switches and Klixon circuit
breakers I want to use. I don't purport to know it all by
any means, I am always learning. One of the learning places
I found on the Internet is:
- The AeroElectric-List Email Forum -
SUBSCRIBE: http://www.matronics.com/subscription
It is run by a guy, Mr. Bob L. Nuckolls, who is semi
retired. He designed many electrical systems used in Lear
jets and several other planes. He now goes around the
country giving classes on how to wire homebuilt and certified
airplanes. He also has a GREAT, HIGHLY informative book/CD
out at:
http://www.aeroelectric.com/Catalog/pub/pub.html#aec9
And sells small parts and tools for doing aircraft electrical
wiring.
http://www.aeroelectric.com/
The Aero List sends me about 15 E-mails a day, which I have my
filter send to a directory, and I look at them when time permits,
usually on weekend nights. I have got a lot of great tips
over the past year. Mr. Bob is sharp and answers your
questions in 1 to 24 hours, usually in good detail, with links
and photos.
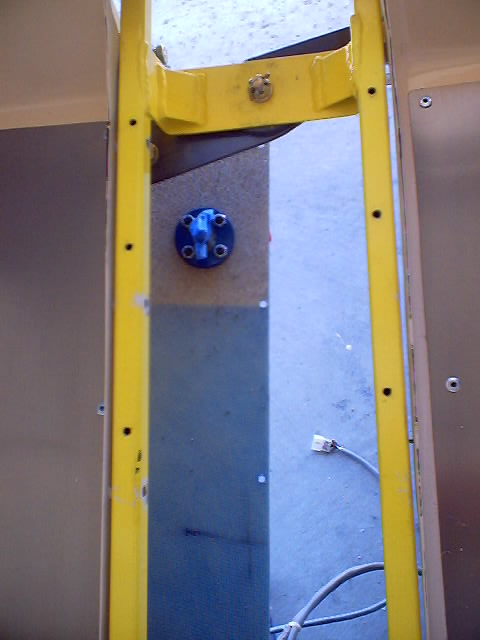
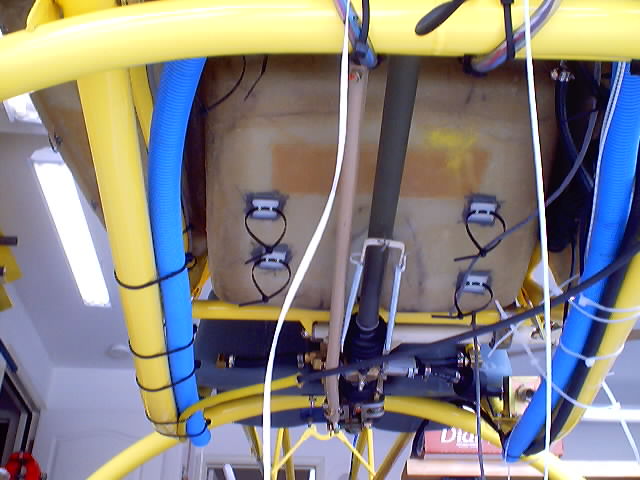
I am in the process of doing my final wiring, I am adding a few personal circuits to the general schematics and in doing test fits of my electrical panel to the Pod I noticed some of the heaver wires, because of their service loops, were encroaching down where the controls of the pedals and cyclic are. This worried me as I don't want the wires rubbing on the control surfaces giving me false feelings or worst yet interfering with the controls and/or wearing down the insulation on the wires. So I got a piece of the body that was trimmed off and cut it to fit on top of the Pod mount bars. I added a flexible piece of plastic to go up in the front protecting the pedal shaft. I also made a 1/2 hole in the wire shield for the Pitot tube hose so it does not interfere with the pedal scissor.
 ...
... 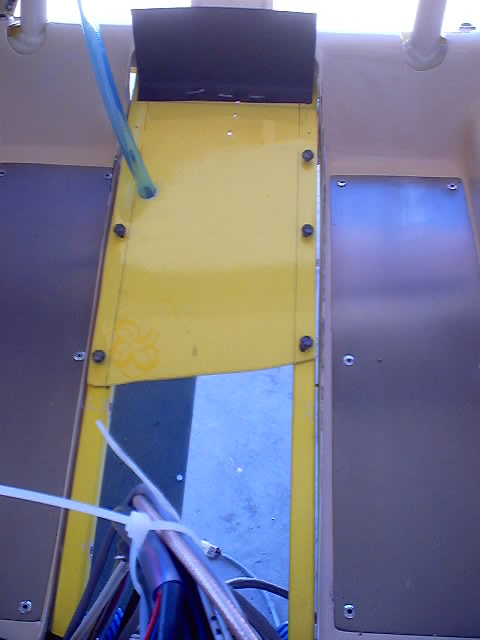
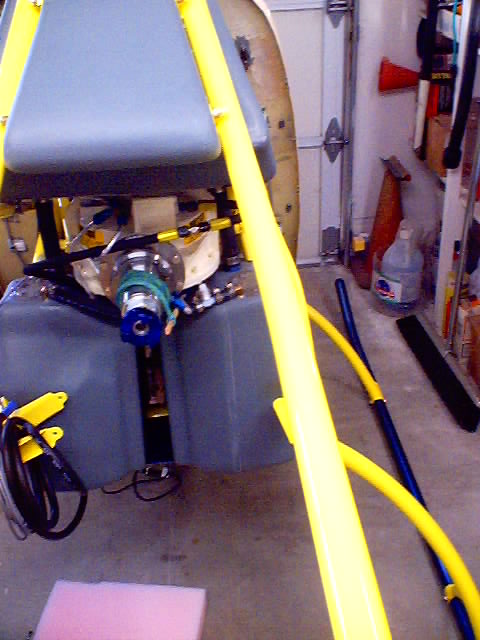
Following the same line of thinking I without letting them interfere with the cyclic. So I went to the hardware store and walked around and found some blue plastic conduit which I ran along the frame on both sides. I even ran a close-line- loop of wax-cord thru each so to run a wire I tape the end of the wire to the wax-cord and pull it through. (see in the Photos)
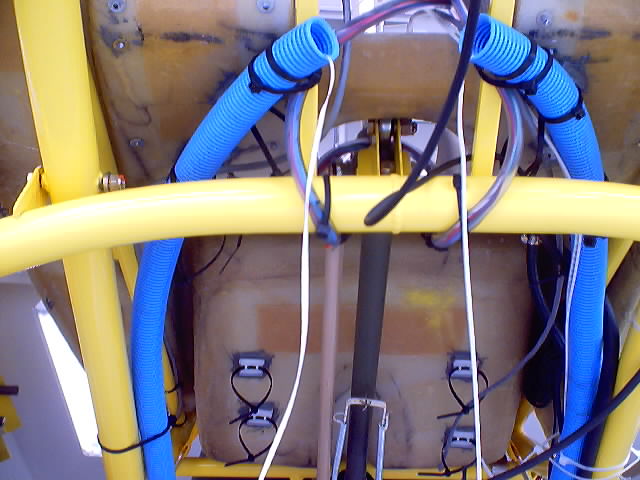
A few notes on electrical wiring in general. If one goes to an aircraft bone yard and looks through electrical panels of new and old planes, even war birds, you will note that most white plastic tie-wraps have yellowed, split, and/or fallen apart. But even in the 50+ year old war birds the wax-cord they used instead of tie-wraps is still intact. I use white tie-wraps to temporary hold things, as I have millions of them. And when it comes time to make it real I pull out the bolt of wax-cord and tie the bundles tight and cut off the white tie-wraps. In the places where a tie-wrap does work best I use Black ones as they are the only ones with UV protection in them to last a bit longer, and I plan on checking them often as I fly my HeliCycle for the next 20 years. If you are real, real cheap (Mr. Dave) one can get by with dental floss. With the wax-cord use a clove hitch knot: http://www.miamisailing.org/knots/clovehitch.htm Then finish off with a double looped square knot, and don't cut the ends too short. Another tip I learned for screws and nuts used for the instruments and on the panel, cover the end of the screws with a Hot-glue gun. The nuts can't vibrate off the screws, but if you do need to remove them, you can pull the glue off in a single clump with needle nose pliers.
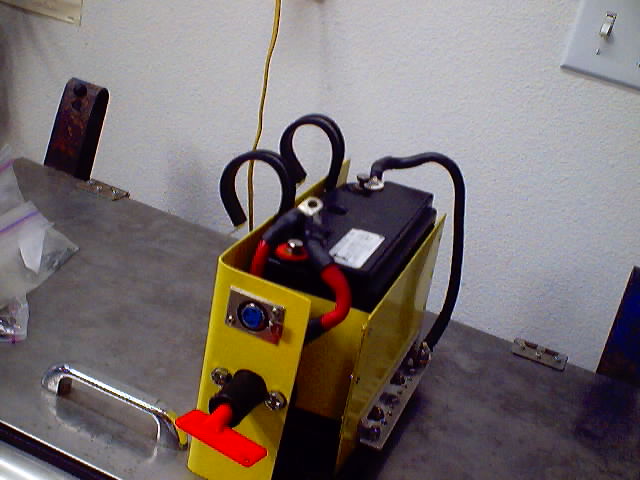
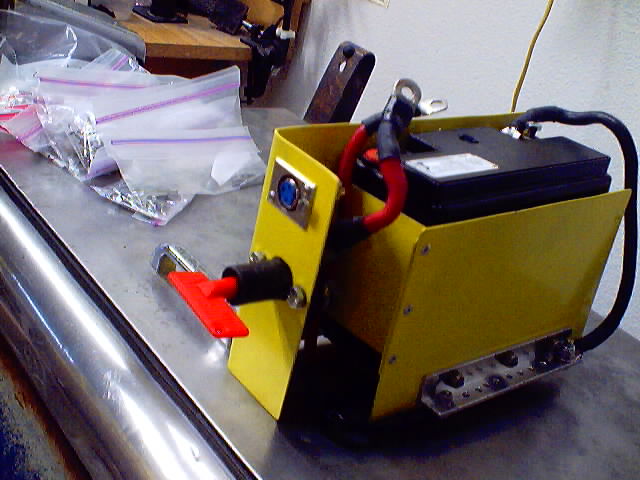
Power to start the Turbine
To start this beast you need a Battery. Mr. Mike and I both found this guy, Eric at the same time http://surplusev.com/ He is in the Irvine area of CA. He has what appears may be a relabeled version of the hawker genisis G13EP. Now Aircraft Spruce has them for $127.95 plus shipping of around $10.00 or here at $60.00 for two which includes shipping! I modified the battery box to hold my battery good and tight, a GND bus bar running along the back bottom, the aux. battery connector on the bottom, and the main PWR switch toward the front, along with a plug above it for a solar panel I have on the roof of my hangar to keep the battery 100% charged up. You can see the two Adell clamps that will attach it to the frame right above the starter. For the Aux. Battery connector, I looked and looked and found this one I think is perfect! You have to buy two at $9.21 each but they come with the pins (I got the Gray for #6 wire rated 120 Amps) I am going to bolt (there are holes and captive nut areas built into the part) one to the bottom of my Battery box which for my manly 199.63 Lbs body hangs right above the starter where it should. I even got some super flexible black and red #6 cable also from McMaster-Carr. Go to: http://www.mcmaster.com/ and type in 7043K22 in the white, top left. Then touch "catalog page" right below. For the battery cable type 6948K712 then hit "catalog page". McMaster Carr has EVERYthing you could ever want (catalog is hard to get and 4 inches thick (I have one at work)) prices are GREAT, they ship as fast as AirCraft Spruce, they have NO minimum, take all credit cards, you can buy on line, and they charge you only exact shipping charges! I got the 2 connectors 15 ft of blk and 15 ft of red #6 cable, a box of stainless hose clamps, a 1 inch hole cutter, a 3/4' hole cutter; shipping was only $4.25 and I got the stuff in 2 days!
It takes quite a bit of power to start spinning the Turbine up, so when you hit the start switch the voltage drops like a rock to maybe 8.5V for a second or two. What this will do is blank out your "Red Lion" digital Turbine tach. When the red Lion powers up it goes thru a second or two of self test. You want to know right away when you hit 17,000 RPM as you have to turn the starter off, so I decided to add a "Beer Can" Capacitor. They are call that because they are about the same size. These are most often used in cars with loud thumping music, where the owners go to the local stereo place and pay $50.oo -$80.oo for these caps and more to have someone install them. Well I found a place where we can get these caps for 1/10 the the price. You need to know two important things about these caps. Our system is a 12V system and when our alternator is charging the system the voltage will be around 13.2V and can spike at 14V plus volts. Now these type caps are very sensitive to over voltage, so pay attention to the voltage rating and make sure you get one rated at over 14V, in the 15V to 25V range is good. The other thing to remember is these are VERY polarity sensitive, the (+) side MUST go to the + side of your 12V wiring and the (-) side to the GND side of your system, if hooked up backwards these caps will explode like a very large firecracker! A good value range is 22,000uF to 48,000uF. Here is the link for the "computer grade" caps, notice there are over 84 different ones and they list the diameters and heights, also remember you have to mount the caps but all it takes is a strip of junk aluminum wrapped around the can and screwed to the pod wall.
Cable Heat Protection
Considering the heat that
will be coming out of that Turbine, and what it can do to wires
that go running past and above it, I decided to find some
protection. I did a little searching and found
some interesting aids. In several of the catalogs (page 150
of Wicks Aircraft Supply just to pick one) ( http://www.wicksaircraft.com/catalog/product_cat.php/subid=2191/index.html
). There is Fire Sleeve at about
$8.00 per foot! depending on diameter (see below in middle). But then I was placing an order for some
auto parts I needed for my new Ranger truck in J.C. Whitney, and
while looking thru the catalog found some fiberglass heat
sleeving that is not only rated for 1,200'F, comes in colors, but
is relatively inexpensive ($18.95 for 50 feet)!. I got some
yellow and some blue as those are my colors: 
http://www.jcwhitney.com/SearchCatContainer.jhtml?_requestid=111064
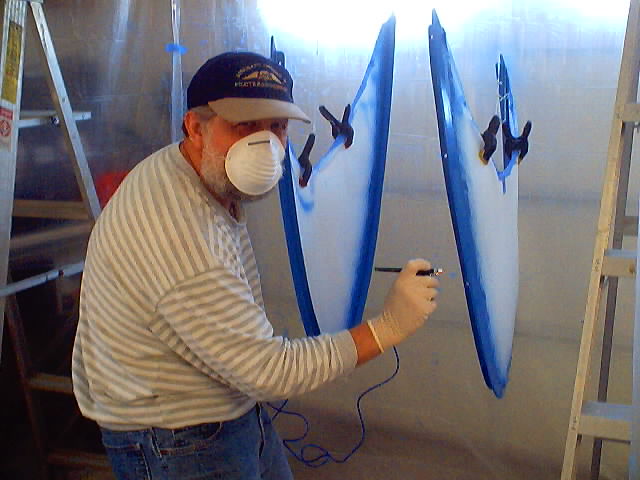
Speaking of my colors, Painting
I consider my self fairly handy with tools and projects, but two things always give me problems, plumbing and painting. So when it came time to put color on my bird, I knew what I wanted but I also knew I would screw it up if I did it. I went over by the local airport in San Luis Obispo and found a painter a few blocks away called Progressive Auto Art, owner Mr. Jack Foster. As you could see from the pictures above I had ordered the frame from BJ powder coated RAL 1018, Zinc yellow. For the seat pan and the instrument pod, I knew they would be in the sun all the time so I decided to do them in a lighter color. I got a light tan boat top-coat fiberglass paint. Well I tried to paint the pod and I was getting runs right away, that is when I decided to have Mr. Jack paint it all for sure. I have a collection of 32 Hawaiian shirts and my hangar is 2,000 feet from the Pacific Ocean, now I have not been to Hawaii yet but in my mind I pictured this bird as a bright yellow and Ocean blue Hawaiian print. I took some color samples to Mr. Jack and we talked about what paint to use, I also went on line and asked over on the RotoWay Forum what those guys had used and had good luck with. We decided on a self etching Epoxy primer on all the metal, followed by two coats of a PPG two stage Urethane Acrylic with "flex/hardener" on both the metal and fiberglass. I worked with stencils on scraps for days to figure out how to do the Hibiscus flowers, then I found on-line (where else) I guy selling "7 year" vinyl transfers. These are the kind of things they put on race cars and he did yellow Hibiscus flowers too. {Update as of 10/10/04 I have removed the yellow Hibiscuc flowers as they were starting to look tatty, so the ship is just blue and yellow now} I then got on-line to a fabric store in Hawaii and ordered some yellow/blue Hawaiian print material so my wonderful Miss Fran could sew the seat covers and blade covers (a lot of moisture at the Ocean during the winter).
Right Side  Tail
Tail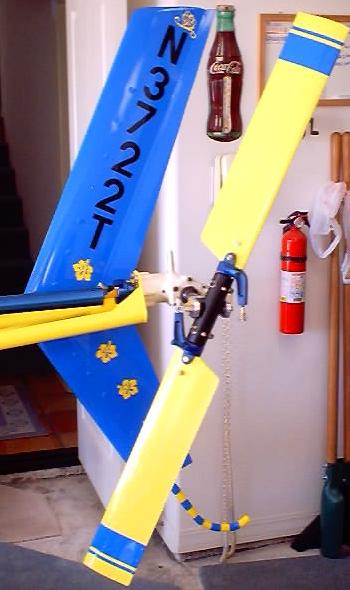
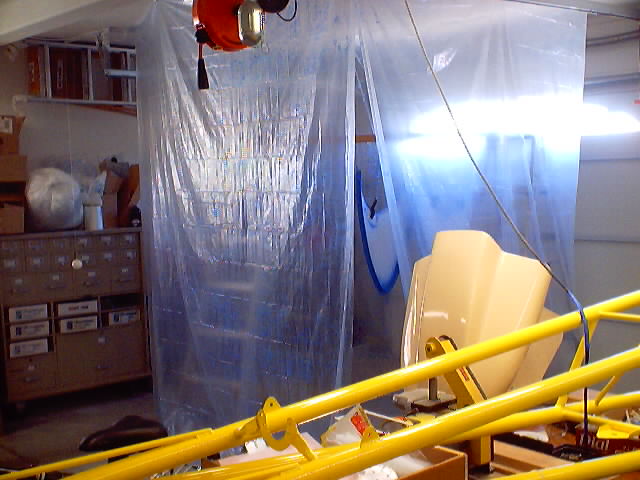
I did some of the painting of the doors, and a bunch of the small plates and parts. What I did wass got two of those butt cheap. ultra thin plastic drop cloths. They are 9' x 12' so using two, with the 9' part hanging from the cealing, you can make a spray booth 6 foot square by thumb tacking the plastic up. Light gets in (but be aware that the fumes stay in).
Fuel Tanks
The fuel system has been something that has had me worried since I got the kit. It consists of three tanks (a 4th one that goes directly behind the seat is on order from Eagle R&D and will be coming in Nov.) that group around the transmission (Center of gravity) you have to drill holes in them to "screw" them to the frame, brackets, and each other, and then plumb them all together. Like I said else where here, I am not that good with plumbing, and any leak in the fuel system is not expectable, so I have been putting it off till now. Well I watched the video on the fuel system like 5 times, and I followed the instructions very carefully. After you locate and drill for the 14 custom bolts, you then have to thread them thru the holes from the inside of the tanks. You do this through the large opening that can be used for a capacitance type fuel gauge or just covered up, either way it has to be sealed both fuel and pressure tight. I am using a fuel flow computer that has a sensor in the fuel line between the filter and the pump and measures the rate and quantity of fuel as it goes by. Eagle R&D sends a tube of Tank Repair to use in sealing these hole covers and their 10 screws. Like I said plumbing and I don't get along so I decided to go for insurance, I located 1422-B-2-S Pro-Seal on line and at AirCraft Spruce which is a two part sealant used by companies like Lear Jet for sealing Jet-A tanks and pressurized cabins. After you install all the special bolts, fittings, and seal the tanks BJ highly recommends you test for leaks with fuel before installing the tanks, because once they are installed it would be a major pain in the ass of time and effort if they leaked. I really took my time drilling, threading the bolts, glue setting the fittings, and sealing the cover plates, then I got a few gallons of Diesel and put it in each of the tanks, shook them around and let them set. Praise the Lord, NO LEAKS! Now came the tricky part of installing the tanks to the frame. Like I said, "you thread the 14 custom bolts from the inside of the tanks", now the tanks are sealed and you must remove the nuts from the bolts to install the tanks to the frame. For safety I had used some monofilament fishing line thru the hole in the end of the bolts just in case they got pushed back into the tank I could pull them out again. As I installed the first bolt it was a tight fit and the fishing line got cut off and the bolt was all but a "C" hair pushed back into the tank. This sent me paranoid so I got out my bolt of flat, waxed, lacing cord and replaced all the "safety" fishing line with it. I then installed the tanks with no problems, just make sure you lube the large fuel lines and slip all the hose clamps on in an orientation so that the clamp nut is accessible, it all is a tight fit, but they are now done and tested with no leaks.
{Bit of a follow up here, the tanks have been changed a bit, and some of the other guys on the Helicycle Builders Forum have come up with good ideas to prevent leaks. I have also found out that the material these tanks are made of is one substance that Pro-Seal does not like to stick to very well. So at this point I would NOT recomend using it}
 .
. 
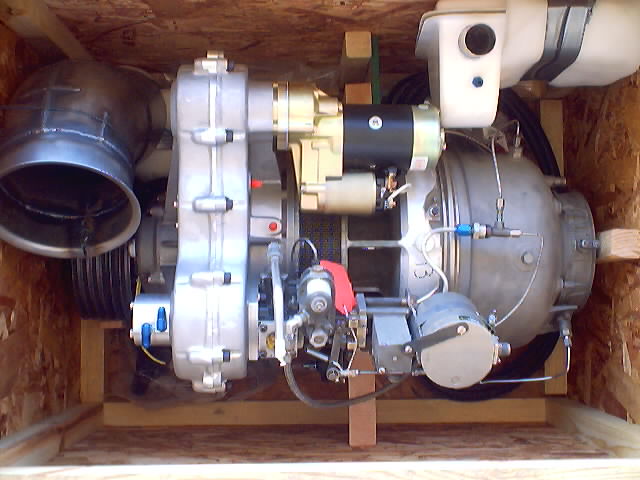
Turbine-in-a-Box
BJ did not like the size and weight of the transmission that came on the Turbine, so BJ being BJ he just did an entire new casting and used the existing gears and adding two scavenger pumps to spray all the gears (the original transmission was a splash only system) oh, and in the process he removed 48 Lbs. You can get more details and see some pictures "HERE". The Turbine just got delivered!!! on 8/15/03, I now have everything I need to finish "da plane"!
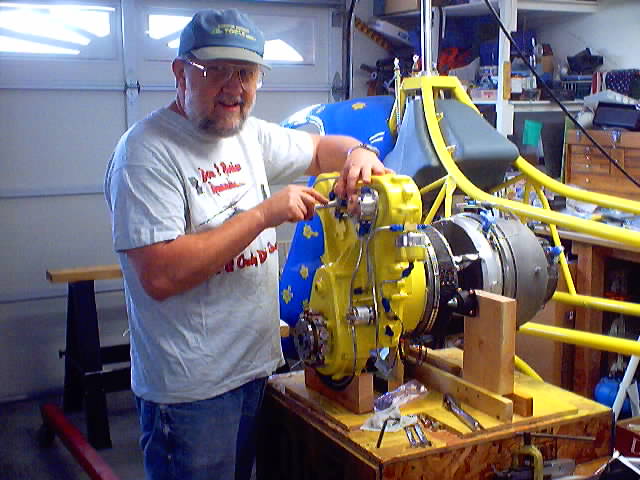
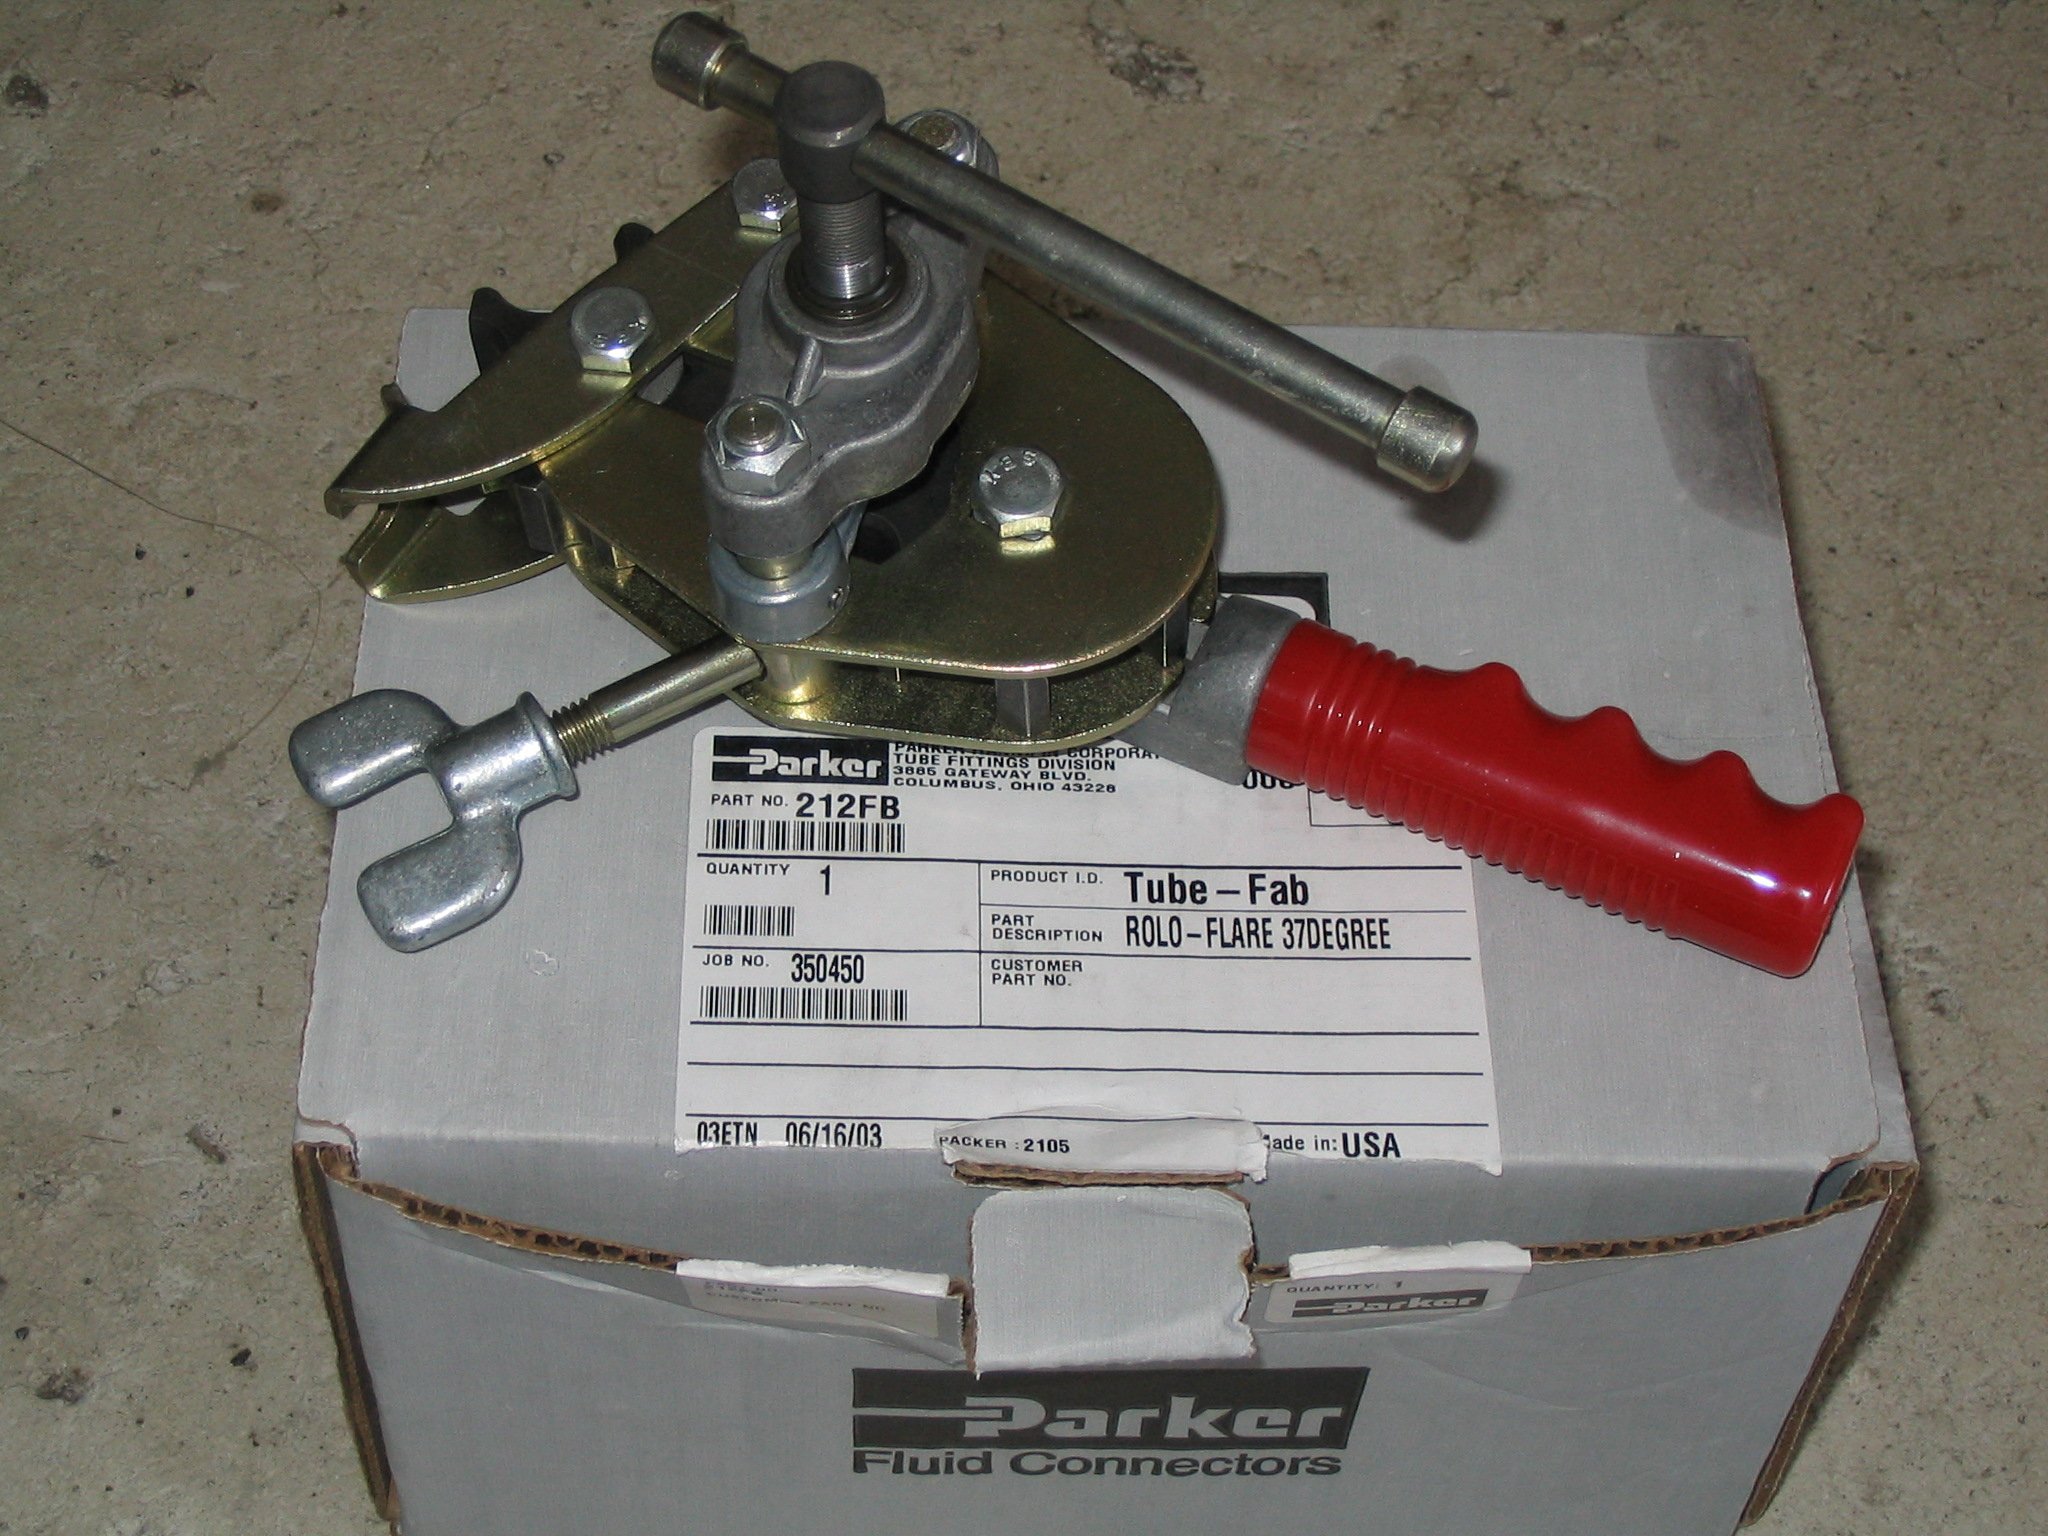
First thing you have to do is plumb the Turbine with 14 Aluminum tubes which you have to form to fit and then do a 37' flare on the ends. These are for the two scavenger pumps which BJ had added to the new Transmission (they can be seen by my hands). The very first thing you will need is an aircraft type flare tool to make all the tube fittings on the Turbine. A normal automotive flare tool does a 45' flare, an aircraft flare tool does a 37' flare. You MUST use the 37' flare tool! The part number for the tool most of us got is 212-FB from Rolo-Flair. It is VERY easy to use and makes a perfect flare every time. Aircraft Spruce cares it. You can use this same tool on all the Aluminum tubes on the Transmission too.
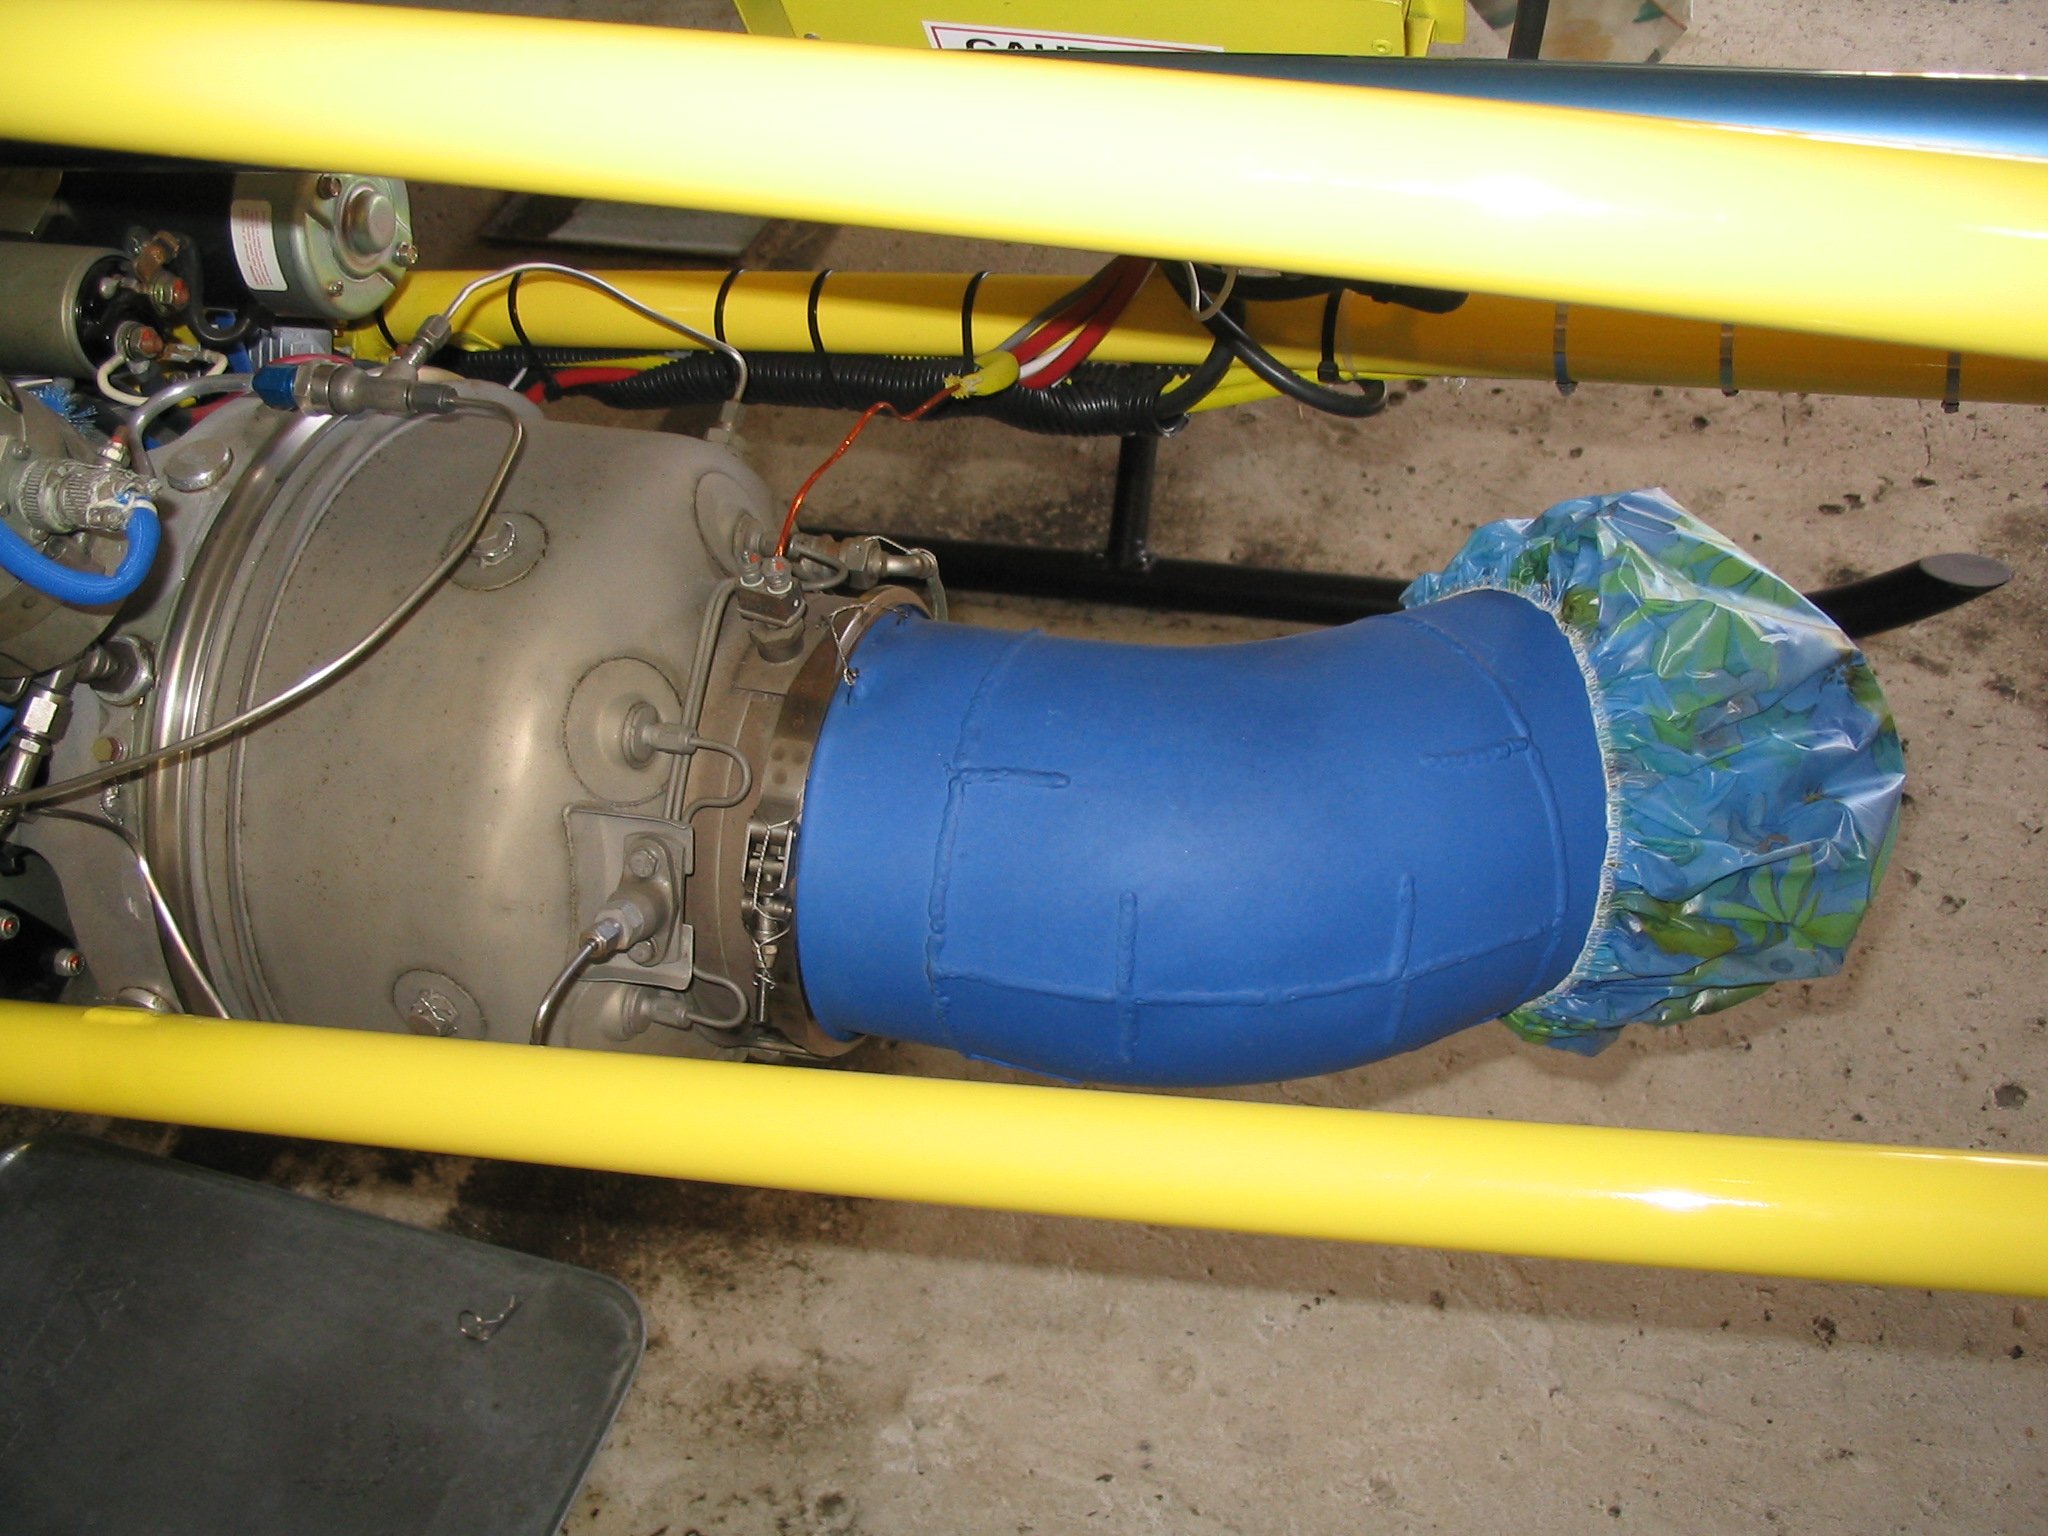
You can also see in the picture that I have cleaned the transmission and used 600' yellow engine block heat paint on it. I used 1,200' flat blue heat paint on the turbine exaust pipe that I got at the local Auto parts store. When you do your preflight check you reach in to feel the play in the Turbine blade bearing, well after having my ship sit around for a very windy week I reached in the exaust to check the play and felt something get mashed between my knuckles. I pulled my hand out and it was a large black widow spider. My wife, Miss Fran came up with the idea of using a shower cap over the exaust, just remember to let the pipe cool before you put it on.
 .
.
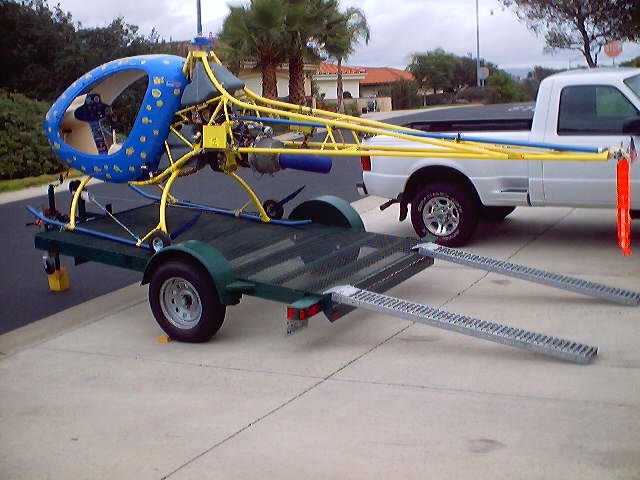
Now I have to get her to the AirPort
If you are building in your garage there is something to consider, how do you get her out, and how do you get her to the Airport??? Well as soon as I installed the transmission (for the first time) I measured if she could clear the garage door. My measurements kept showing me I had plenty of room (I needed 82" and my door height was 82.25") if you call 1/4 of an inch plenty of room. I had a roll of mylar left over from a drafting plotter so I placed sheets of it under the skids so I could drag her out of the garage with a whopping 3/16 of an inch clearance. My Airport is about 3 miles away, back when I had a gyroplane I got a trailer to transport it around. When I sold the gyroplane I kept the trailer so I had a means to get the "Hawaiian" to the Airport.
Pick an "N" number, any number
As your fly the friendly skys and come in contact with control towers and other controllers over the radio it is proper procedure to give your full "N-number" on the first call (3722T (three seven two two Tango) for me) and the just the last three on all calls to the same control after that (22T (Two Two Tango) for me). That is why I waited for a year to get "Two-To-Tango". Yes, you can pick what numbers you want to have, but it will cost you a whopping $10.oo. You do not need to have an airplane to get a number, when you pay the money you are just reserving the number for a year. First you need to know what format the "N-number" can be: http://registry.faa.gov/nnumber.asp OK so now you got some good ideas only thing someone may already have that. So you go here and check, you can now check the actual FAA data base to see if an "N" number is taken, reserved, or free, go to: http://162.58.35.241/acdatabase/acmain.htm Click on "N-Number" type in a number (with out the "N") and the information will be displayed. Now you can find out who owns that plane you like. Once you decided on a number and find out it is free you go here: http://registry.faa.gov/aircraft.asp#SpecialN-Number When you get the number it is yours for 1 year, you can either register it to an aircraft or if you are not done with your build pay another $10.oo on line and renew it for another year.
The Dreaded FAA
You may be building a plane the way you want, but if you ever intend to fly it you have to deal with the Federal Government, the FAA to be exact. The exact details are found with examples of how the forms should be filled out at: http://home.hiwaay.net/~sbuc/tvrvbg/ac20-27e.pdf You should do this part about 3 months before you think you will finish the plane. I will take Oklahoma about a month to get back to you with the "White Card". The paper work is in two parts, you fill out a first set of four forms (8050-1, 8050-2, 8050-88, 8130-12) along with $5.oo and send them off to Oklahoma City to get the "White Card", FAA form 8050-3 Which is a white postcard (Certificate of Aircraft Registration) just like the registration slip in your car. About a month before you plan on being done you should contact your local FAA office by phone or E-mail and explain your situation and timetable and send in the second set of paper work which is forms(8130-6, 8130-12) along with photos of the aircraft, and a copy of the weight and balance.
For years I have heard people tell horror stories about the FAA. About how they were only out to stop people from flying. When I started building I heard more stories about FAA inspectors, how nit picky and pompous they were. When my build was getting close to the end and it was time to start doing my FAA paperwork, everyone warned me to pay a DAR to do the inspection and stay far away from the FAA. I had been going to the Flight Safety Seminars held every other month in my area, they have been put on by the local Safety Officer Mr. Pat Duncan. I decided to talk to him about getting an inspection, actually thinking he might know some cheap DARs. We talked and E-mailed on the subject. He was suggesting that the FAA was really not as harsh as I had heard. My respect for him helped me decide to try the FAA. He was kind enough to give me a name to contact at my local FAA center, San Jose, a Mr. John Howard. He suggested I contact him with a letter explaining my progress and intentions. I did just that in an E-mail and included the URL for this web site, I did that on a Sunday night. I was very surprised to get an E-mail reply first thing Monday morning, and not only that but he had read my web site and gave me several compliments. It turns out he is the Assistant Manager and he assigned Inspector Mike Schaadt to my case. Mr. Mike and I communicated by E-mail and a few phone calls, I sent him all the necessary paperwork and we set up a date, Dec. 9th, when he was going to be down in my area for him to inspect Two-Two-Tango. The 9th came and I was nervous as could be, I had worked on this ship for over two years and I was about to meet a man that for a million reasons could tell me I could not fly her. I got to Oceano airport a few minutes early only to find Mr. Mike had arrived before me. He was inside the security gates having coffee with a few of the regulars which as it turns out he knows. We met and went down to my hangar. After exchanging pleasantries Mr. Mike pulled out several check lists and proceeded to look over Two-to-Tango. OK, so I am not perfect, and Mr. Mike found a few things I needed to do, nothing major but simple overlooked things like: I forgot to label "ON" and "OFF" on the fuel valve, and to label the switches and buttons on the cyclic control. We discussed the Operating Limitations and their conditions, and I signed the different forms he brought. Mr. Mike then gave me the "PINK CARD", the Special Airworthiness Certificate to be displayed in the HeliCycle with the Certificate of Aircraft Registration.
Painless, no blood, the whole thing took less than two hours. At no time did I sense that Mr. Mike was there to do anything but help be reach my goal of flying this helicopter soon and safely. I have been told that the FAA has a new saying, "We're from the FAA and we're here to help!" and you know what, I am beginning to believe it is true. I am sure that different FAA inspectors across the country might not be as kind and helpful as Mr. Mike was, as individuals vary, but you really should consider giving them a chance and not fear them.
SHE IS DONE !!!
Finally !!! Now its time to fly, well almost. The HeliCycle is a helicopter, and a helicopter has many rotating parts, rotating in different planes at different speeds. For your world to be smooooth takes careful balancing of the different rotating elements.
The Factory Checkout
I did a day by day report to the other builders on the Builders Forum during the 6 day checkout:
Check out day 1: Hiya Gents, Dang, old BJ worked me and Mr. Homer a 9 hour day, I never sat down! And that is with things going "very well, according to schedule" as BJ says. He makes the FAA check out a walk in the park. He comes to your site with all kinds of jigs and test fixtures, right now I am the test case for the test fixtures and procedures. Man oh man, some of the settings I thought were nuts on he checked and showed me were not so great, and some of the settings I thought needed attention he checked and said they measured up good. We fired the Turbine up at 2:30 today, that is after special priming of one line and suction of another to make sure the oil is doing its thing at the very first second of spooling up. The 1,200' paint on the tail pipe cook/cured in about 2 minutes, we ran her for about 5 minutes adjusting settings on the Gov. So far 3 other builders have shown up, some for the full week, and three others say they are coming. After working on this project for over 2 years now, it feels like we just did a months worth of work in 9 hours! BJ has fine tuned some of the settings and is putting them into his Check out book. This check out program is really a necessary part for a successful build, like I said, some things I thought did not even need checking turned out to need the most adjustment, you really can't check your own work like a trained person like BJ or Mr. Homer can. And the information that is past on during lunch and dinner, you can't buy and you get to ask all the questions you want to know about, or don't understand. Tom...
Check out Day 2: Hiya Gents, Morning started out 44' but warmed up to 74' in the afternoon. This was an 8 hour day with high speed balancing of the tail rotor (with out the main rotor on) using an electric sensor. I got to do the starts (three) today, for the first week you may want to not chew gum at the same time. Because old Mr. Tom forgot to make sure the blades were slid out 100% so we had to totally re-do the static balancing of the blades and grind a bit off of one of the weights. It can not be stressed enough how the wood end plugs MUST fit good and snug so when the screws are tighten down the blade is NOT pushed or deformed in ANY way (we had to add thin Delrin spacers to mine). And that all the screws fit in the holes PERFECTLY flush (not close, FLUSH). If you haven't take your airspeed indicator out and have some one drive you down the highway while you hold a Pitot tube out the car window (maybe even have your GPS going and calibrate your airspeed indicator at around 65 (autorotation speed)). By the bye you need 5 sets of all your tools, one set to leave in each corner of the hangar and one to use. We have BJ, Mr. Homer, Mr. Mike Romeo, Mr. Bob Briggs, Mr. Bob Bushman, and me Tom all looking for the same two 7/16ths that are in some ones back pocket that just went to the bathroom at the other end of the field, or in a rag on the seat in the helicopter. Just have every tool you have ever owned ready and available. So far four starts, no leaks, praise the Lord. The elastomeric bearings are now installed and the ship is wired with sensors so in the morning we can high speed balance the mains. Gosh I guess we then have to start flying her!!! Tom...
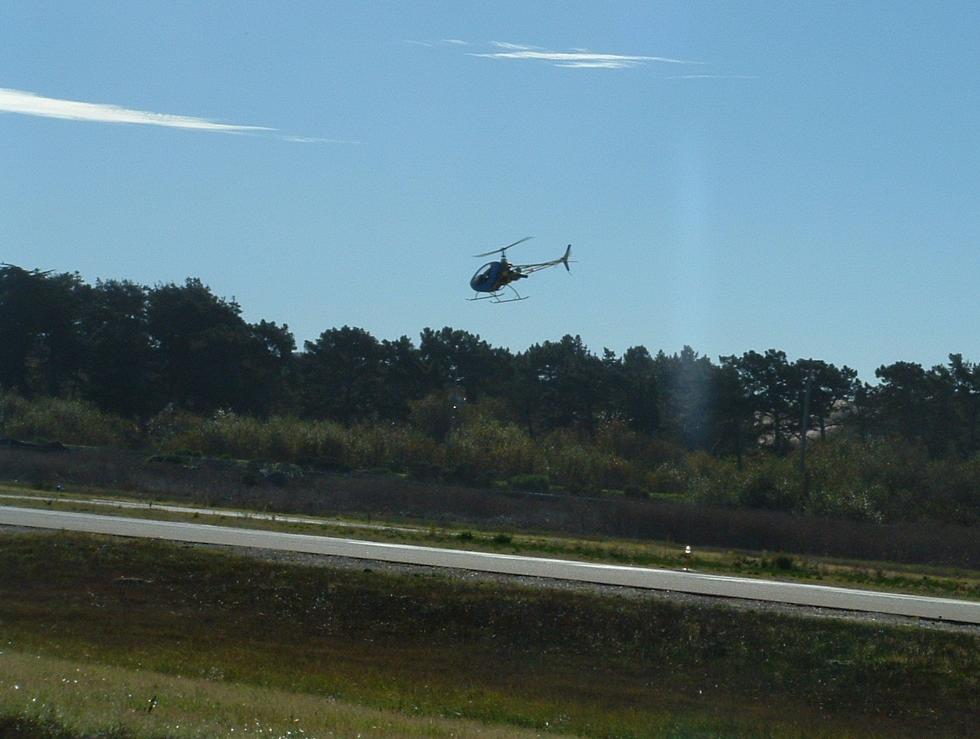
Check out Day 3: Hiya Gents, Well this morning 12/17/03 at 10:39 the HeliCycle Helicopter N3722T that I have been working on for over two years had its first flight! At the controls was Mr. BJ. After three hours of fine tuning the balance of the main and tail rotors, Mr. BJ took her for a short 10 minute first flight after doing a few "Quick Stops". He came back and did an autorotation nice and smooth. He was raving on how smooth she flew, he said he had her up to 120 and she flew smooth through the whole range. Then we had to relocate the oil pressure sensor and do a capillary line to it, and I had to take a truck ride to get more Jet-A fuel from SLO airport to feed the beast. When I got back Mr BJ took her up late in the day for a run down the beach for a sunset flight. Tomorrow it is Mr. Homer's and my turn! I posted some pictures at: Files, Tom's Progress' 03 Check out. Tom...
Check out Day 4: Hiya Gents,
Last night over dinner we discussed the days events, what tweaks
and adjustments we would make in the morning and what the flight
plan would be. Then came breakfast, and we discussed it all
again. Weather continues to be cooperate with a 72' and steady
light wind off the ocean. We went to the airport and worked on
the ship making the tweaks and adjustments we discussed to fine
tune her. Then it was time to tie old Mr. Tom down in the cockpit
for his first flight. Well that is a bit of a misnomer. What I
really did was hover all around the tarmac. Or as Mr. Homer put
it, "go out there and Hoover the dust off the tarmac".
I did 3 flights under BJ's radio controlled control. The wind
picked up quite a bit so then I had to run off to get more fuel.
Mr. Hap Miller and Mr. Mike Fontaine flew down for the day to
check out the check out. Some have asked who all is in the
picture: 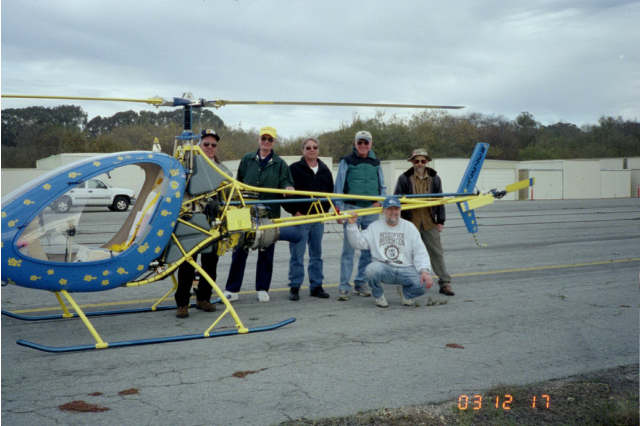
The handsome guy in the foreground is Mr. Tom, behind two-to-Tango, from left to right is: Mr. Homer Bell, Mr. BJ, Mr. Mike Romeo, Mr. Bob Bushman, and Mr. Bob Briggs. My thanks to all of them especially Mr. Homer and Mr. Mike for their turning of wrenches, hiding of wrenches, and finding of wrenches. More flying in the morning, Tom...
Check out Day 5: Hiya Gents, Well I got a few hours of flying back and forth, up and down the tarmac, doing quick stops with BJ on the radio "suggesting" improvements. We then ran into a power drop problem. We took the ship into the hangar and brain stormed on what might cause it. We striped off all the lines on the Turbine thinking fuel limiting in the fine spray nozzles but they all checked out OK. Next we looked at the fuel filter. We took her apart and cleaned the crud out of it. We think that may be it but rain came in off the ocean with strong winds so we will do a start first thing in the morning. You guys better have all tools available for the check outs as you NEVER know what problems may exists or come up. Tom...
Check out Day 6: Hiya Gents, The check out is over, the ship fly's and I fly! With 4 hours on her it turned out to be a belt tension problem, they had gone down to 26 Lbs, along with a trace of oil being blown on them. We re-tensioned them to 35 and cleaned them and everything is fine. Mr. Tom is a VERY happy camper! Super special THANK YOU to Mr. Homer, as he re-did a bunch of things on my ship I screwed up, showed me how to adjust settings, and it also gave me a chance to get to know him and I now consider him a good friend. Tom...
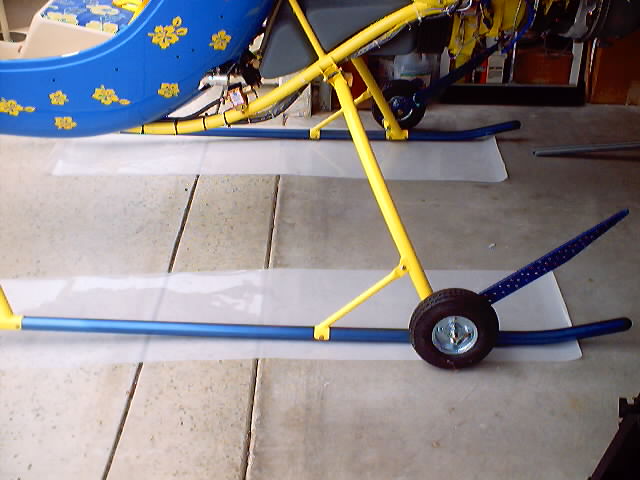
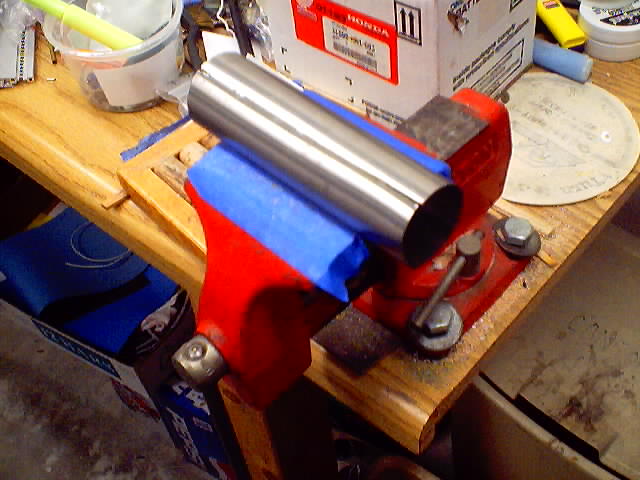
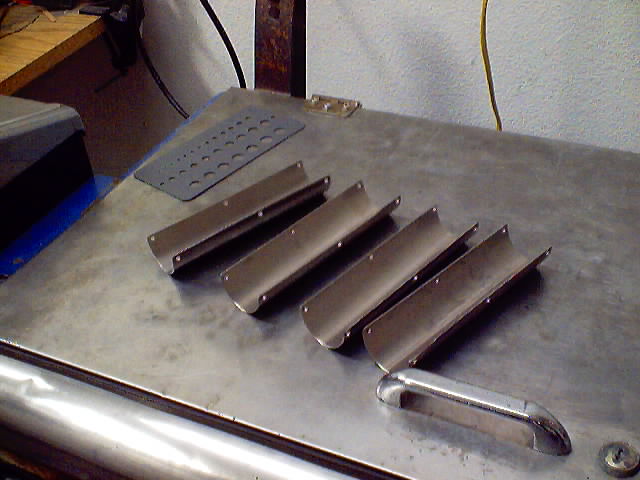
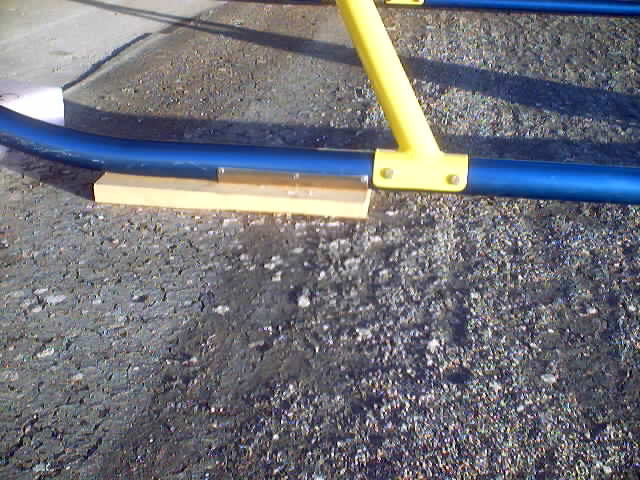
Baby needs new shoes
My small Airport is all blacktop, really old, rough blacktop. Oh sure we have lots of grass areas but in California we also have environmentalist groups which are really strong along the costal areas. Bottom line, we are not allowed to use the grass (little critters (they think)). I do all my flying off of this blacktop and just moving my ship in and out of the hangar I keep scraping the skids so my first addition to the Hawaiian is skid shoes. The skids are 1.5" OD so I got on Ebay and found a 12" piece of 3Al-2.5V Titanium tube, 1.75" OD with a .035" wall for $25.oo. Titanium has developed a mystique as a nightmare to machine, this is simply not the case. If you use new, sharp tools in good condition it is comparable to working stainless. Using a hacksaw I cut it into 4 equal pieces. Because the 1.68 ID of the Titanium is slightly larger than the 1.50" OD of skid tubes I had to compress the "C" of the pieces a bit in the vice. I had to do this very carefully as Titanium I have found out can only be bent so far before it will snap, think of it as very brittle. But it all bent easy enough and the shoes fit like a glove (well, you know what I mean). I then drilled 6 holes in each shoe to rivet them to the skids. You can see in the picture on the right how rough the blacktop is.
# ### WARNING ### #
A FUEL ADDITIVE MUST BE USED ! ! !
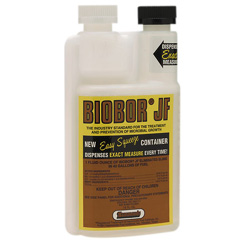
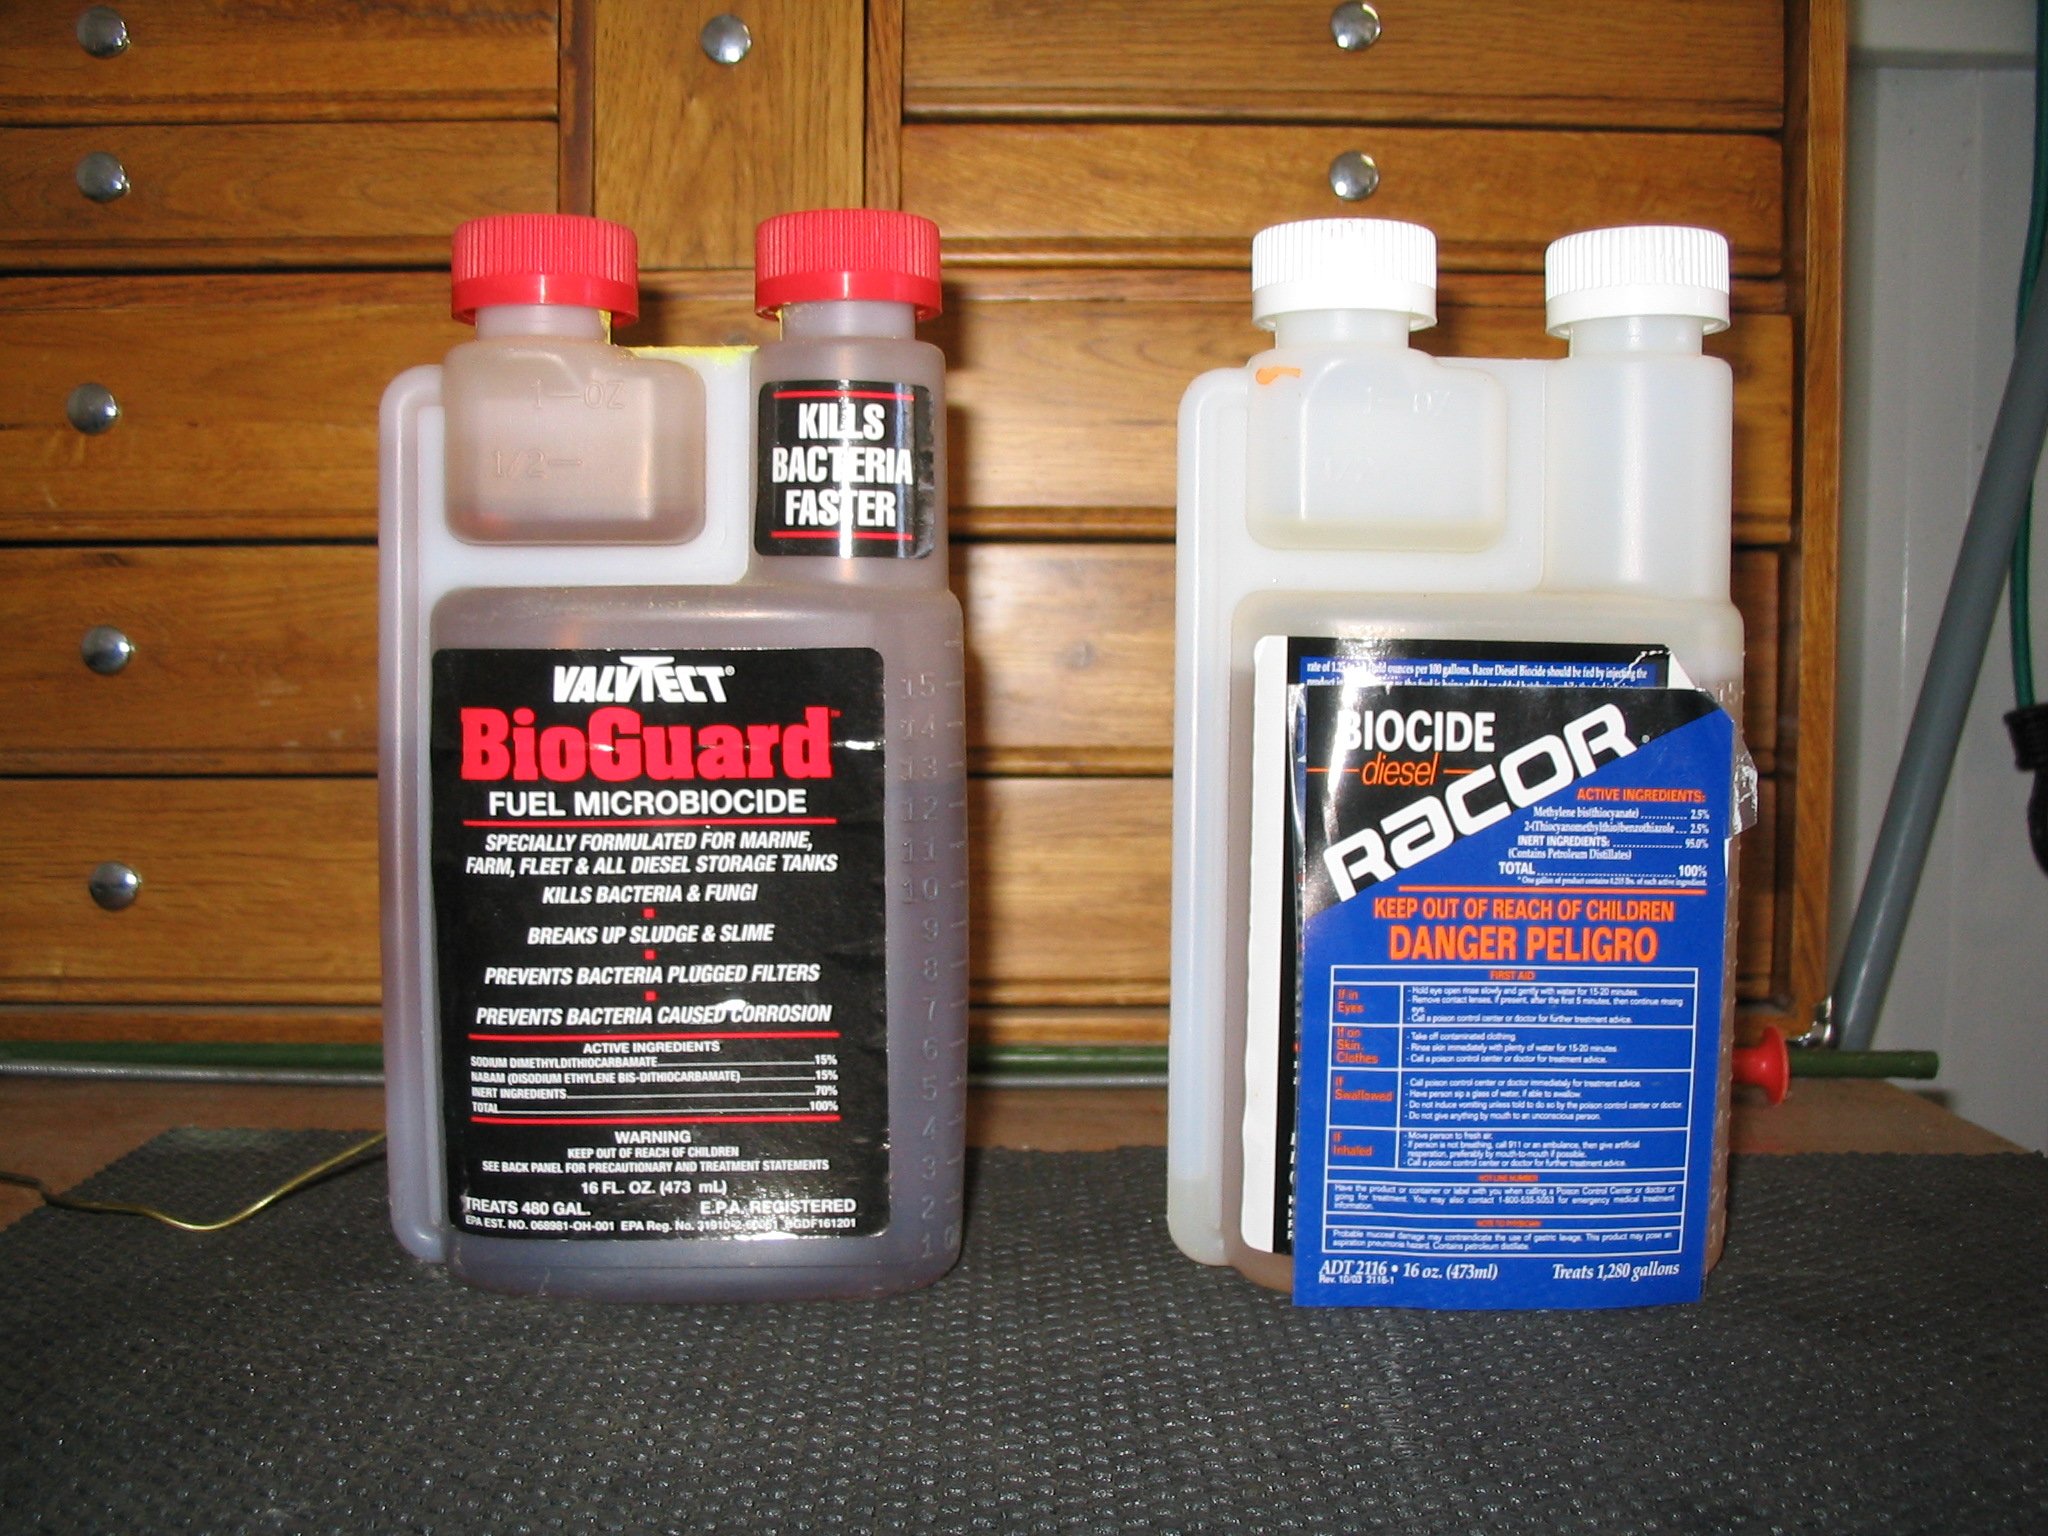
Back in February while I was talking to BJ, I told him that an old guy looking over my plane back in January mentioned how using a glass filter for "diesel" (Jet-A) is not a great idea as the sun light can get it growing if it sits too long, and he suggested I use a fungal anti growth additive. Because I am using my truck transfer tank and a storage barrel in the hangar I figured it can't hurt as I have fuel sitting around in these tanks that never gets used. I have been told by an airport refueler that the Prist stuff is to keep any water in the fuel from freezing at altitude, and is minimal at preventing fungal growth. Well BJ called me in April, he found his glass filter clogged with a clear, slimy, fungal growth and wanted to warn me and the others that were then flying. I reminded him of our discussion and that I had been using a fuel additive since January, he asked for info on them so I hard copied BJ the info. I found these three Anti - Fungals they are available at Boating and Marine shops. I bought mine from West Marine (800-262-8464) A large Marine supply company with 90 stores located all over the country and by phone mail order and on the Internet. With any of these you only use 2-3 drops per gallon. Biobor JR can treat 1,000 gallons at $20.00 but it is considered Hazardous material to UPS, but it is Mil Spec and I would rate it #1. Racor Biocide and BioGuard can each treat 1,000 gallons at $19.00 are water soluble, and not considered Hazardous material to UPS.
http://mastercatalog04.westmarine.com/0325.asp
http://www.heckels.com/product.asp?ProdID=114354&CtgID=12900
http://www.valvtect.com/products04.asp
 .
.
Just because I like to work on her, for shits and grins, and general paranoia, I replaced my glass fuel filter and the "can" fuel filter in the Turbine fuel pump with new replacements I had. I then inspected the two filters that I removed, the filter from the glass had a few minute gray plastic pieces, and nothing in the Turbine "can" filter which is located in the top of the Turbine fuel pump/controller. Both were clean of any slime or growth. I was happy to see this as I wondered because of not flying for three weeks with the wind conditions I had. It is to be noted that I have been using the BioGuard fuel additive in my stored Jet-A for a few months now. So now my paranoia is gone and with bone dry tanks it gave me a chance to fill them a gallon at a time to double check the gallon markings I did to my fuel sight tube.
Fuel Additive Update !!!
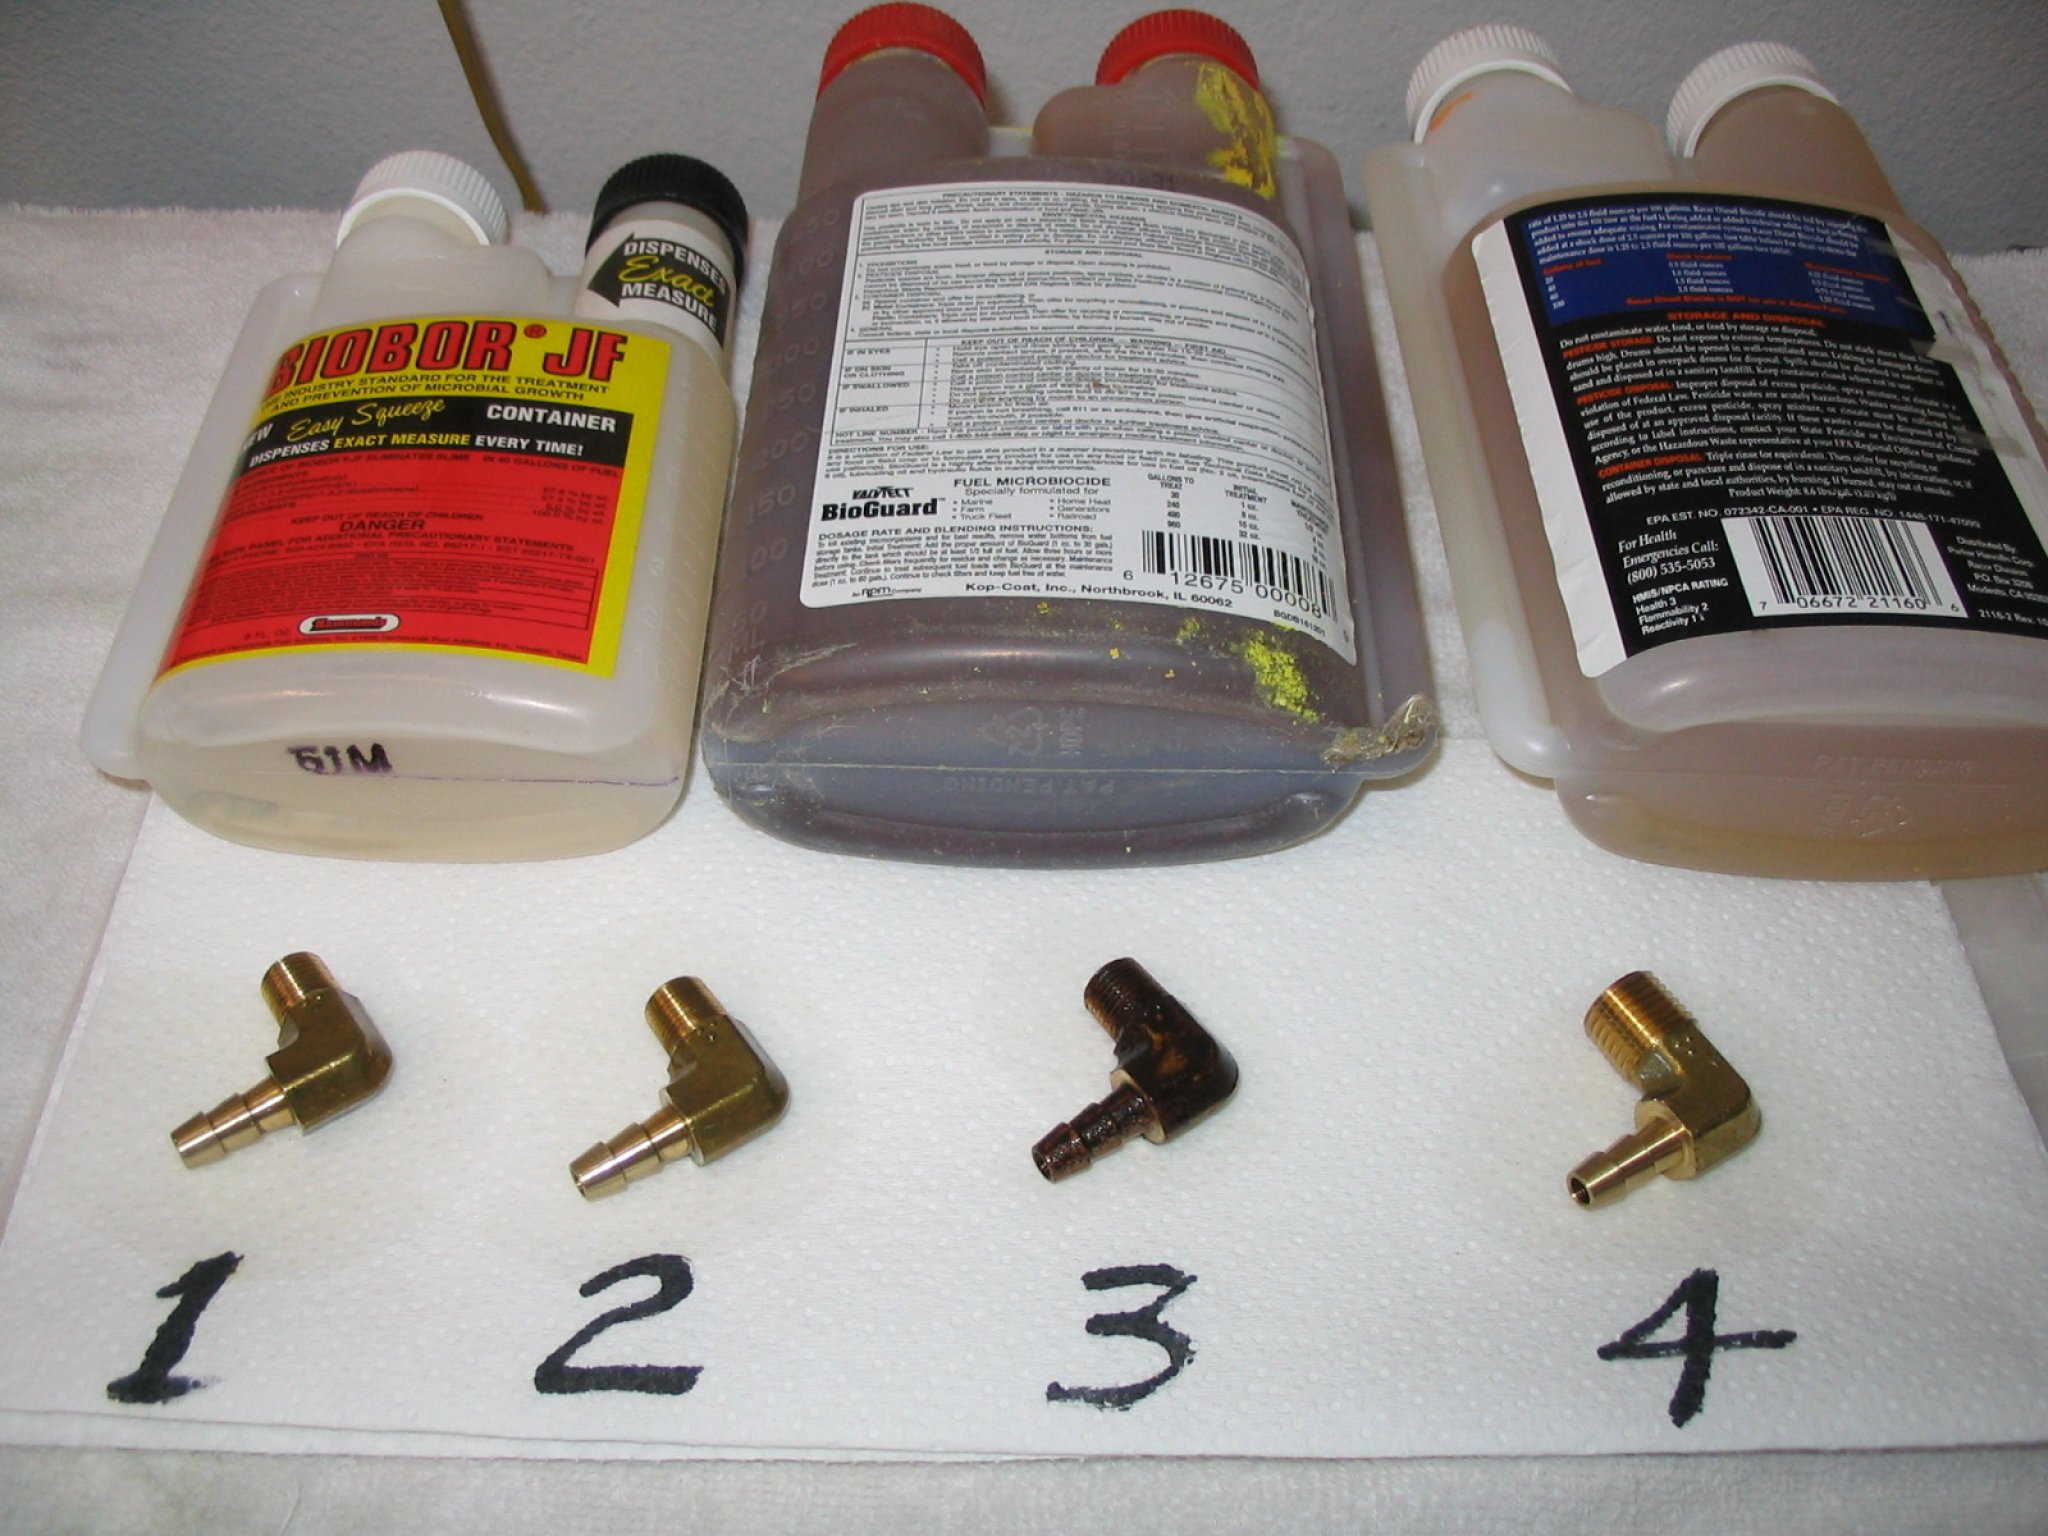
For the last few days I have been running a test on 4 fuel samples after a problem was reported by Bob one of the Helicycle builders:
#1. Jet-A fresh from the airport pump (control sample)
#2. Jet-A with Biobor-JF additive from Hammonds Co.
#3. Jet-A with BioGuard additive from Valvtect
#4. Jet-A with Diesel Biocide additive from Racor
I read the instructions on each (almost exactly the same on all) and like Mr. Bert said they have a "normal" dose for protection and a stronger "shock" dose for tanks already contaminated. The "normal" protection dose is 0.5 Oz per 40 gallons for Biobor and Diesel Biocide and 0.5 Oz per 30 gallons for BioGuard. The "shock" dose for each is double at 1 Oz per 40 gallons or 30 gallons respectively. I mixed up my batches as close as I could (these were Qt samples) to 1.5 times the "shock" dose. Swished them till the additive went into solution (BioGuard took around a minute while the others were fairly quick). I had some spare 1/4" brass fittings as I plumed most of my fuel system with 3/8" fittings, so I cleaned the barbed ends with a pad to remove any oxidative coating that might already have formed and added them to the samples. I swished the brass in the samples every few hours.
Results: The Biobor-JF and Diesel Biocide are both clear liquids while the BioGuard has the color of cola and imparts that color to the normally clear Jet-A. I am happy to report that after 3 days neither the Biobor-JF or Diesel Biocide did anything I can tell to the brass fitting. But the BioGuard started turning the brass fitting black in a matter of hours! In measuring out the additives I spilled a trace down the sides of the containers, and notice in the picture that the spilled BioGuard dried out and left a yellow powder that looks almost like raw sulfur from my old chem lab days. Bottom line, I would NOT recommend using the BioGuard additive, but I see NO problem using the Biobor-JF or the Diesel Biocide additives. Like Bert said, over dosing the fuel is not necessary and is NOT a good idea, it only takes a few drops per gallon. Please remember these are anti fungals, you should always wear the blue Nitrile gloves when working with the additives, or the fuel in general (it is hard to wash the smell off your hands).
I decided to change to a real Jet-A/Diesel filter
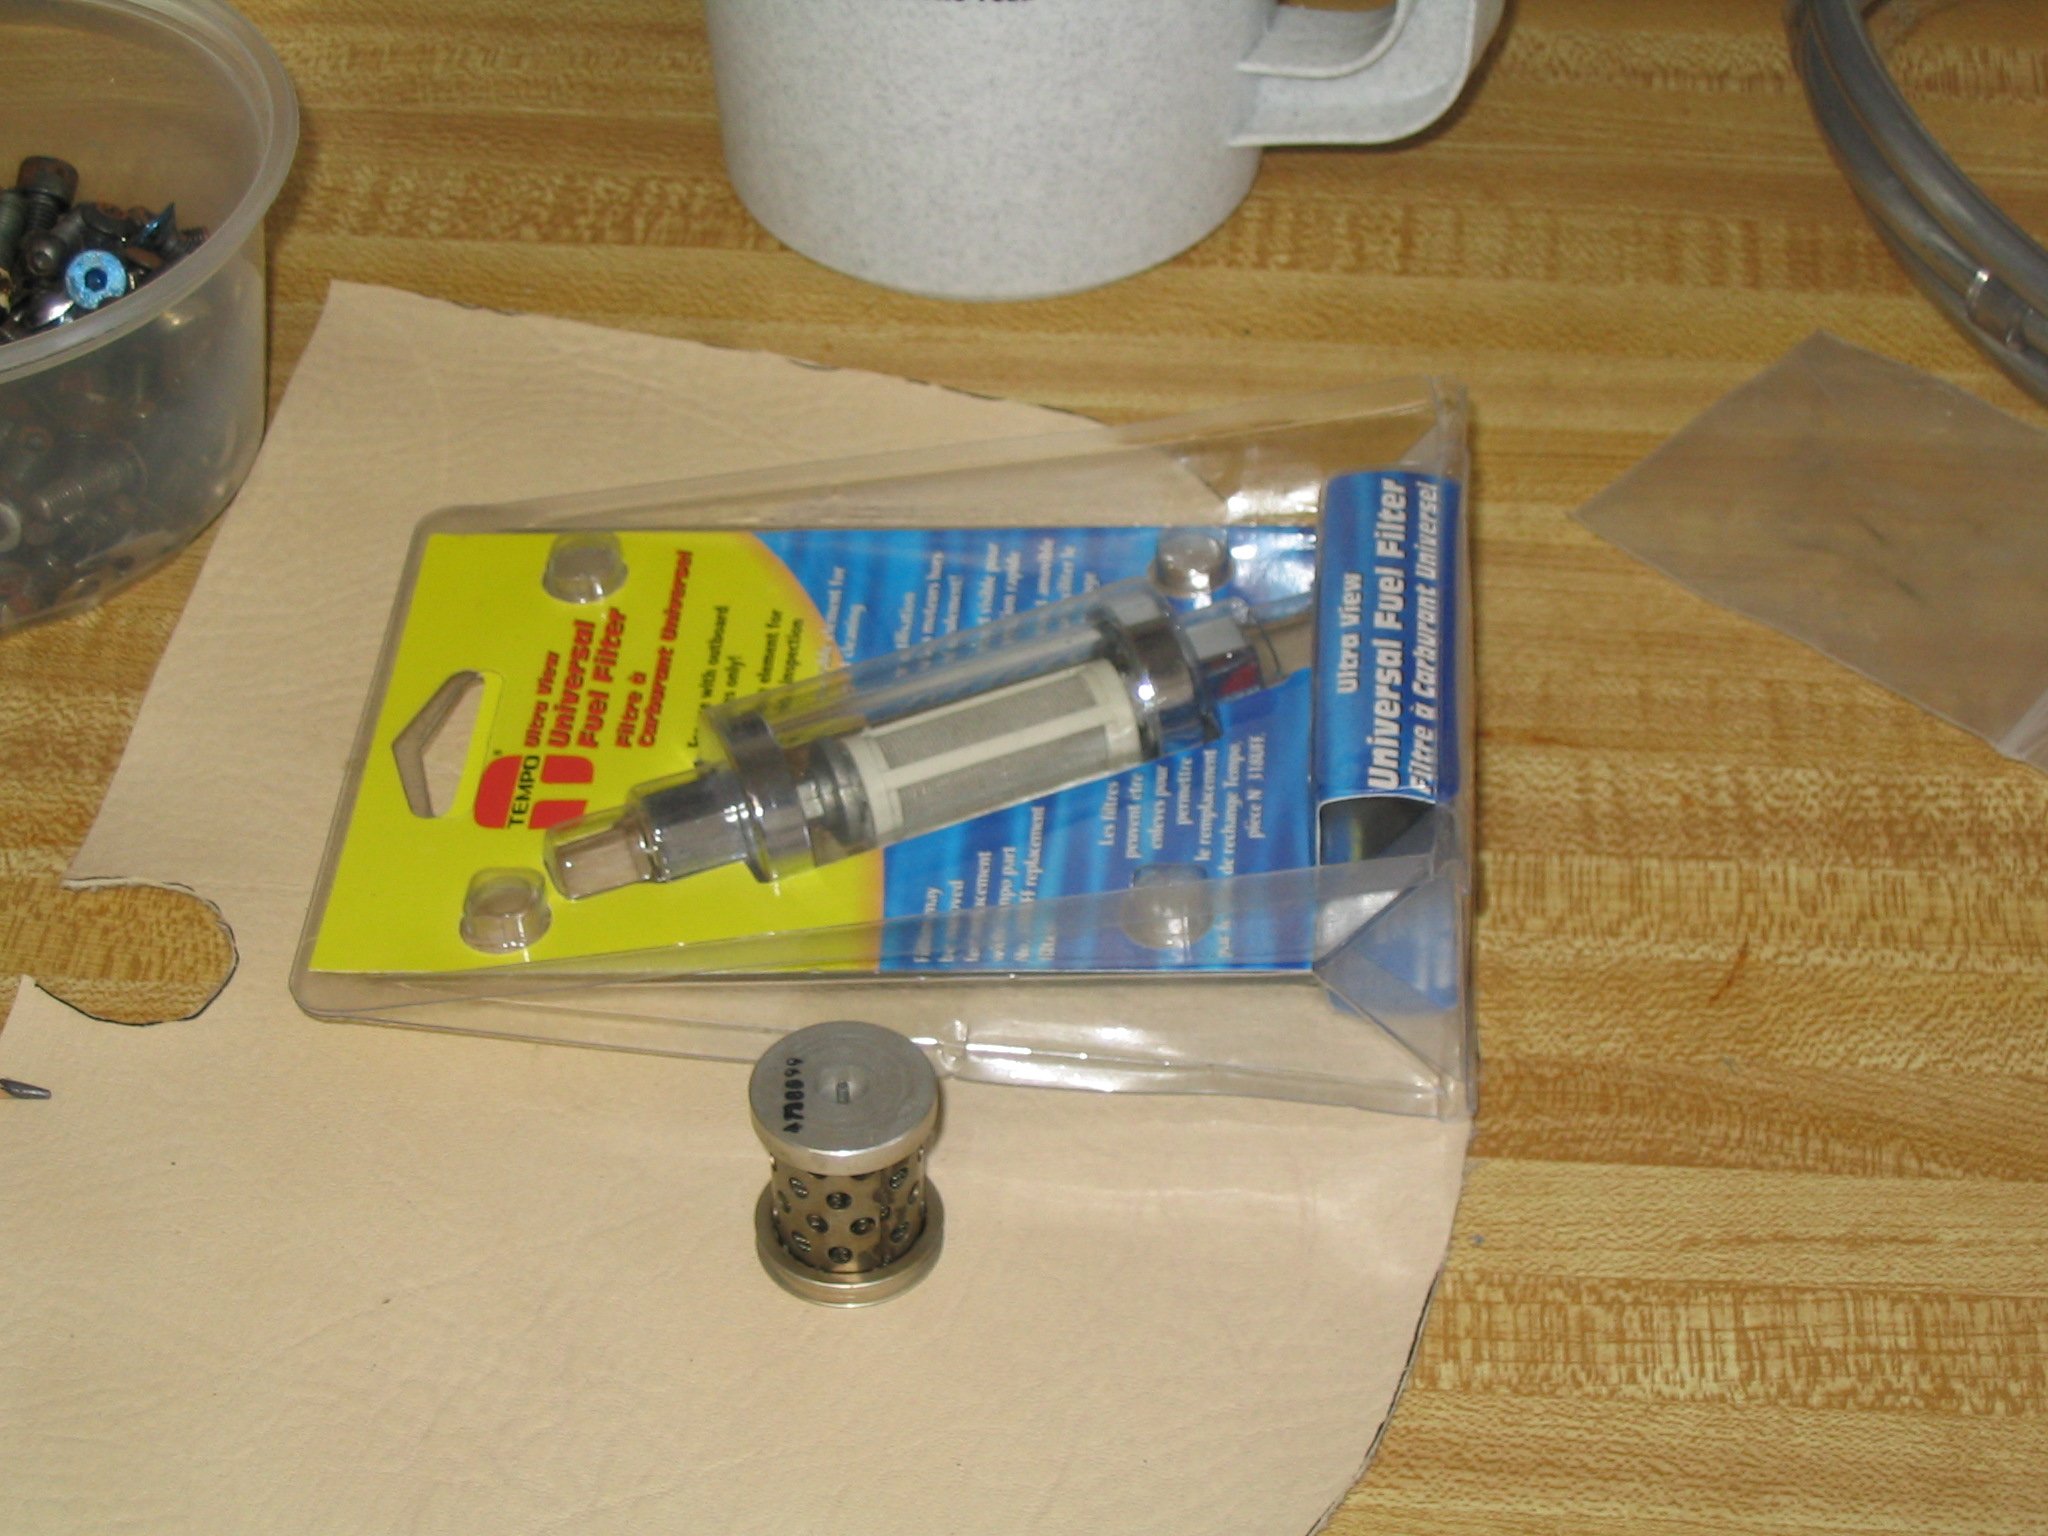
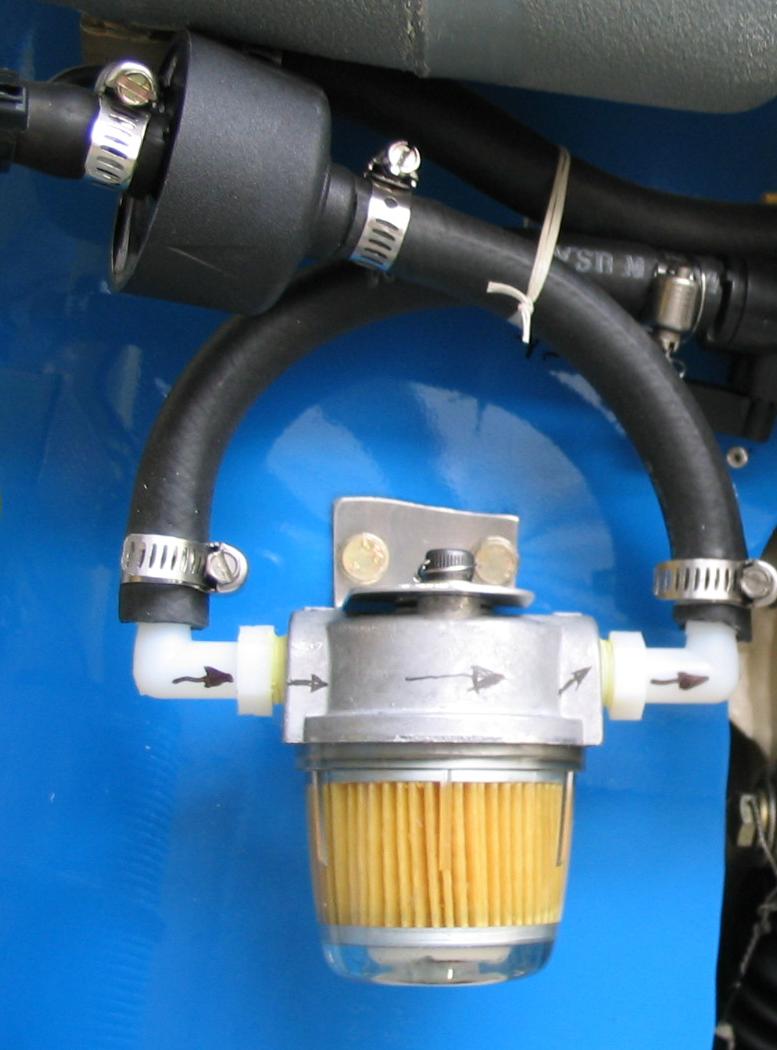
At the time when BJ first picked the parts for the Helicycle kits the intention was to use a large Rotax which had a fuel flow of 7-8 gallons per hour and BJ kitted an inline fuel filter which had a glass body so you could see any contamination. But now with the Turbines the fuel flow is around 11-12 gallons per hour and I have seen my little glass filter get some what plugged to where it just bugged me. I have been searching for months and have bought and tried several different types of fuel filters. I still like the idea of the clear filter so you can see and confirm that it is getting loaded up. First thing I did was run a test on the current glass body filter I have been flying for a year, I disconnected the fuel line at the top of the Turbine where it goes into the Turbines fuel pump and ran a hose to a 5 gallon fuel can, I then turned on the fuel pump and by reading my fuel flow meter found out I can pump 18 gallons per hour through a fairly clean original glass filter. I then installed the new filter I found and repeated the test. The new filter indicated a flow of 23 gallons per hour. Just going by appearance, I would say the new filter has over twice the filter area. The other features I like about it is the bowl screws on easily, it has a cheap disposable 15 mic paper filter (which looks almost the same as the ones we use for the Turbine and Trans oils!). The two fittings on the filter are 1/4 FPT, and all my plumbing before the pump is 3/8", so I just got two 90' 1/4"PT to 3/8" barb fittings. I then used JB weld to attach a #6 SS washer to the clear bowl in the middle when it was tightened snug, drilled a 1/16" hole in the upper body and safety wired the bowl so it can not un-screw. I then made a simple "L" bracket to hold the filter to the body, I drilled the body and put in two #10 nut plates to attach the bracket, drilled and safety wired that all up. I flew it after Church Christmas morning and NO problem. Here is the URL for the filter: http://www.jackssmallengines.com/barens_filters_fuel.cfm It is the second one listed, this one does NOT have the drain plug, but in a year I have never had visible water where I would need the drain plug: 6175 Assy #6432 $10.78; 15 mic Filter #6433 $4.77; Mt Bracket #6437 $1.60; Gasket Kit #6440 $2.30; So for $19.45 you get a complete filter system, mounting bracket (I made my own out of scrap) a spare filter, and a spare gasket set (highly recommend). I am happy with it so far.
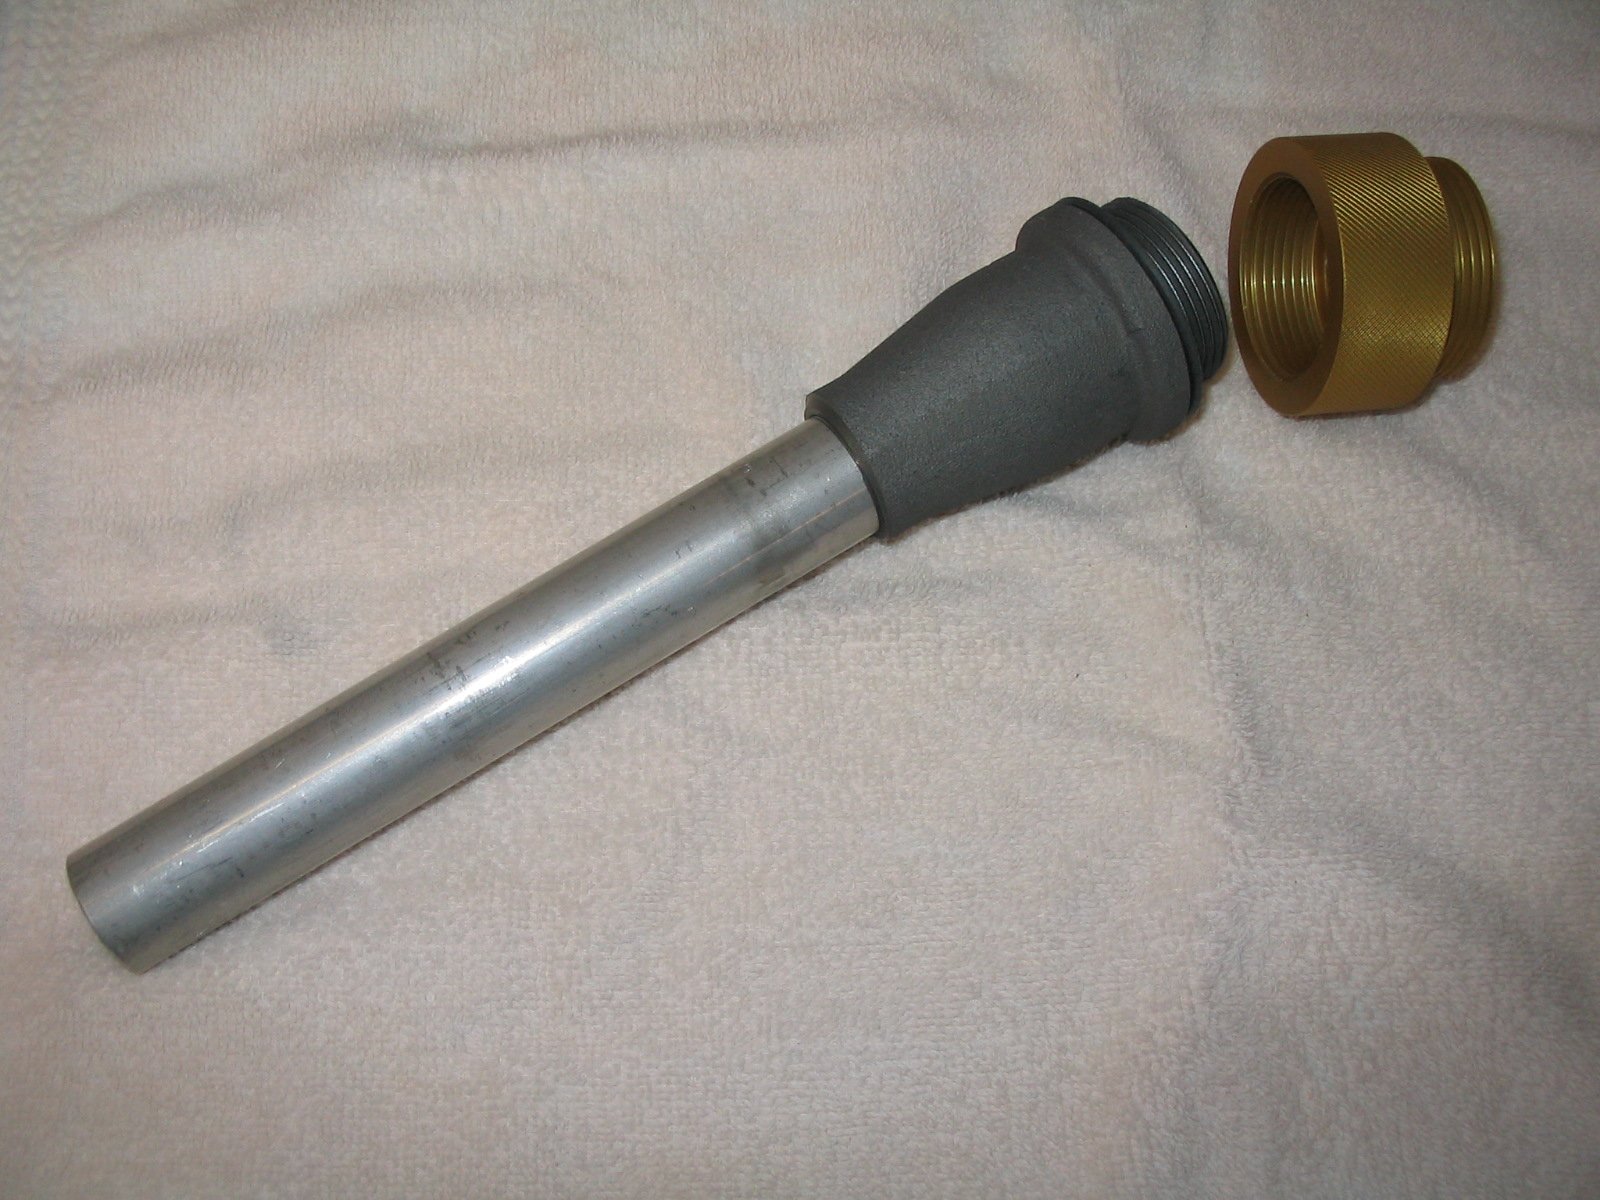
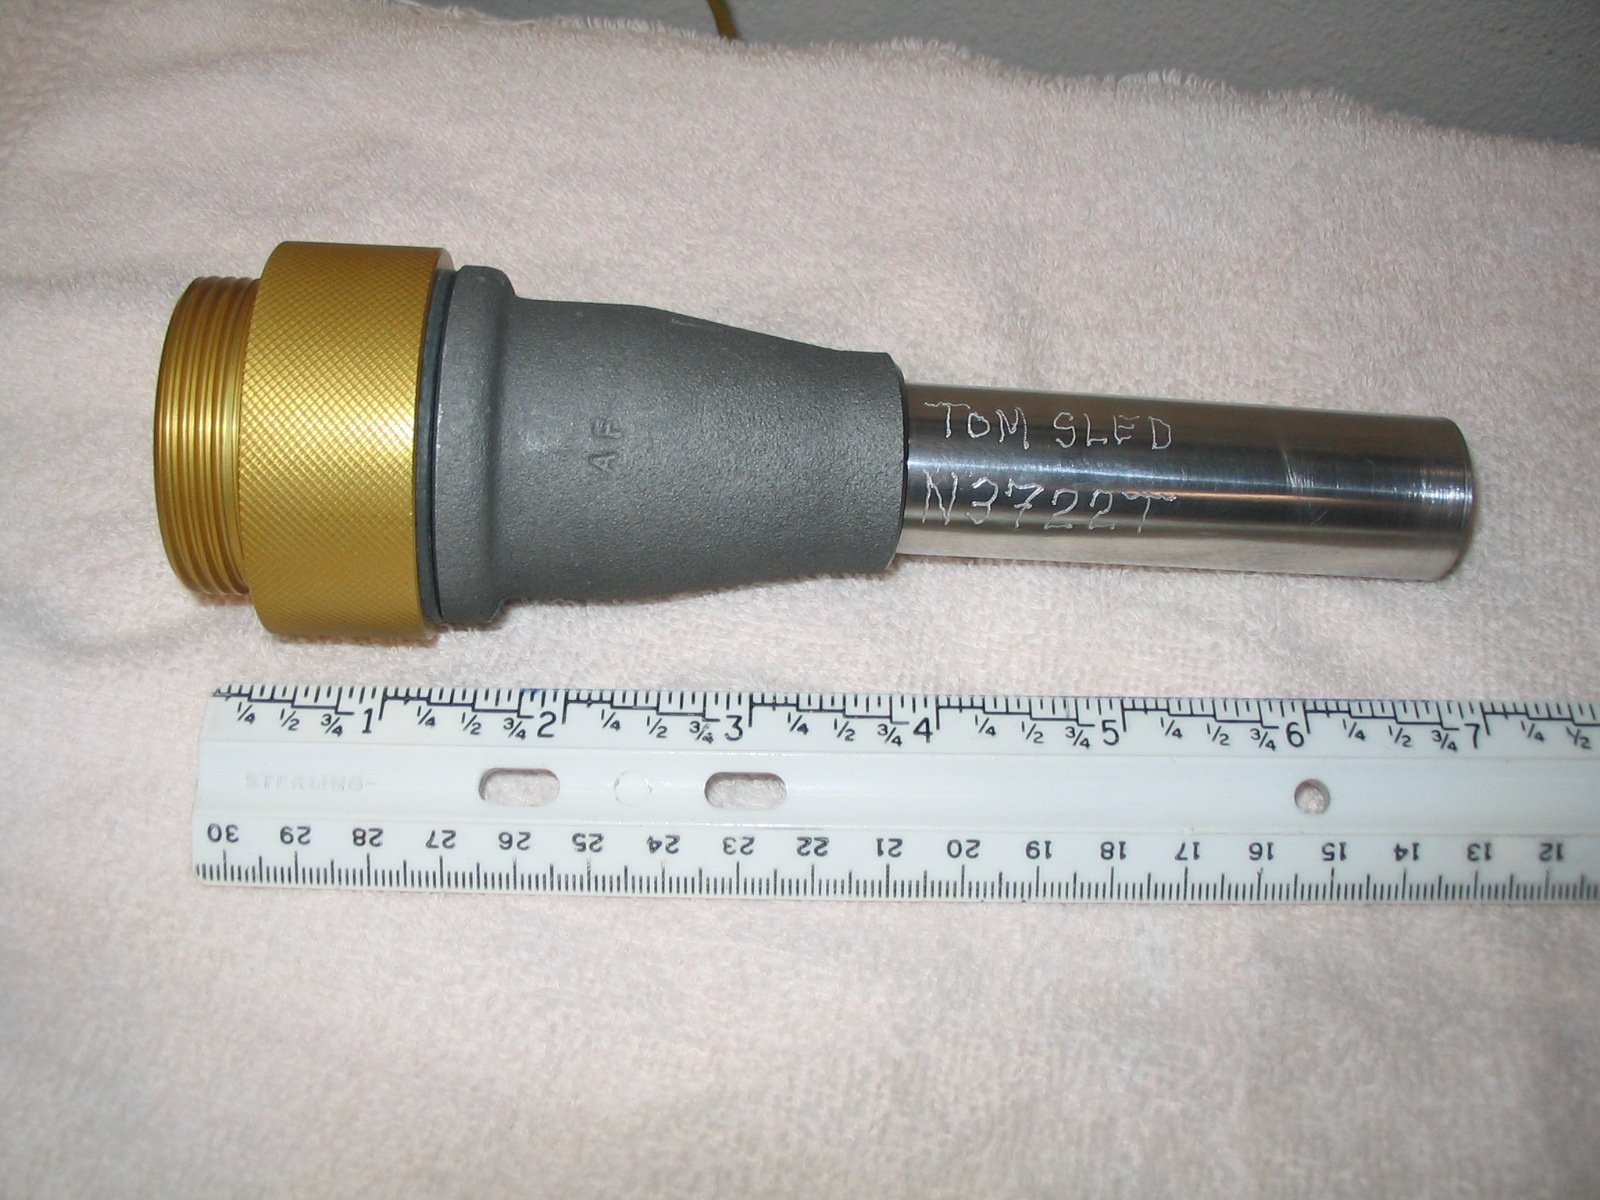
Filler up with Jet-A
The Helicycle likes Jet-A, (likes it a lot!) some of the guys are using K1 off their farms. It is NOT recomended to use Diesel as it tends to coat the inside of the Turbine. The original design of the Helicycle had intended that we be burning 100LL fuel, so the filling hole for the fuel system has an opening to accept the normal 1" nozzle. Well the FAA has designated the Jet-A dispensers be of only 3 types. There is the large capacity 2" twist lock Whittaker nozzle spouts (pg. 11 of catalog URL below) used to re-fuel the heavy iron. To fuel smaller planes you will find a 1.5" straight spout and 1.5" flared spout (pg. 7) neither of which will fit into our tank opening. I asked the fuelling guy if he could please take the 1" spout off the 100LL and put it onto the Jet-A nozzle. He explained that it can not be done as the FAA purposely mandated that 100LL and Jet-A nozzles (pg. 4) and spouts (pg. 7) be different thread sizes. Matt, Dave, and the rest of us flying have been using funnels and transfer tanks to fuel our ships and making our own (not so handy) adapters. I have been researching this for many months, I guy I met who owns a helicopter crop dusting company said AVfuel sells a rubber adapter that fits the 1.5" flare spout and the other end is 1" (see pg. 10 of catalog) but he said it sprays fuel back and has even blown off on him, soaking him in fuel, plus it cost $70.oo. I called AVfuel and got lucky talking to a sales type as after explaining our problem he told me he had a discussion with one of their design Engineers just an hour before at lunch and was told that they now had a Jet-A nozzle to 100LL spout thread adapter! He told me he would have to find out the new part number and call me back. The next day he called with the info but even though I have an AVfuel credit card they can only sell to registered fueling companies, so he gave me the name of a distributor who I called and ordered the parts thru. I say parts because you need the adapter but you also need a 1" spout. I got the parts UPS, it is not a rubber adapter but is an actual "V" down, anodized metal, thread adapter to a 1" nozzle that screws right onto any Jet-A fueling head in just a few seconds. With the spout it is about 10" long but I cut mine to 6" overall so I can carry it in a standard quart size zip-lock bag after I use it. I took it to the airport fuel tanks and it goes on/off in less then 10 seconds and fits perfectly! I have engraved mine with my name and "N" number so no fuel guy will think I am ripping them off. It is not in the AVfuel catalog yet but here is the URL of the catalog so you can "see" all these parts I mentioned above: http://www.avfuel.com/programsAndServices/catalog.pdf To order it, the person to talk to or E-mail is David at MilTech Sales in CA. http://www.mil-techsales.com/ David: david@mil-techsales.com (323) 666-6416 The part numbers are: Adapter GTP-5957 $27.56 1" Spout 297SA-9050 $46.20 They accept credit cards. They offer a wire mesh strainer (190S-7063) for $30.oo but you really don't need it at all. The parts weigh about 1 Lb total. This is a new part and I know David will have to order some so when you order you might have to wait about 8 days, but believe me, your gona love it!
Time for an oil change
The Helicycle Manual says to change main and tail oils, the Turbine oil, and both the filter in the trans and the Turbine at 25 hours then again at 100 hour intervals. Because I was the first checkout, BJ told me to drain and check my oils at 5 hours, then at 30 hours take the filter elements apart and stretch them out and check for any pieces, chunks, slivers (I only had some slivers that you could tell were from making the fittings). He also said to pour the oils over a white cloth like an old T-shirt to check the amount of "dust" in the oil. All mine at 30 hours looked VERY clean with the tail gear box the darkest. Filters we use are Fram CH6015. On the left is the transmission and on the right Turbine and the last photo is the tail transmission oil.
![]() ..
..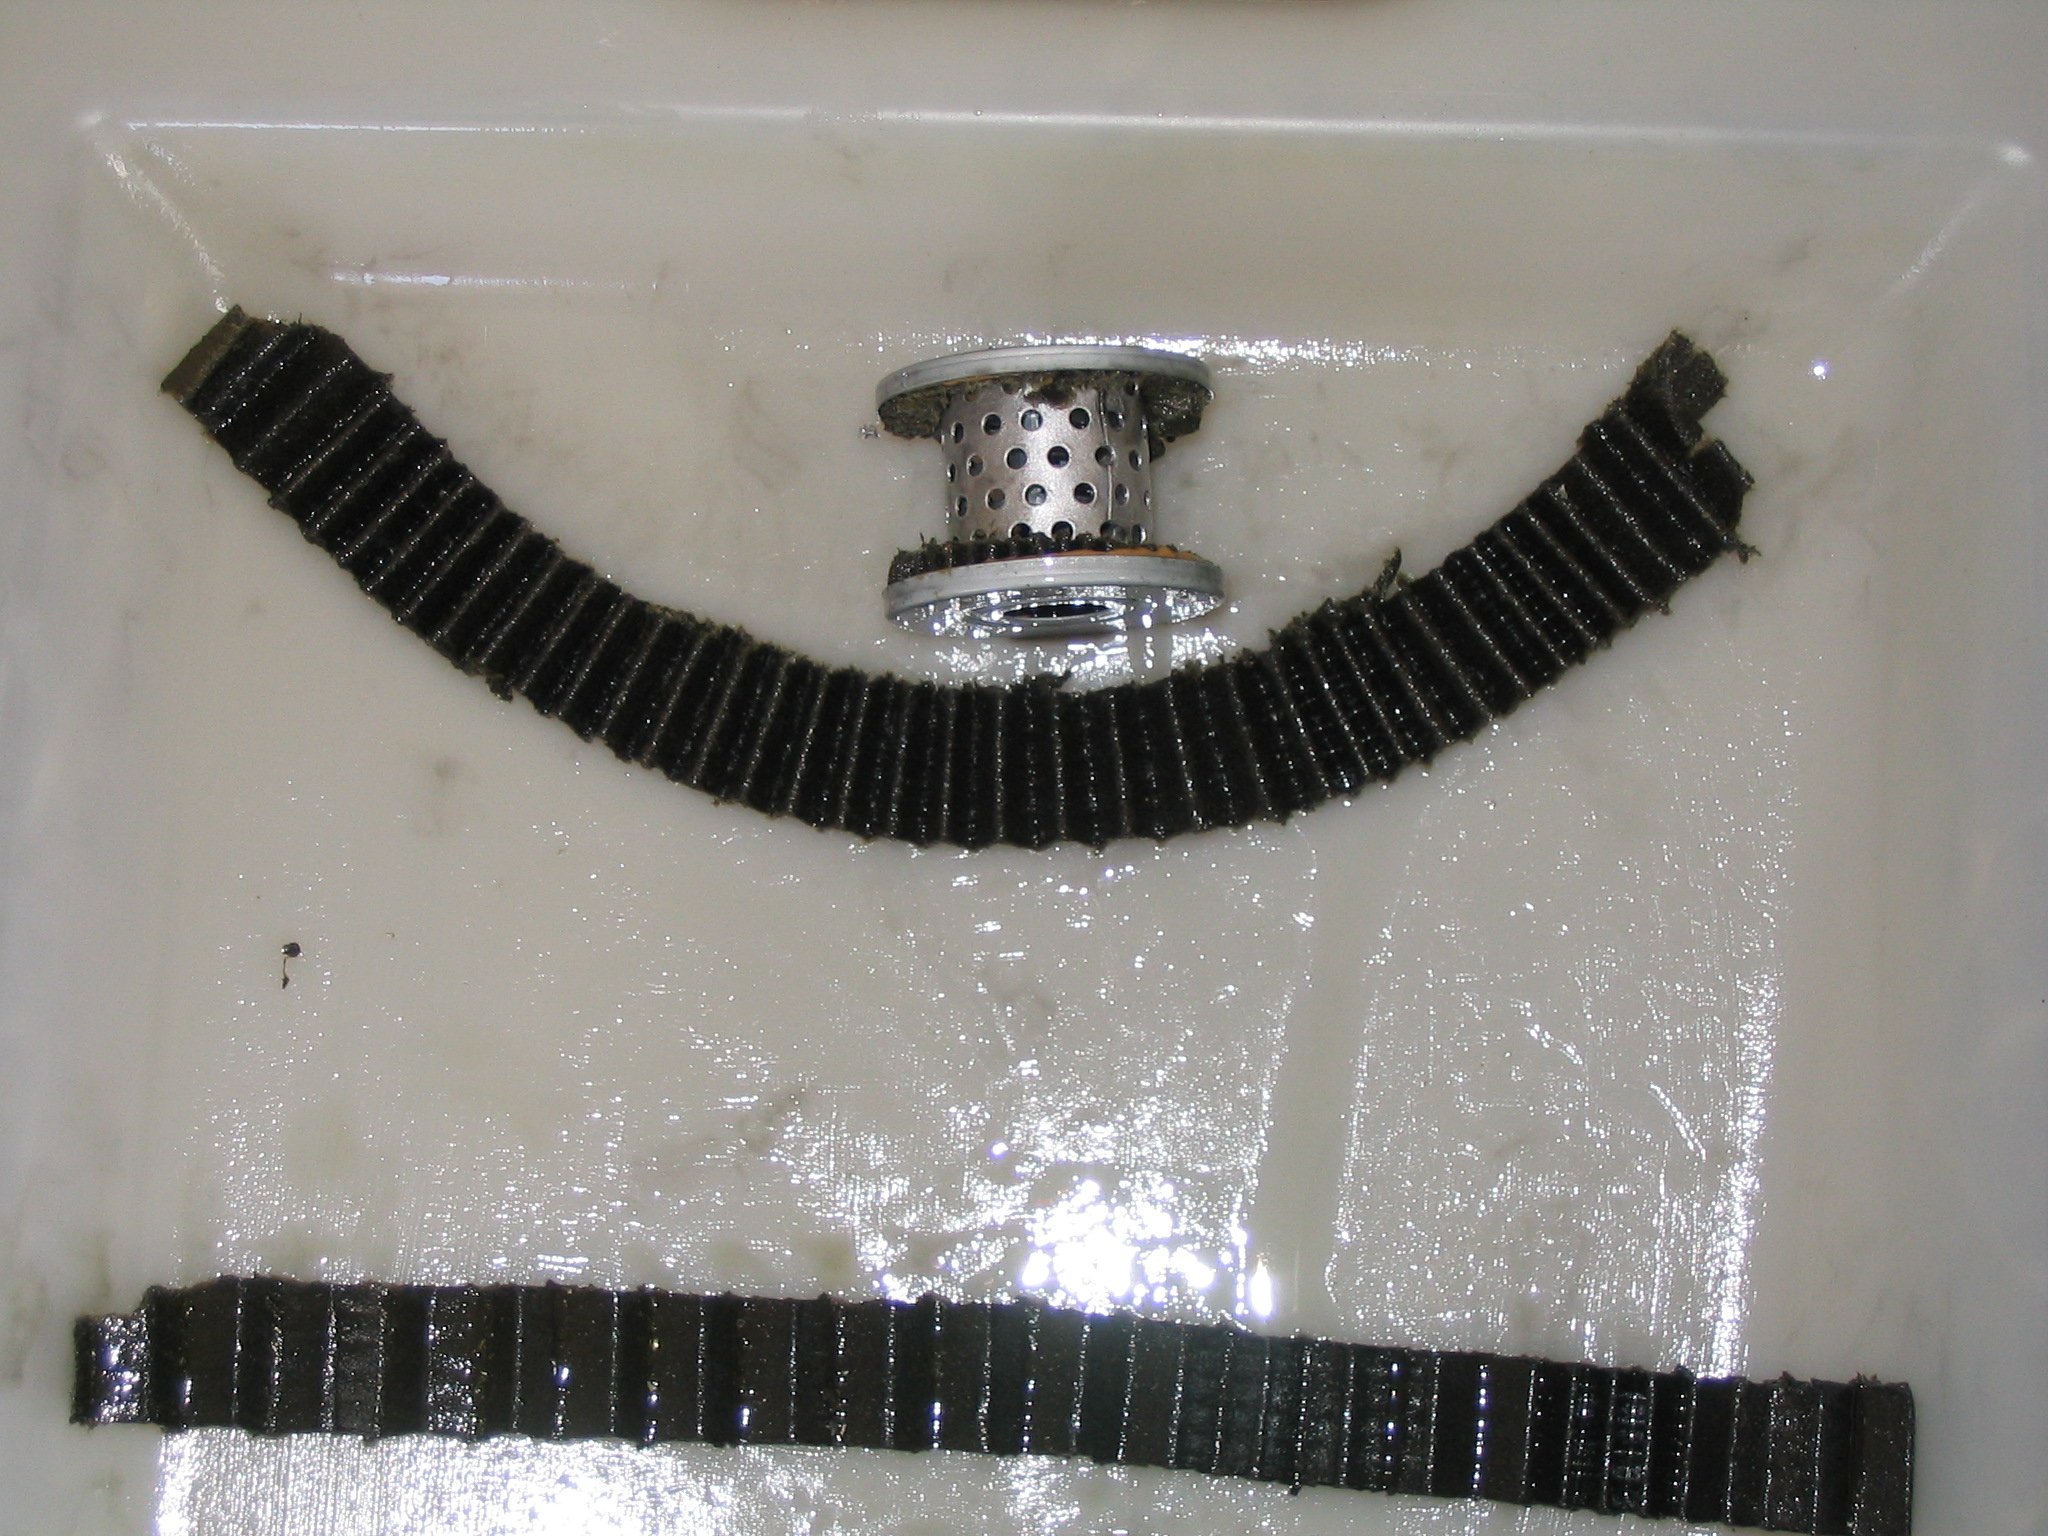
![]() ..
..
![]()
Tribute to remember Mr. BJ
For those that did not make it to Homers, someone had taken a picture of Homer and BJ together the year before and had it framed and presented it to Homer. Homer talked about BJ for a bit then we had a minute of silence. I had been thinking of some way to honor BJ's memory and had planned on discussing different ideas with the other builders at Homers. Miss Nancy, wife of Hap Miller (who happens to be builder 1-01) was also thinking along the same line and had some decals made and brought them to Homers. It is a peel the paper off the back, 5" x 3" black letters on clear type. I put one on my yellow Governor box (I added the flag below it) because I have a rivet in the center of my cover I had to hog a hole in the center of the decal, then I sprayed the cover and decal with a clear coat so it doesn't start peeling with all the high speed flying and salt air. For those that were not at Homers, Miss Nancy is charging $5.oo to get one contact me by E-mail for the details.
"Fly high and smoooooth Mr. BJ... . ."

Catalogs
Let me take a second to talk about ordering parts. Before I started, and thru out this build I got hold of every catalog I could, to compare parts and their prices. I wound up with around 30catalogs that are useful. I made price comparison spreadsheets for the parts that were identical in the catalogs, then grouped my ordering to save on shipping charges. All these places have catalogs-on-line, which is great for ordering, but there is nothing like a stack of "paper" catalogs on your table to compare, and they are FREE!!!
AirCraft Spruce: I remember going to this place when I lived in Whittier and they were in Fullerton, CA back in the 70's. Well they have always had the best selection and the "raw" materials. Now their 600 page catalog is free, yes FREE.
All Electronics: Can not be beat for electrical items CHEAP. Best source for jacketed, shielded cable, sensors, strobes, and connectors. Tie wraps, switches just anything electronic, and it is a FREE catalog. A lot of the items are surplus but top quality for cheap.
Wicks Aircraft parts: Has some unique items and some good prices, Catalog is FREE…!
SkySport, Catalog is FREE…!
AirStar, Catalog is FREE…!
LockWood, Catalog is FREE just call or E-mail them…!
LEAF Leading Edge Air Foils, Catalog is FREE…!
Chief AirCraft, has a lot of choices, Catalog is FREE…!
Wag Aero, Catalog is FREE…!
Flight Helmet, Catalog is "On-line"…! Parts for old military helmets (like mine), have used Helicopter helmets, flight gloves.
EastWood, Catalog is FREE…!
AirParts Inc. , Great for raw materials, Rivits, Nuts, good prices. Catalog is FREE…!
Varga Enterprises, Catalog is FREE…!
Americans Avionics, Catalog is FREE…!
Eastern Avionics, Catalog is FREE…!
Hart Aviation, Catalog is FREE…!
Radio Shack, This is an "On-line" catalog. Get your free Catalog at local store.
Waytek Inc. Electronics, Catalog is FREE…!
Digikey Electronics, Catalog is FREE…!
Mouser Electronics, Catalog is FREE…!
MECI Electronics, Catalog is FREE…!
MCM Electronics, Catalog is FREE…!
Parts Express Electronics, Catalog is FREE…!
J.C. Whitney, Catalog is FREE…!
Harbor freight, Not the highest quality tools but they are LOW COST, they have 50% off sales every month. If you start early (a few months) you can get all the tools you don't now have when they are on sale. They just had digital 6 inch, digital calipers on sale for $19.95, they have a long handle hex key set for $3.99! And you will get a catalog a month for the rest of your life, plus 10 years.
West Marine, Catalog is FREE... A thick must have catalog, good quality parts for electric and fuel.
Caswell Plating, Catalog is FREE...! Very good for various finishing supplies.
J & L Industrial Supply, Catalog is FREE…! 800.521-9520
Travers Tool Co. Catalog is FREE…! 800.221-0270
Grizzly Industrial tools,Catalog is FREE…! 800.523-4777
CPS Calif Power Systems, Catalog is $6.95 but does have a large selection and some good prices.
Taskem Corp, No catalog, only "on-line", GREAT Digital Altimeter and Digital Tach (I got em both...)
Dakota Digital, No catalog, only "on-line", Digital temp and pressure gauges and sensors (have used them before)
Victoria's Secrets, Remember, you occasionally have to get something for "her"... (birthday, Christmas, anniversary (ifin you remember to remember...))
GREAT LINKS ...
HELICOPTER ORGANIZATION:
Homer K. Bell, Helicopter Building Consultant http://www.kitcopterconsult.com/
Professional Helicopter Pilots Ass. http://www.autorotate.org/autorotate/index.asp
Helicopter Association International http://www.rotor.com/
Just Helicopters http://www.justhelicopters.com/
Vietnam Helicopter Pilots Association: http://www.vhpa.org/
FAA Weather DUAT http://www.duat.com
Great Weather site: http://usairnet.com/cgi-bin/launch/code.cgi?sta=KSVH&model=avn&state=NC&Submit=Get+Forecast
Vertical Reference http://www.verticalreference.com/
Popular Rotorcraft Ass. http://www.pra.org/
R22 Helicopter Group http://www.r22helicopters.com/
Household Battery comparision chart http://www.zbattery.com/zbattery/batteryinfo.html#
My new home to be Lot#18 Phase 1 http://www.longislandairpark.com/
WEB Pages of other builders:
Homer K. Bell, Helicopter Building Consultant http://www.kitcopterconsult.com/
3rd Rounder Mr. Mike Romeo http://www.mromeo.com
Mr Matt Lazar's Helicycle page http://home.bellsouth.net/personalpages/pwp-967ml
Mr. Richard Morrisely's Helicycle page http://www.helicycle.com/rmorrisey/Rmorriseyl.htm
Mr. Milton Huhta's Helicycle page http://www.helicycle.com/miltonhuhta/milt.htm
Mr. Joe Loxterkamp http://www.helicycle.com/joelex/ship1.htm
Al Hammer's HeliCycle http://was.kewlhair.com/hammer/
Eagle R&D's Home page http://www.helicycle.com/
Turbine powered Angel http://www.usbusiness.com/helicopter/ch7tpg2.htm
MOVIE AND AN INVITE...
You can see an 8 minute Internet video of Mr. Doug starting and flying his, the first Turbine HeliCycle, If you go to:
http://www.helicycle.com/dougschwochert/helicycle.WMV
It is the same Turbine engine the rest of us will be using a Solar T62T-32. There is a group of first, second, and third round Turbine HeliCycle builders, about 55 of us are on the Internet in a private builders only site. But we want to share our experience and excitement of the Turbine Helicycle so we started a NEW, "Open" HeliCycle Forum where people that are interested in the HeliCycle can get together with the builders in friendly open discussion, see photos of the builds, links to builders web sites, and ask questions.
Now if you have questions about price, or delivery please contact Blake at Eagle R&D direct at 208.461-2567 (Eagle R&D does NOT do E-mail yet). But if you have questions on how hard/easy the build is, on quality of parts, on time needed, on tools needed, or on why we bought them, come on in and ask away at:
http://groups.yahoo.com/group/helicycle_discuss/
If you feel I have helped you please be so kind to mention my name to Blake if you talk to him and especially if you decide to buy. He does not give commissions but I like to stay on his "A" list.
"NEW" Experimental Helicopter Magazine
Mr. Stuart Fields was at Homers and is starting a new Experimental Helicopter magazine that looks like it will be a good detail and technical one. Thought you might be interested, and please tell your friends.
The first edition (Nov 04) is about to go to press, might be a collectors edition... To see kind of what it will look like go to this link and click on the magazine on the right, it is a large PDF file and takes time to load: http://www.vkss.com/eh_index.htm Here is the info that Mr. Stu has sent me: The plan is for 6 issues/yr. at a subscription cost of $35.oo Present planning calls for a full color magazine with a goal to emphasize technical issues and solutions. Your comments will be appreciated and help us. Stuart Fields sfkf@iwvisp.com Or if you would like to advertise something you have for sale: Just a note to check whether you wish to run a classified ad in the first issue of Experimental Helicopter mag -- Nov 2004. Rate: First 30 - $12 USD; .15/word thereafter; $3 - $5/picture if requested (depends upon size and amount of necessary editing). Please send wording in email right away so layout of the magazine can be completed. Payment by PayPal will be in a week+ when the Classified ad order section is put on the website. We will notify you when the area is available. BTW: keep spreading the word about EH to anyone interested in subscribing in time for the first issue. If you know anyone who is planning on subscribing by check, instead of PayPal, remind them to include their email address with their communication info when subscribing. Stuart & Kathryn Fields Experimental Helicopter, P. O. Box 1585 / 8075 Seibenthal Inyokern, CA 93527 (760) 377-4478 ph (760) 408-9747 publication cell (760) 608-9747 tech cell www.vkss.com/eh_index.htm E-mail to: eh@iwvisp.com
TOOL SALE ON RIGHT NOW (on going for ever...)
The HeliCycle is not hard to build if you have the right tools, and of cours you want to buy the tools while they are on sale, well a bunch of good one are on "RIGHT NOW". Here is a list of tools that if you don't already have get them as they are called out and you will use them over and over. These are the best prices I have seen in a long time. I suggest you go to the web site, enter the item numbers I listed in the "Find Item number" slot on the left and you will get a picture and discription of the items, look to see if you need the item. After that order on line or CALL and order so you get the catalog sale price. http://www.harborfreight.com/ Harbor Freight always has major sales up to 50% off on the front and back covers of every catalog.
page Item number Price Item Description:
xXXx 47257-3ABA 19.99 Digital Calipers 6"
XX 45340-3HAB 4.49 6" Safety Wire Twisters
XX 37325-0HAH 9.99 3 pc Aviation Tin Snips
68 00167-1JJA 34.99 Air Rivet Gun***
XX 01029-8ABB 1.99 Drill, Bolt size gauge
104 42006-1JJA 7.99 20 pc Sanding Drums
104 41000-1JJA 9.99 Flex Shaft
112 2485-0VGA 39.99 1" Belt Sander
XX 34498-0ABA 1.99 120 Grit Sand Belts
XXX 31309-1HAH 19.99 4.5" Angle Grinder
XXX 06674-5HAH 9.99 4.5" Metal grinder wheels
XXX 44829-2HAH 59.99 14" cut-off Saw ***
XX 41895-AHAH 9.99 Laser Level
page Item number Price Item Description:
XX 37861-5HAB 3.99 10 pc Long Hex Key Set
XX 05646-2ABB 6.49 Magnetic base clamp
4K 32157-4RVB 1.99 Diamond 4 pc Sanding Drums
XX 33675-2ABB 6.99 1" Dial Indicator
XX 34214-5ABB 2.99 Angle Finder
1 30756-4RVH 2.99 7 Function Multi-Meter
X 01611-2HAH 39.99 115pc Titanium Drill Bit Set
XX 07356-0HAH 6.99 Blind hand Rivet gun
8K 36118-8RVB 3.49 Lg Latex Gloves
XX 42099-4ABB 4.99 Micro Torch
The two items above marked
(***) and not necessary but will make your build a lot
smoother, and I am sure you can use them both in many other
projects.
Some of my favorite pictures
Here are a few pictures I really like, I have a whole bunch at: Pictures/
The "old days" and what I fly now. Note the difference in rotor blades!
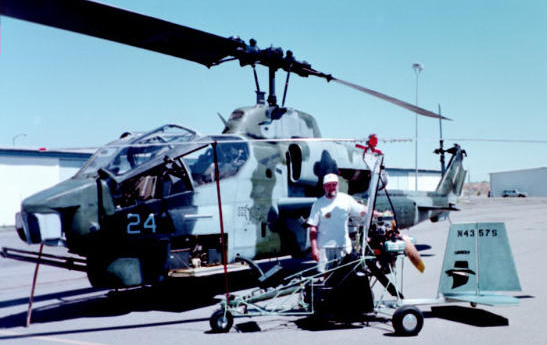
In case you are wondering, yes I built this Bandit GyroPlane, see the story of that build at: http://home.pacbell.net/tsled/
Me taking off at my AirPort, Oceano. Note I still have and use my old Army helicopter helmet, re-wired.
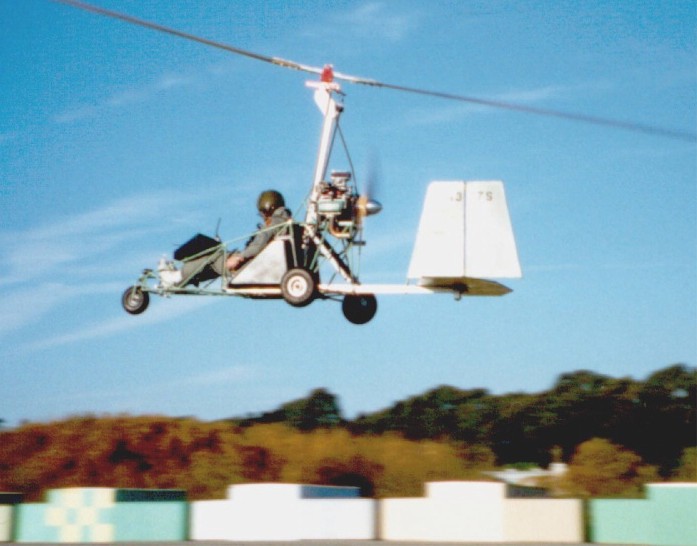
THIS DOCUMENT IS A WORK IN PROGRESS, please check back often as I add to it when ever I can....
Tom and Miss Fran have moved. We are no longer on the Central Coast of California but have moved to the Lake Norman area of North Carolina. It is just above Charlotte next to Mooresville, the home of NASCAR (Michael Waltrip and Joe Nemacheck live just across a small bay from us (in the trees, bottom center of the picture below)). We bought a lot in an airpark http://www.longislandairpark.com/ Lot # 18 of Phase 1. We are right on the runway about in the middle. This is Sept and our hangar is under construction and the plans for our house are out for bid. We also bought a small sewing machine store in Statesville http://www.SewingMachinesandFabrics.com where Miss Fran is selling machines and teaching classes and I am cleaning and repairing them (same thing as a Helicycle). This is NOT retirement, in fact we are working more hours now then a few months ago when we just had "jobs". But the airpark is FANTASTIC!!! we can hardly wait till our house is done and we are all moved in, Summer 06.


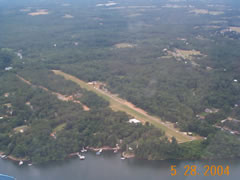
As of
9/11/04 The 40 hours are done!
If you got questions on my flying hobby, I am
Tom Sled
828.478.2313
Send E-mails to: tsled@earthlink.net


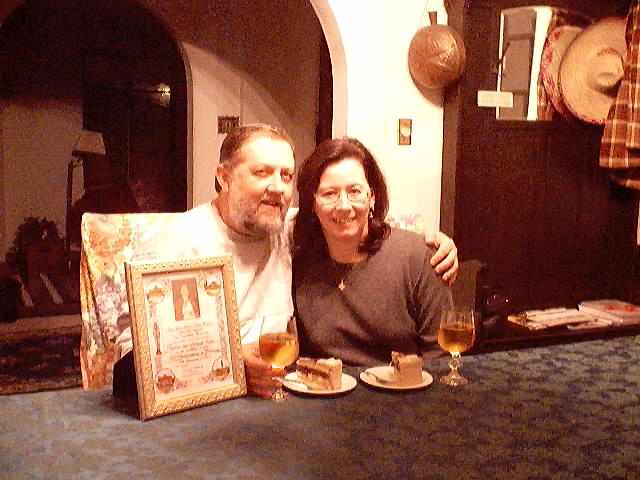
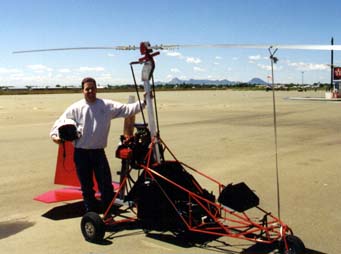
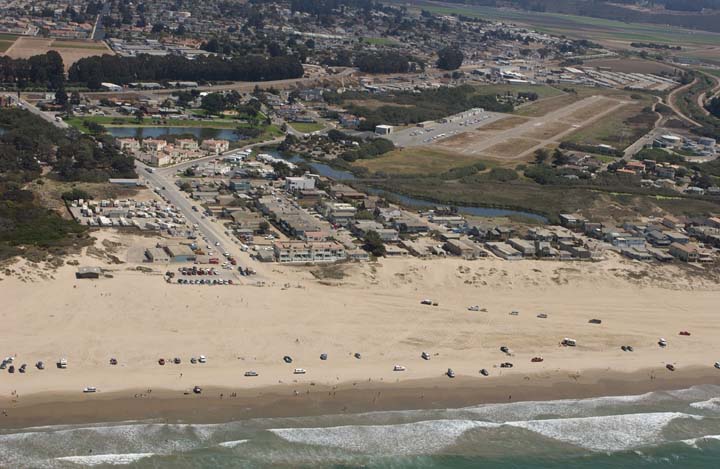
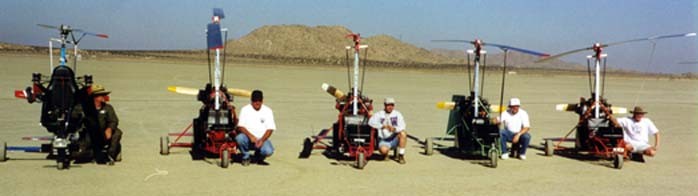